Full Rear Caliper Strip down and rebuild. Handbrake issues
Posted: Tue May 17, 2011 12:59 am
Copy of a recent post I made on MR2roc.org. Hope you guys find it useful.
Handbrake cables are frequently adjusted and handbrake cables replaced because the autoadjuster, hidden inside the rear caliper is seized.
I guess that much of this work is carried out is unnecessary and may be a temporary cure at best.
Following this guide, that I hope is complete, takes you inside the rear caliper to the problem area. Dont forget to do both sides.
Whist I have posted several pictures, it is best to take pictures of your own as you go along. That way you will have your own record of the way things looked before dissasembly and perhaps help others with your experience.
Complete strip down requires special tools or adapted standard tools and is probably beyond the average mechanic without them. Consider purchasing new or recon calipers before proceeding if you are in any doubt.
Tool Numbers: Toyota 09719-00020 Caliper rewind tool or Halfrauds or similar, Toyota 09756–00010 Nut, Autoadjuster compressor
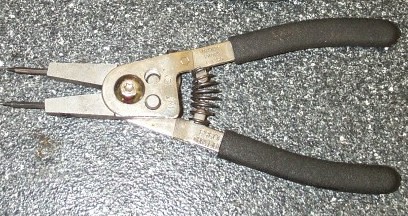
You will also need a pair of long nose circlip pliers looking like this. Buy the best you can afford.
Brake caliper cleaning fluid, Millers Oils Red rubber grease (compatable with rubber, helps fit new seals)
Complete Rear Caliper seal kit and a set of rear brake pads to suit your vehicle.
Proceed generally as if changing the brake pads:
• Using a brake hose compression tool, seal the flexible brake hose.
• Unscrew the brake hose banjo bolt retaining the gasket for re use, if damaged replace. Catch any spilt fluid for disposal.
• Remove the caliper by unscrewing the lower bolt to the torque plate and lifting it away. The torque plate can be remove sepaerately if reqd.
Dismantling On a clean work bench:
The caliper will contain trapped brake fluid!
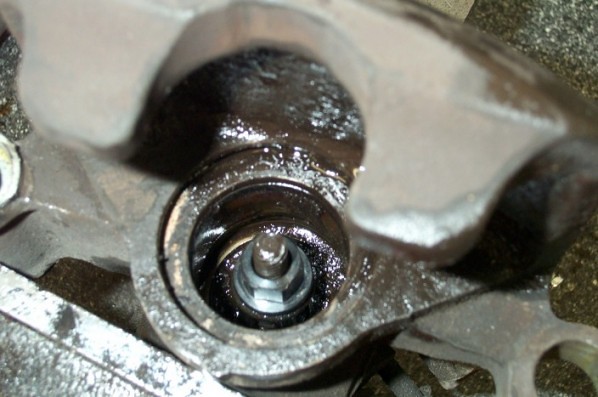
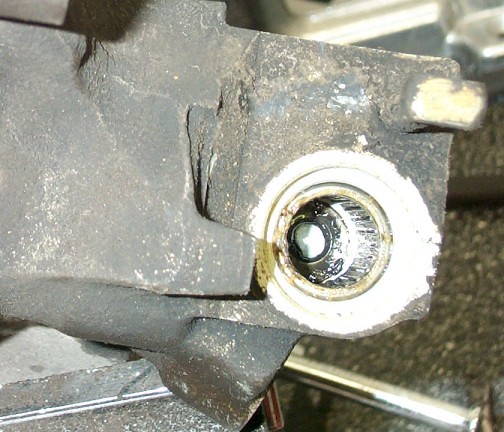
• Examine the caliper for any external signs of damage or wear, especially on visible seals.
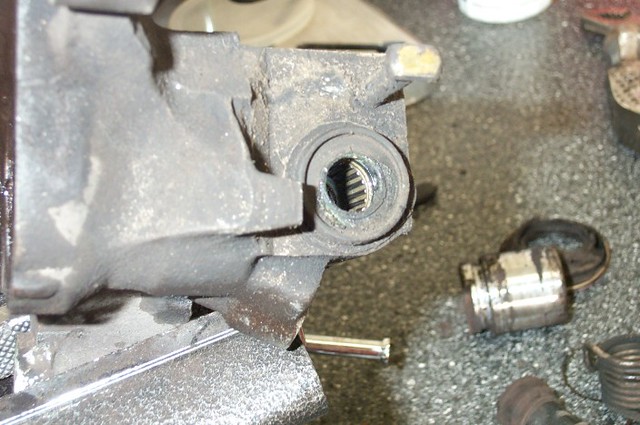
• Remove the rubber dust boots and sliding bushes.
• Tap out the main pin boot.
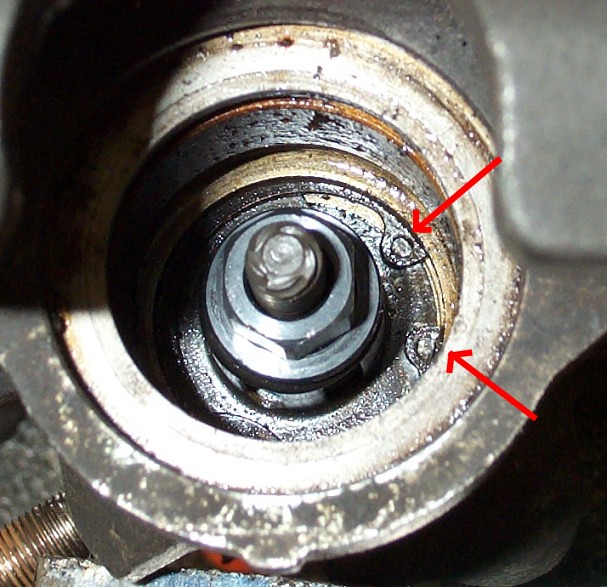
• Using a caliper piston removal tool 09719-00020 unscrew the piston and remove its outer seal.
• Pry out the piston seal from the bore of the caliper.
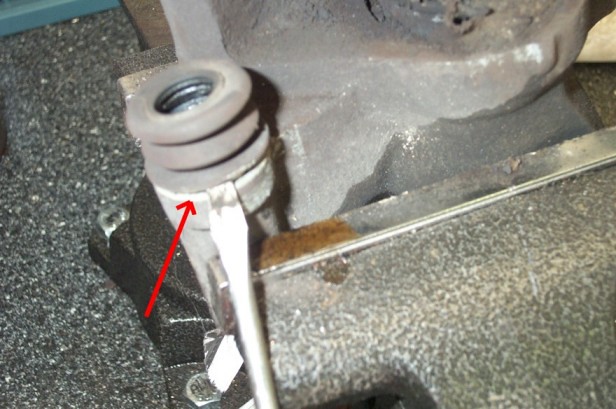
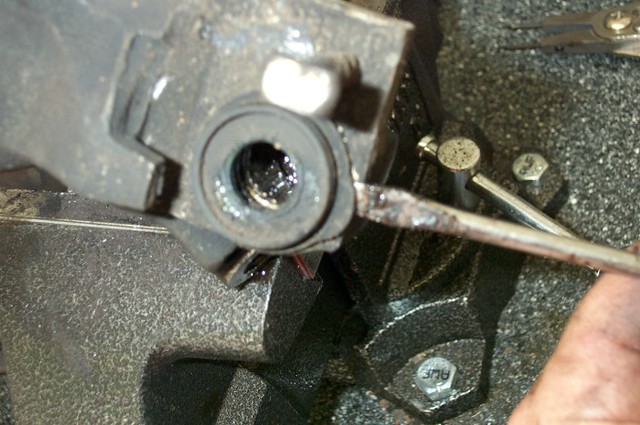
The following is the most difficult part and ideally needs a special tool 09756–00010 .

• Remove the adjusting bolt assembly using a special tool 09756–00010 or a home adapted tool to compress the auto adjuster internal spring and release pressure on the circlip. Failure to do this will either damage the circlip or allow parts to fly around the workshop.
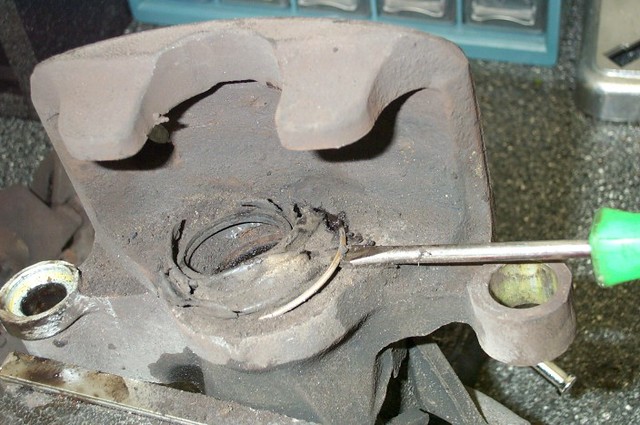
• Using circlip pliers release the circlip securing the parking brake auto adjuster assembly from the cylinder.

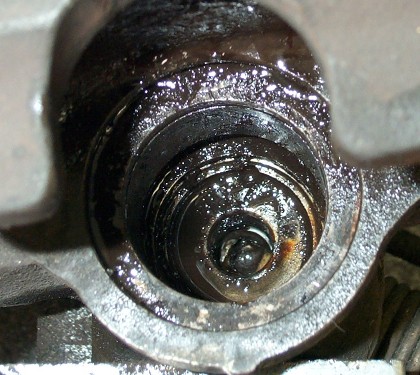
Back to the easy stuff
This is perhaps the area that causes most problems as the internal parts corrode.
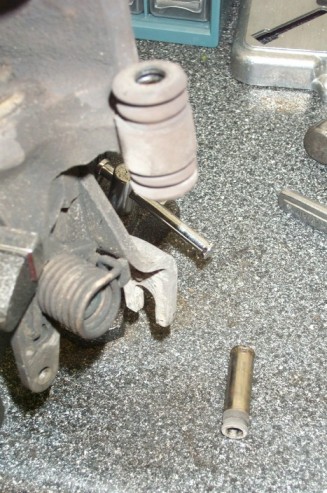
• Pry the torsion spring from the parking brake crank and unbolt the crank from its shaft.
• Remove the parking brake boot and its shaft and bearing. This is the most likely location of any corrosion that prevents the correct operation of the handbrake auto adjuster. The bearing may not be supplied with your refurb kit, clean it thoroughly in situ and lubricate sparingly with lithium grease.
• Clean up the autoadjuster components. Note that the small Oring needs replacement.
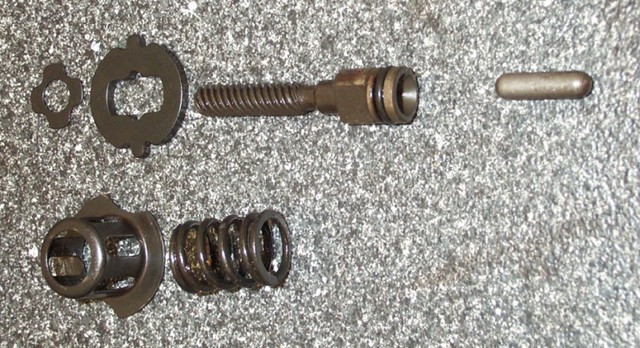
• Remove the brake bleed nipple.
The caliper body can now be cleaned thoroughly and painted if requited. Reassembly using new parts where possible:
• Install the brake bleed nipple.
• If available install a new parking brake crank bearing and its shaft and dust boot fully into the caliper.
• Install the parking brake crank and check there is clearance between the parking brake crank and the caliper.
• Fit the torsion spring.
Back to the difficult bit
• Reinstall the auto adjuster assembly complete with a new O ring. It must be aligned correctly and must be securely retained by the circlip.
Easy bits again
• Check that the parking brake mechanism works correctly by operating the handbrake crank and observing that the internal bolt moves smoothly.
• Install new piston seal in the cylinder, and fit the piston along with its protective boot.
• Install new sliding pin boots snugly into the caliper.
• Install the dust boot with the flanged face inside.

• Reassemble the caliper onto the torque plate as for changing the brake pads.
• Re fit the brake hose and bleed the brakes.
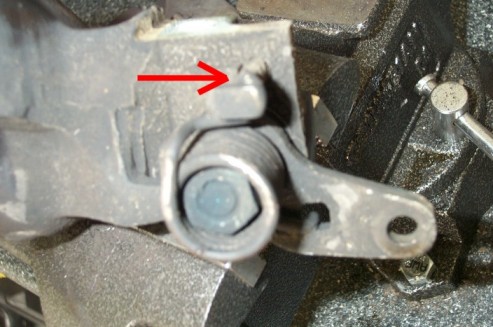
Finally
• With the caliper fitted, attach the handbrake cables and tension them so that there is 1.0mm clearance between the handbrake crank on the caliper and its stop pin.
Sources: various Toyota manuals and those from other car manufacturer’s workshop manuals .
Thanks to Alucard7002 from Rover 800 Enthusiasts Forum and Eric Southers for some of the pictures.
Handbrake cables are frequently adjusted and handbrake cables replaced because the autoadjuster, hidden inside the rear caliper is seized.
I guess that much of this work is carried out is unnecessary and may be a temporary cure at best.
Following this guide, that I hope is complete, takes you inside the rear caliper to the problem area. Dont forget to do both sides.
Whist I have posted several pictures, it is best to take pictures of your own as you go along. That way you will have your own record of the way things looked before dissasembly and perhaps help others with your experience.
Complete strip down requires special tools or adapted standard tools and is probably beyond the average mechanic without them. Consider purchasing new or recon calipers before proceeding if you are in any doubt.
Tool Numbers: Toyota 09719-00020 Caliper rewind tool or Halfrauds or similar, Toyota 09756–00010 Nut, Autoadjuster compressor
You will also need a pair of long nose circlip pliers looking like this. Buy the best you can afford.
Brake caliper cleaning fluid, Millers Oils Red rubber grease (compatable with rubber, helps fit new seals)
Complete Rear Caliper seal kit and a set of rear brake pads to suit your vehicle.
Proceed generally as if changing the brake pads:
• Using a brake hose compression tool, seal the flexible brake hose.
• Unscrew the brake hose banjo bolt retaining the gasket for re use, if damaged replace. Catch any spilt fluid for disposal.
• Remove the caliper by unscrewing the lower bolt to the torque plate and lifting it away. The torque plate can be remove sepaerately if reqd.
Dismantling On a clean work bench:
The caliper will contain trapped brake fluid!
• Examine the caliper for any external signs of damage or wear, especially on visible seals.
• Remove the rubber dust boots and sliding bushes.
• Tap out the main pin boot.
• Using a caliper piston removal tool 09719-00020 unscrew the piston and remove its outer seal.
• Pry out the piston seal from the bore of the caliper.
The following is the most difficult part and ideally needs a special tool 09756–00010 .
• Remove the adjusting bolt assembly using a special tool 09756–00010 or a home adapted tool to compress the auto adjuster internal spring and release pressure on the circlip. Failure to do this will either damage the circlip or allow parts to fly around the workshop.
• Using circlip pliers release the circlip securing the parking brake auto adjuster assembly from the cylinder.
Back to the easy stuff
This is perhaps the area that causes most problems as the internal parts corrode.
• Pry the torsion spring from the parking brake crank and unbolt the crank from its shaft.
• Remove the parking brake boot and its shaft and bearing. This is the most likely location of any corrosion that prevents the correct operation of the handbrake auto adjuster. The bearing may not be supplied with your refurb kit, clean it thoroughly in situ and lubricate sparingly with lithium grease.
• Clean up the autoadjuster components. Note that the small Oring needs replacement.
• Remove the brake bleed nipple.
The caliper body can now be cleaned thoroughly and painted if requited. Reassembly using new parts where possible:
• Install the brake bleed nipple.
• If available install a new parking brake crank bearing and its shaft and dust boot fully into the caliper.
• Install the parking brake crank and check there is clearance between the parking brake crank and the caliper.
• Fit the torsion spring.
Back to the difficult bit
• Reinstall the auto adjuster assembly complete with a new O ring. It must be aligned correctly and must be securely retained by the circlip.
Easy bits again
• Check that the parking brake mechanism works correctly by operating the handbrake crank and observing that the internal bolt moves smoothly.
• Install new piston seal in the cylinder, and fit the piston along with its protective boot.
• Install new sliding pin boots snugly into the caliper.
• Install the dust boot with the flanged face inside.
• Reassemble the caliper onto the torque plate as for changing the brake pads.
• Re fit the brake hose and bleed the brakes.
Finally
• With the caliper fitted, attach the handbrake cables and tension them so that there is 1.0mm clearance between the handbrake crank on the caliper and its stop pin.
Sources: various Toyota manuals and those from other car manufacturer’s workshop manuals .
Thanks to Alucard7002 from Rover 800 Enthusiasts Forum and Eric Southers for some of the pictures.