**HOW TO - Re-condition your Gear Selector
Posted: Sat May 04, 2013 5:20 pm
Some of you know I was complaining about the quality of my gear lever. I am reasonably sure its not the second syncro. If all else fails then I will have to look at that.
First step was checking the gear selector arm on the engine. I found that the small steel square bushing was actually missing. So, that wasn’t going to help. I got that replaced and still wasn’t fully happy so this writeup ensued.
First up is to remove the gear knob. If you have a standard gear knob it will simply screw off. If you have an aftermarket one it may be held on with allen screws or similar. Mine has an aftermarket one so im unscrewing the base cover, undoing the allen screws, then it just pulls off.

Next i remove the leather gaitor. That just pulls straight up. Next is to remove the gaitor surround. This needs to lift up from the BACK EDGE FIRST! (furthest from the ashtray)

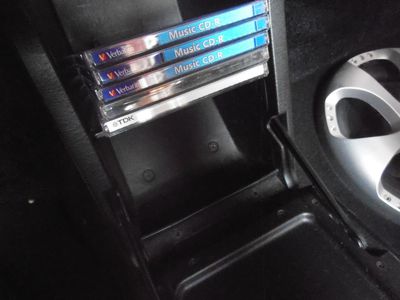
Now to remove the centre console from the car. Start with the rear storage compartment. There are 4 screws holding this on. The first 2 are in the top lift up compartment.

Next the other 2 are in the lower fold down compartment.
Then you need to remove the main centre console. There are 6 screws holding this on. First 2 are at the back below the compartment i just took off.
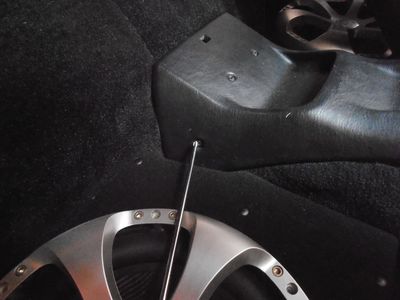
Second set are about 1/2 way up behind the seats. You will have to shift them both forward to get to them
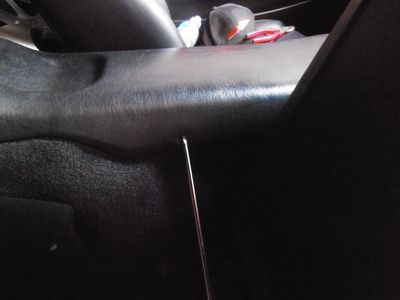
The third set of screws is under the gaitar surround that i removed earlier
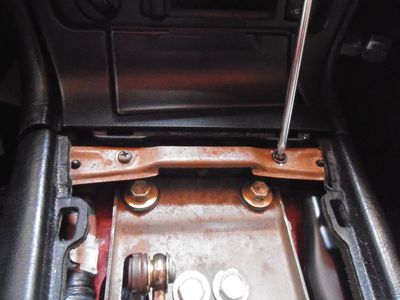
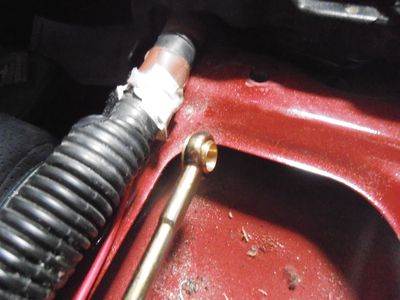
Next you can see there is a rose joint holding the gearstick to the forward/back gearlink cable. This undoes with a 12mm socket.
Also, on the side/side selector arm is a small clip holding the arm to the side/side selector cable. Use a flat head screwdriver to pull off the clip. Keep this and the washer to the side.
Next is to remove the large clips that are holding the gearlink cables to the main support plate. Seen at the bottom of the pic. These were pretty tight for me and i had to get hold of them with a set of short nose pliers and pull them off pretty hard.
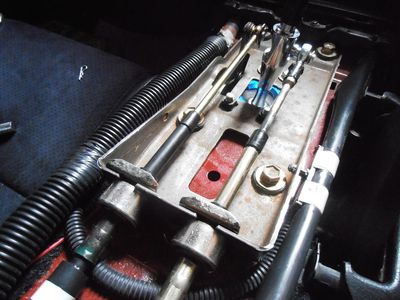
You can see there are 4 12mm bolts holding the support plate down onto the chassis. Remove these and now the whole assembly should start to come away from the car.
Now youve got it out, its pretty straight forward to check all the bushes. Simply check each moving part in turn. Check for the ball of the gear stick sitting in the nylon seat. Has it got excess play. Check the spring on the side/side selector arm is firm, not bent. Check each of the other bushes for movement. There shouldnt be any.
Im going to be replacing all of them so i dont have to be doing this again.
Finally all my bushes have arrived, so next is to rebuild the gear selector components replacing the bushes.
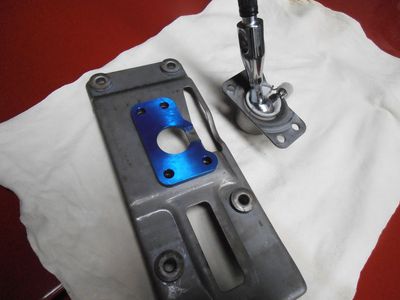
My gear lever might look different to yours as ive got a JONO short shifter and drop plate. Apart from this, the rest of the assembly will work the same for you.
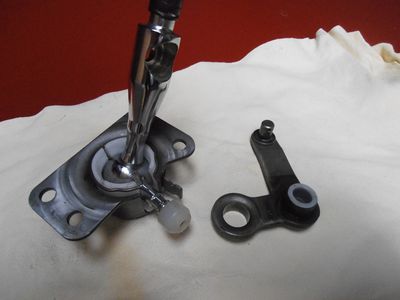
Ive pulled my gear stick out of the nylon seat and replaced it with the new one. These seem to be same for all gens. Part no. 33556-17010. Mine had a little up and down movement but this new one is in there tight! Ive put a LITTLE BIT of high quality grease into the seat. This is just to prevent the ball of the gearstick wearing away too much of the nylon seat over time. I found the allen screw on my short shifter a little loose so tightened that up. Also replaced the bushing that goes onto the side/side selector arm. These also seem to be the same for all gens. Part no. 33548-12021. Now I thought mine a little slack but wasn’t that bad I thought, until I put the new one on. I had to use a small hammer as it was real tight. All these “not too bads” are adding up to a whole lot of slack.
Ive used the same retaining ring around the nylon seat as these don’t tend to stretch at all.
Next ive replaced the little rubber seat bushing that goes in the bottom of the steel housing. This is also a generic item. Part no. 90385-24001 Put this in with REBATE UP.

Then you can put the nylon seat with the gear lever all into the housing.
Next is the side/side selector arm. This bushing is made up of two parts. Again I thought its not that bad. But only removing them found the plastic very brittle and actually just shattered with a screwdriver… This bushing is different for the 94+. You will have to check part no. for yours if you have a gen 3. For 1 and 2 part no. is 90386-12034
These are sold separately and you will need 2 of them!
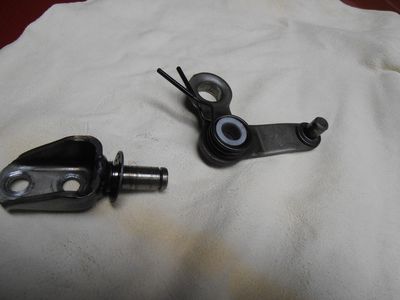
Next is the pivoting bracket. This just has a spring on it that returns your gear lever to centre when moving side/side. Again, didn’t think my spring seemed bad till I got the new one. You can clearly see the difference in the size of it. Its been stretched out quite a bit really. Old one is at the back in the picture. Not only are the spring coils further apart, the arms are wider too.

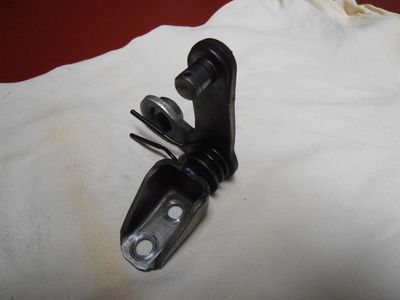
So, the spring slides over the selector arm with the bushing I just did,
then this whole assembly goes onto the pivoting bracket. (make sure the washer is on the pivoting bracket) This gives the spring something firm to press against when you finish the assembly off with the second washer and “C” clip.

That’s both of the assemblies done. Time to put them all back together
Ive got here, the main plate support. The 4 main mounting points that you screw this down with onto the car chassis have 4 little metal bushes that are supported with rubber shown here. These are also replaceable. I haven’t done this, you can. Alternatively DeltaV sell brass bushings if you like. My reassembly goes…Main support plate, drop plate underneath, then the gear seat housing under that. You may not have the drop plate.
Screw these together with the 14mm bolts. (Further apart bolts, with the thread welded in the plate) I haven’t done the bolts up tight, to allow for assembly of the side/side arm.

Now I had to slide in the side/side selector. Youll need to get the spring into position as well as slide the arm over the bushing all at the same time. A little fiddly but do-able by yourself.

Put the other two bolts in..Remember, these bolt down, with the nuts on the underside of the support plate.
Tighten all four bolts up well.

The whole lot together with no slack in any of the bushes.

Its amazing how much difference each of those “tiny bit loose” things felt.
Into the car.
Ive taken out the plastic bushing that goes in the side/side selector cable. Ive replaced it with a solid brass one.
This kit I got from DeltaV. It has this bushing along with a new brass rose joint for the forward/back selector cable.
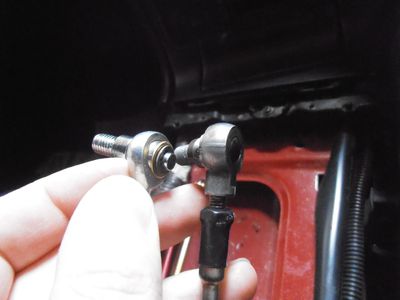
Rose joint replaced.
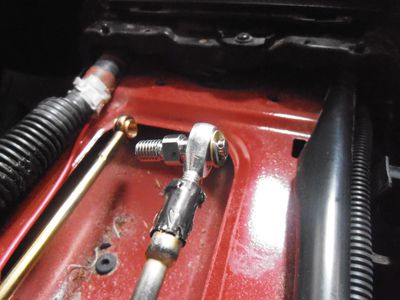
Brass washer seems not quite thick enough. We’ll see if this slack makes a difference.
Time to drop the gear lever assembly/support plate all in. Put the side/side selector cable on (with washer and clip) and also the rose joint in place (12mm nut) before securing everything down with the 4 main bolts.
Also replace the two clips holding the selector cables in place onto the main support plate.
All done.
Put your centre console back on using the 2 screws up the front of the console. Two on each side. At half way down (by seats) and also two at the rear under centre compartment. Total 6 screws. Don’t forget the little screw cover caps. These always go missing otherwise.
Replace the 4 screws in the centre compartment. 2 in the upper lift up compartment and 2 in the lower fold down compartment.
Put your Gear gaitor surround back on. THE FRONT CLIPS CLOSEST TO ASHTRAY FIRST!
Replace the gaitor and screw your gear knob back on.
Done!
Conclusion: I had to wait nearly a month for all the pieces to arrive from Australia and Japan. Toyota had to actually make one of the bushings new. NST tells me that its because these parts rarely fail that they don’t stock them much. I think its more likely that most peoples cars will have at least a couple of these bushings failing but they tend to look at other things like trans fluid or selector cables or syncros. Once one of these bushings loosens. It puts that bit more stress on each of the others. Domino effect, compounding as they all fail.
First step was checking the gear selector arm on the engine. I found that the small steel square bushing was actually missing. So, that wasn’t going to help. I got that replaced and still wasn’t fully happy so this writeup ensued.
First up is to remove the gear knob. If you have a standard gear knob it will simply screw off. If you have an aftermarket one it may be held on with allen screws or similar. Mine has an aftermarket one so im unscrewing the base cover, undoing the allen screws, then it just pulls off.
Next i remove the leather gaitor. That just pulls straight up. Next is to remove the gaitor surround. This needs to lift up from the BACK EDGE FIRST! (furthest from the ashtray)
Now to remove the centre console from the car. Start with the rear storage compartment. There are 4 screws holding this on. The first 2 are in the top lift up compartment.
Next the other 2 are in the lower fold down compartment.
Then you need to remove the main centre console. There are 6 screws holding this on. First 2 are at the back below the compartment i just took off.
Second set are about 1/2 way up behind the seats. You will have to shift them both forward to get to them
The third set of screws is under the gaitar surround that i removed earlier
Next you can see there is a rose joint holding the gearstick to the forward/back gearlink cable. This undoes with a 12mm socket.
Also, on the side/side selector arm is a small clip holding the arm to the side/side selector cable. Use a flat head screwdriver to pull off the clip. Keep this and the washer to the side.
Next is to remove the large clips that are holding the gearlink cables to the main support plate. Seen at the bottom of the pic. These were pretty tight for me and i had to get hold of them with a set of short nose pliers and pull them off pretty hard.
You can see there are 4 12mm bolts holding the support plate down onto the chassis. Remove these and now the whole assembly should start to come away from the car.
Now youve got it out, its pretty straight forward to check all the bushes. Simply check each moving part in turn. Check for the ball of the gear stick sitting in the nylon seat. Has it got excess play. Check the spring on the side/side selector arm is firm, not bent. Check each of the other bushes for movement. There shouldnt be any.
Im going to be replacing all of them so i dont have to be doing this again.
Finally all my bushes have arrived, so next is to rebuild the gear selector components replacing the bushes.
My gear lever might look different to yours as ive got a JONO short shifter and drop plate. Apart from this, the rest of the assembly will work the same for you.
Ive pulled my gear stick out of the nylon seat and replaced it with the new one. These seem to be same for all gens. Part no. 33556-17010. Mine had a little up and down movement but this new one is in there tight! Ive put a LITTLE BIT of high quality grease into the seat. This is just to prevent the ball of the gearstick wearing away too much of the nylon seat over time. I found the allen screw on my short shifter a little loose so tightened that up. Also replaced the bushing that goes onto the side/side selector arm. These also seem to be the same for all gens. Part no. 33548-12021. Now I thought mine a little slack but wasn’t that bad I thought, until I put the new one on. I had to use a small hammer as it was real tight. All these “not too bads” are adding up to a whole lot of slack.
Ive used the same retaining ring around the nylon seat as these don’t tend to stretch at all.
Next ive replaced the little rubber seat bushing that goes in the bottom of the steel housing. This is also a generic item. Part no. 90385-24001 Put this in with REBATE UP.
Then you can put the nylon seat with the gear lever all into the housing.
Next is the side/side selector arm. This bushing is made up of two parts. Again I thought its not that bad. But only removing them found the plastic very brittle and actually just shattered with a screwdriver… This bushing is different for the 94+. You will have to check part no. for yours if you have a gen 3. For 1 and 2 part no. is 90386-12034
These are sold separately and you will need 2 of them!
Next is the pivoting bracket. This just has a spring on it that returns your gear lever to centre when moving side/side. Again, didn’t think my spring seemed bad till I got the new one. You can clearly see the difference in the size of it. Its been stretched out quite a bit really. Old one is at the back in the picture. Not only are the spring coils further apart, the arms are wider too.
So, the spring slides over the selector arm with the bushing I just did,
then this whole assembly goes onto the pivoting bracket. (make sure the washer is on the pivoting bracket) This gives the spring something firm to press against when you finish the assembly off with the second washer and “C” clip.
That’s both of the assemblies done. Time to put them all back together
Ive got here, the main plate support. The 4 main mounting points that you screw this down with onto the car chassis have 4 little metal bushes that are supported with rubber shown here. These are also replaceable. I haven’t done this, you can. Alternatively DeltaV sell brass bushings if you like. My reassembly goes…Main support plate, drop plate underneath, then the gear seat housing under that. You may not have the drop plate.
Screw these together with the 14mm bolts. (Further apart bolts, with the thread welded in the plate) I haven’t done the bolts up tight, to allow for assembly of the side/side arm.
Now I had to slide in the side/side selector. Youll need to get the spring into position as well as slide the arm over the bushing all at the same time. A little fiddly but do-able by yourself.
Put the other two bolts in..Remember, these bolt down, with the nuts on the underside of the support plate.
Tighten all four bolts up well.
The whole lot together with no slack in any of the bushes.
Its amazing how much difference each of those “tiny bit loose” things felt.
Into the car.
Ive taken out the plastic bushing that goes in the side/side selector cable. Ive replaced it with a solid brass one.
This kit I got from DeltaV. It has this bushing along with a new brass rose joint for the forward/back selector cable.
Rose joint replaced.
Brass washer seems not quite thick enough. We’ll see if this slack makes a difference.
Time to drop the gear lever assembly/support plate all in. Put the side/side selector cable on (with washer and clip) and also the rose joint in place (12mm nut) before securing everything down with the 4 main bolts.
Also replace the two clips holding the selector cables in place onto the main support plate.
All done.
Put your centre console back on using the 2 screws up the front of the console. Two on each side. At half way down (by seats) and also two at the rear under centre compartment. Total 6 screws. Don’t forget the little screw cover caps. These always go missing otherwise.
Replace the 4 screws in the centre compartment. 2 in the upper lift up compartment and 2 in the lower fold down compartment.
Put your Gear gaitor surround back on. THE FRONT CLIPS CLOSEST TO ASHTRAY FIRST!
Replace the gaitor and screw your gear knob back on.
Done!
Conclusion: I had to wait nearly a month for all the pieces to arrive from Australia and Japan. Toyota had to actually make one of the bushings new. NST tells me that its because these parts rarely fail that they don’t stock them much. I think its more likely that most peoples cars will have at least a couple of these bushings failing but they tend to look at other things like trans fluid or selector cables or syncros. Once one of these bushings loosens. It puts that bit more stress on each of the others. Domino effect, compounding as they all fail.