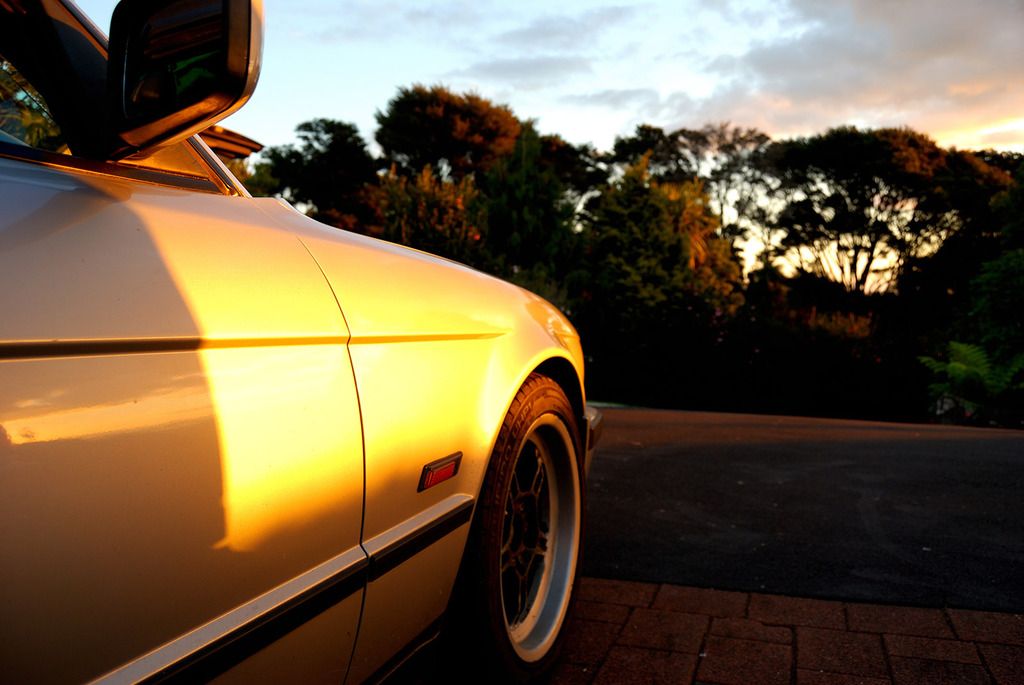
TNR's AW11 (Finally!)
Moderator: Moderators
Forum rules
This section of the forum is a great resource if you're looking for ideas, and it's a cool way of obtaining technical information that may otherwise not have been posted. (Members can use the Search functionality at top right of the forum to speed up finding things) Please respect others' contributions and don't diss anyone - keep comments helpful, factual, positive and polite. One thread per vehicle or owner please - don't start lots of threads about just one car. And if you need assistance with your car and want to host a spanner day, please use the appropriate section of the forum: http://mr2.org.nz/phpbb3/viewforum.php?f=35 Thank you.
This section of the forum is a great resource if you're looking for ideas, and it's a cool way of obtaining technical information that may otherwise not have been posted. (Members can use the Search functionality at top right of the forum to speed up finding things) Please respect others' contributions and don't diss anyone - keep comments helpful, factual, positive and polite. One thread per vehicle or owner please - don't start lots of threads about just one car. And if you need assistance with your car and want to host a spanner day, please use the appropriate section of the forum: http://mr2.org.nz/phpbb3/viewforum.php?f=35 Thank you.
-
flying_wedge

- Club Member - MR2OCNZ
- Posts: 1696
- Joined: Sat Aug 06, 2005 5:07 pm
- Stomping Ground: Christchurch
- Prime Mover: AW11
- First name: Mark
Re: TNR's AW11 (Finally!)
Sweet work, love the effort going into this - will be a well sorted and considered car once together.

-
TNR
- Club Member - MR2OCNZ
- Posts: 161
- Joined: Sun Sep 13, 2015 6:03 pm
- Stomping Ground: Auckland
- Prime Mover: AW11
- First name: TNR
Re: TNR's AW11 (Finally!)
Thanks everyone, appreciate it.
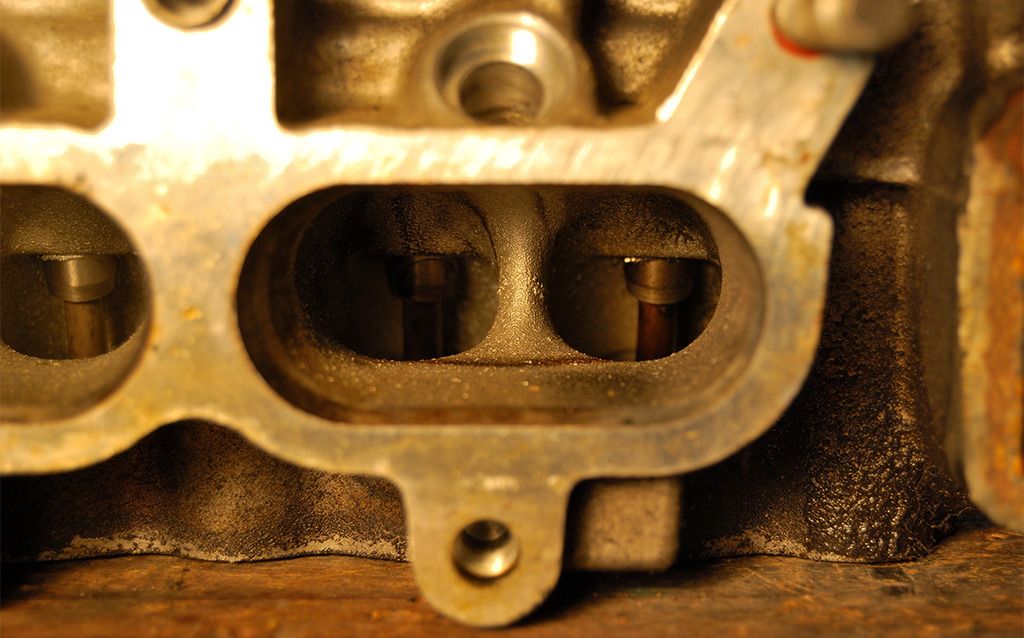
As you might remember from the pics of the engine when I first got it; it was pretty dirty and oily. Its an old engine and chances are the oil seals have never been replaced, so I thought I better address this.
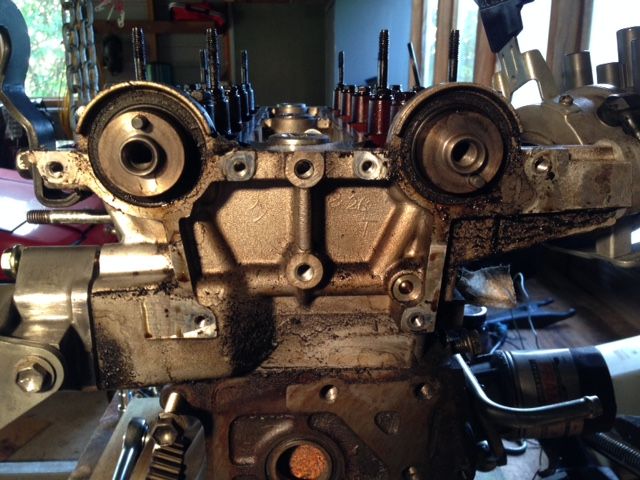
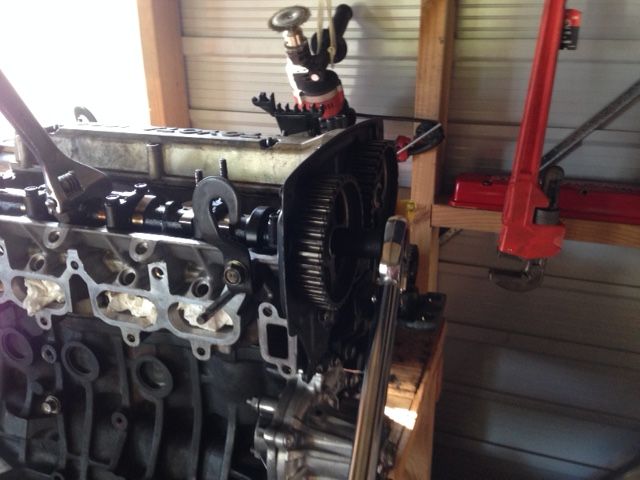
Removing cam timing gears:
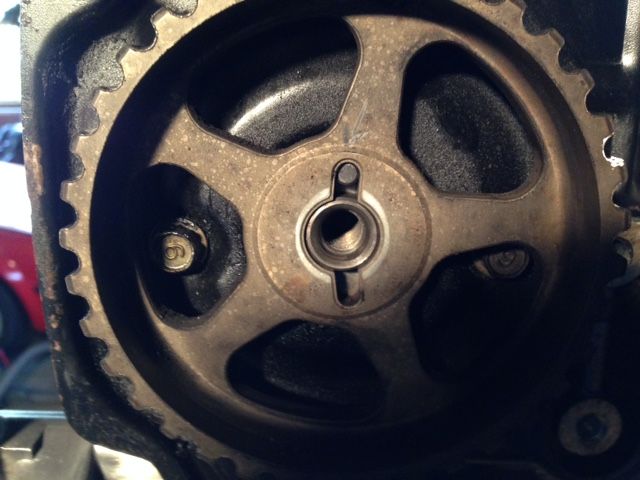
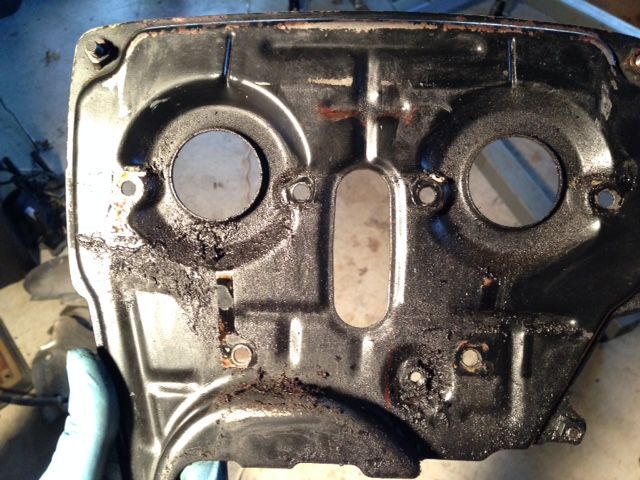
Notice the oil:
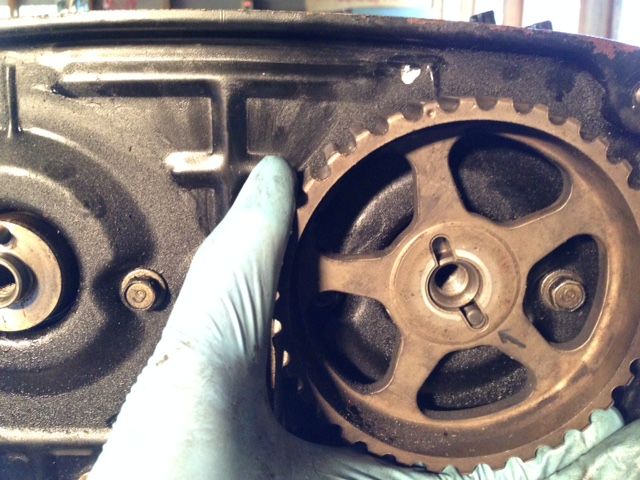
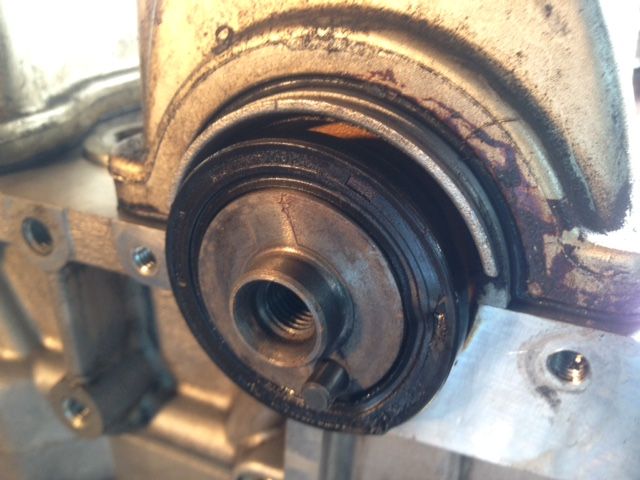
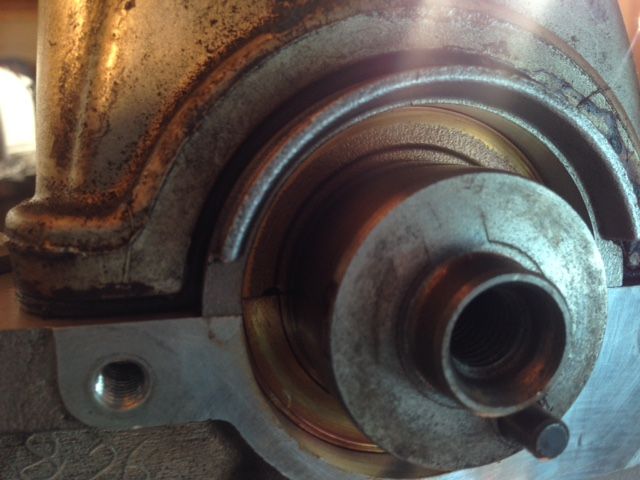
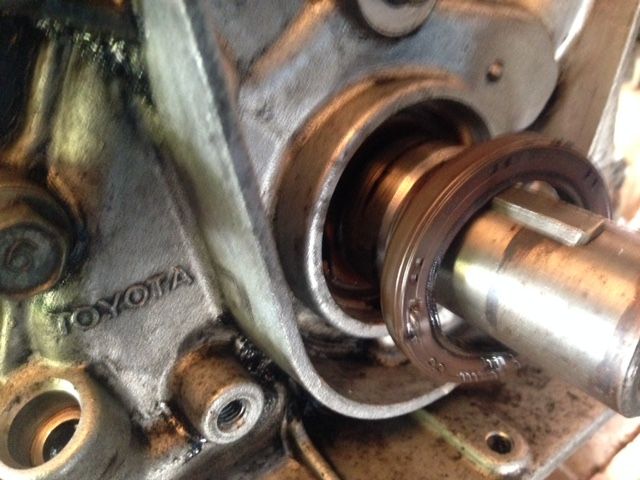
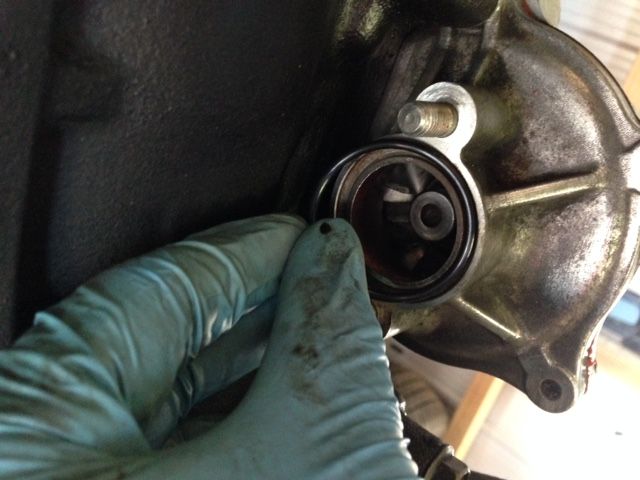
With the cover removed its clear to see the camshaft seal was leaking:
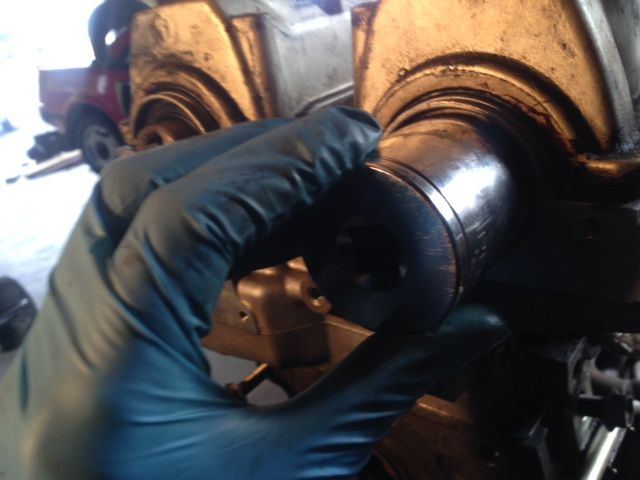
Removing old seal:

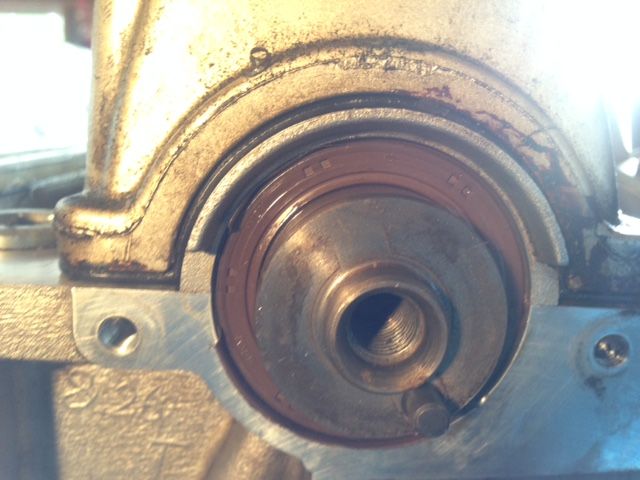
Inserting new seal:
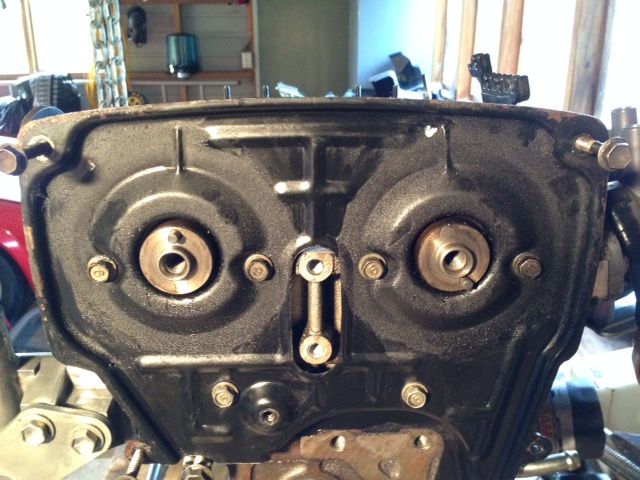
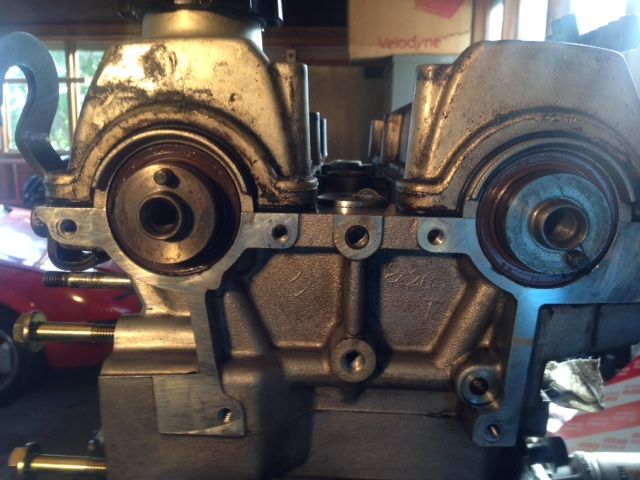
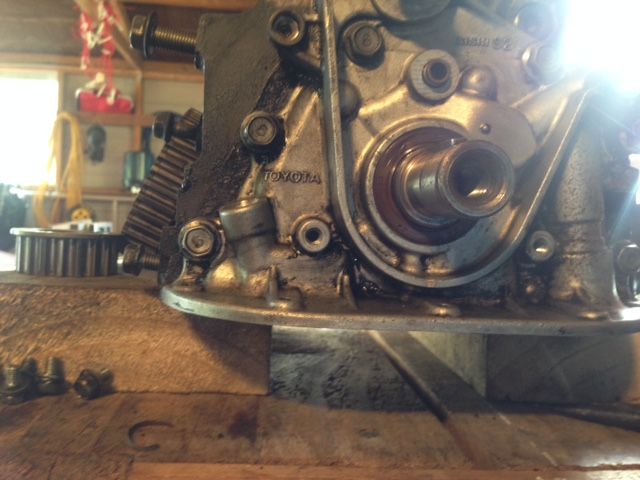
Both seals in and head cleaned:
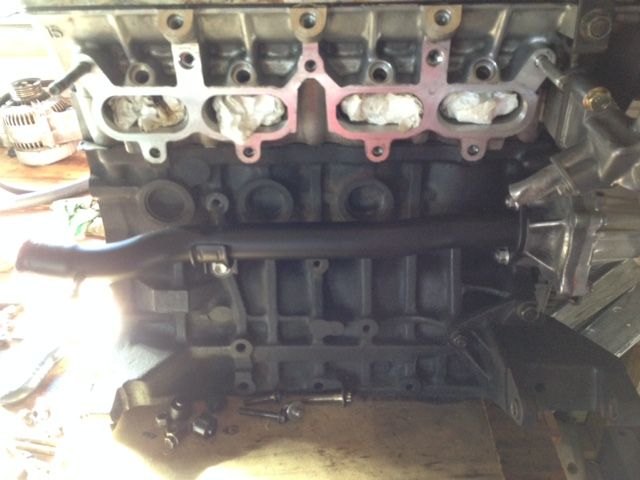
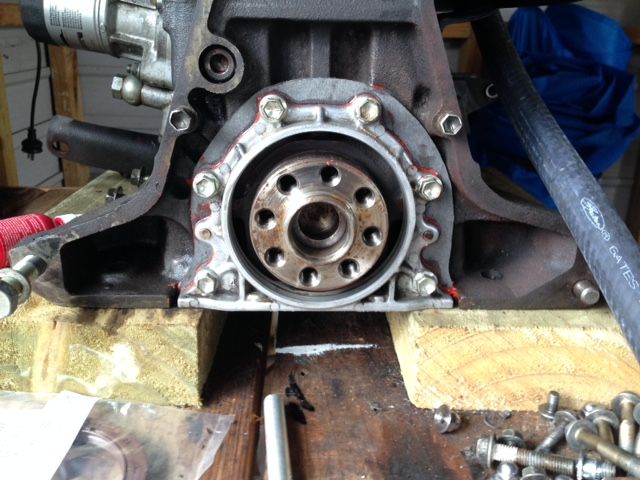
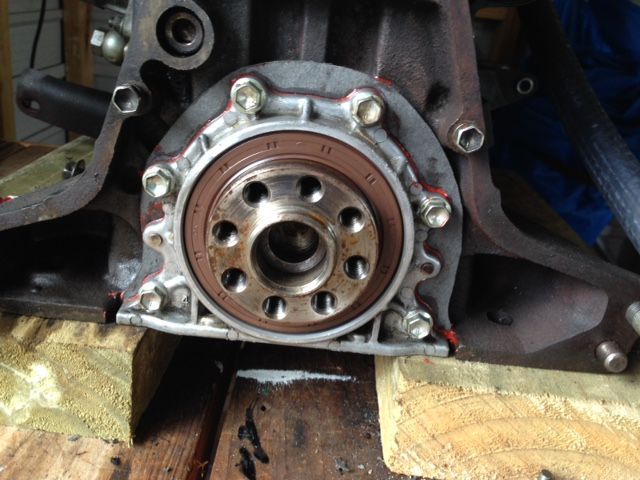
Front main seal:
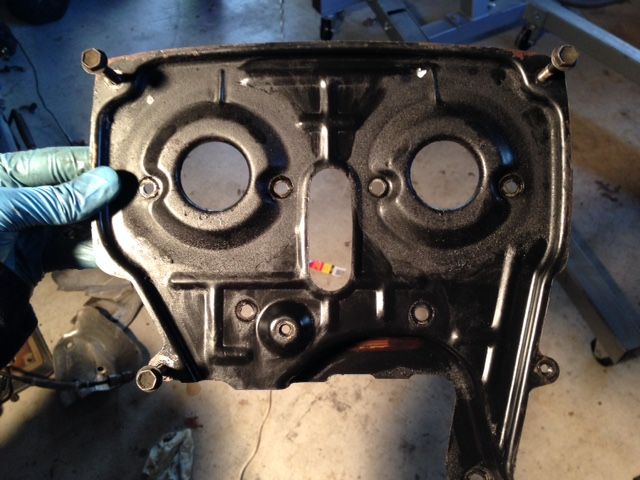
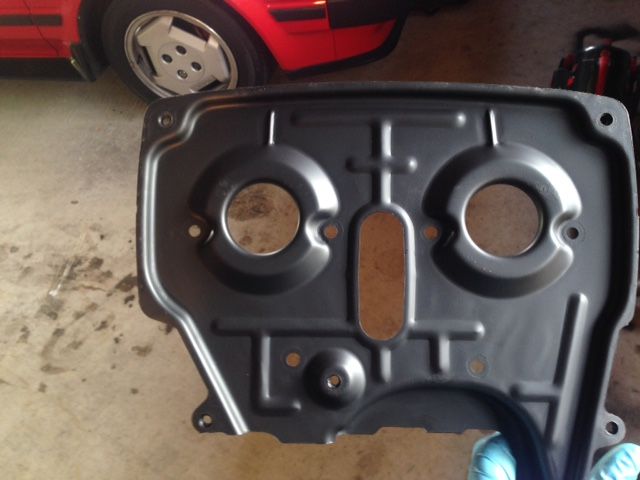
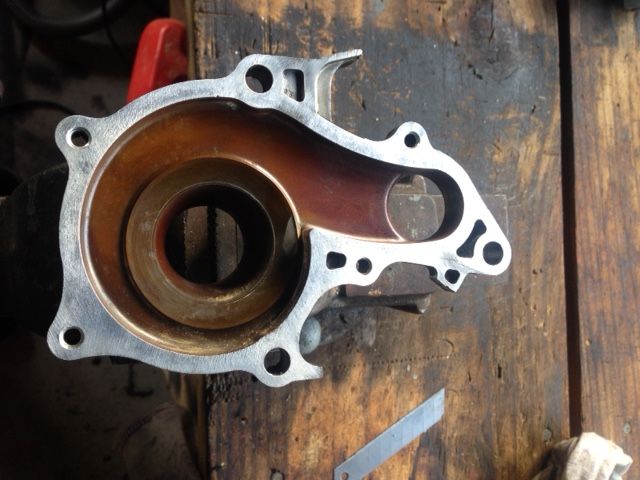
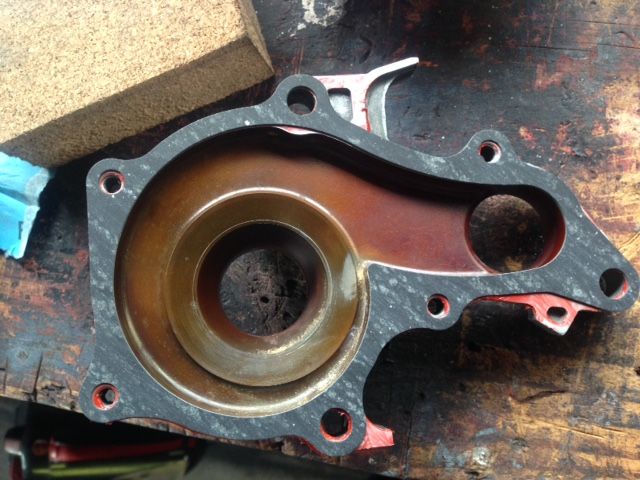
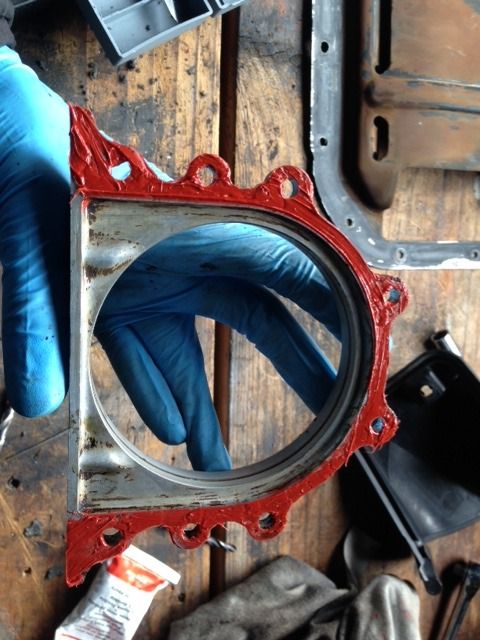
Repainted the backing/cover plate with high heat paint:
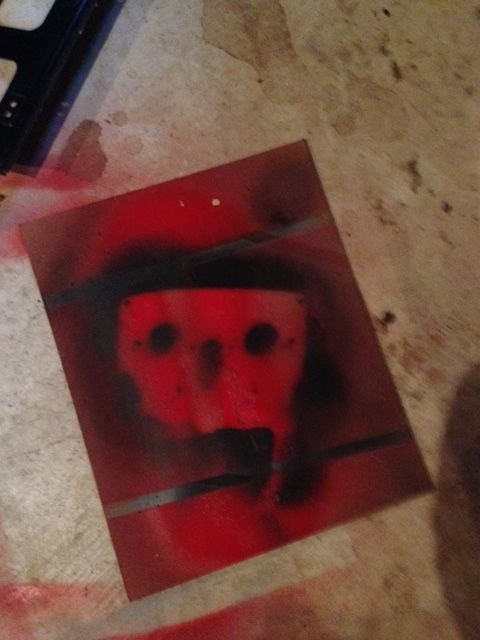
Made a nice robo skull image:
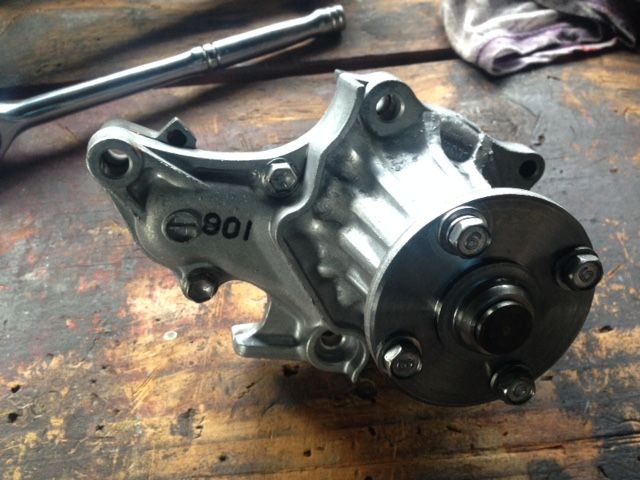
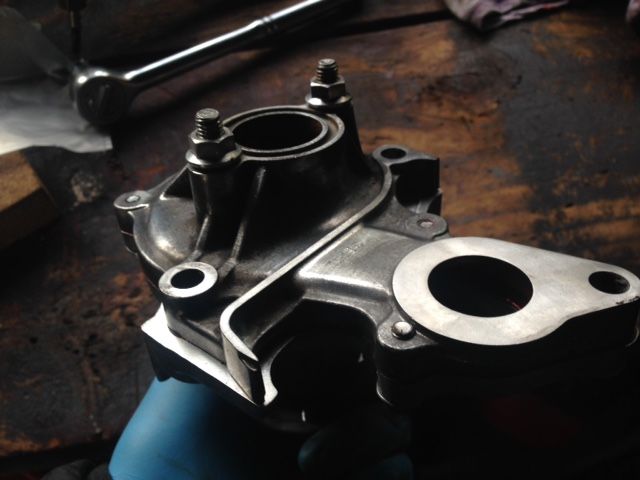
Fitted:
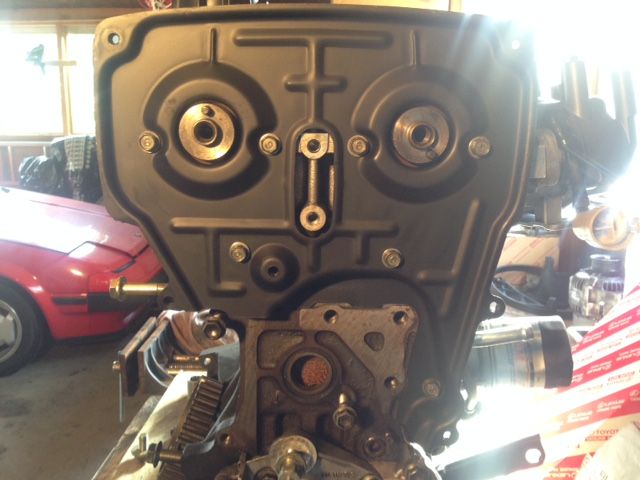
Torquing cam sprocket bolts (47Nm if I recall?):
New Toyota waterpump:
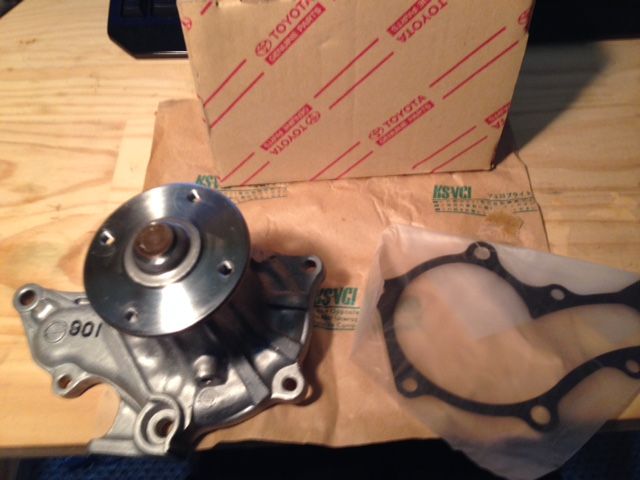
All my money is disapearing, so I didn't buy the whole pump assembly. Reusing the old pump backing:
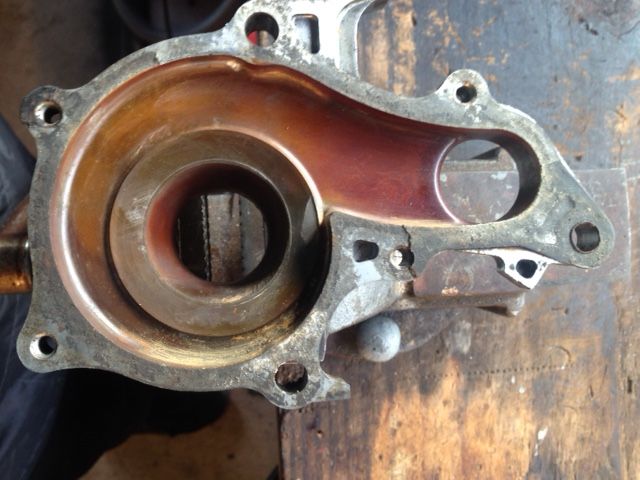
I noticed that the water pipe which I cleaned up had started to rust slightly already, I must have rubbed off some anti corossion coating? So cleaned it up again, primer and high heat black paint:

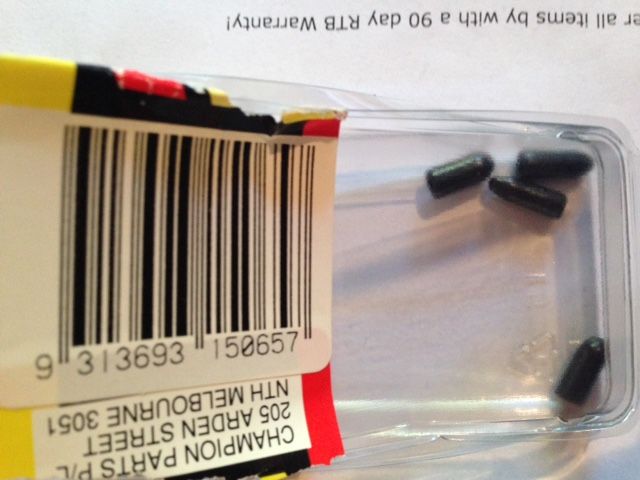
Vacuum caps for vacuum nips on ITB's (Going to get vac signal from T3 ITB adapter ports):
Okay now for the main update. I managed to install the clutch hardline which runs from the front of the car to the rear. I knew it was going to be a pain and it was. Nothing too complicated but have to remove a number of components (Under body covers, E-brake adjuster/splitter mechanism, front chassis support, front sway bar mounts, fuel tank straps, front heater hoses).
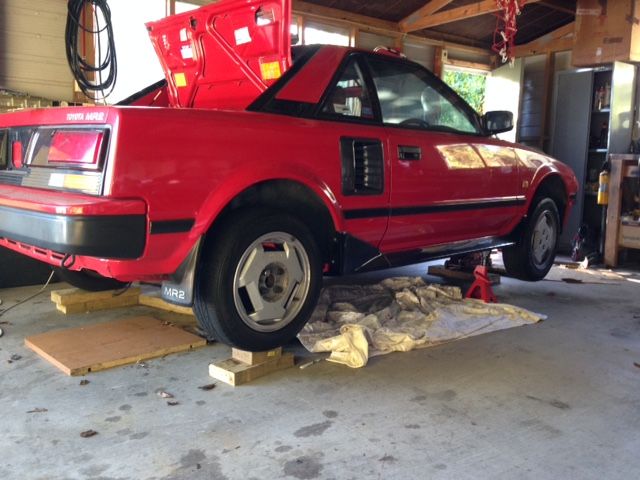
Lifted car in preparation:
The hydraulic line is split into two sections, one short section from the clutch master to the under body of the car, then a second section which connects to the first and then runs to the engine bay of the car.
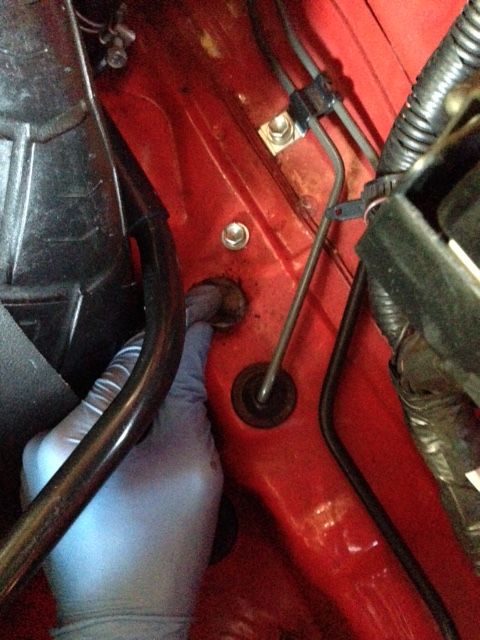
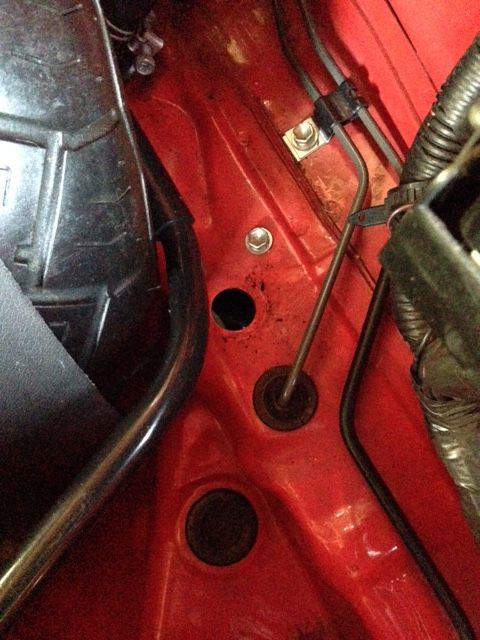
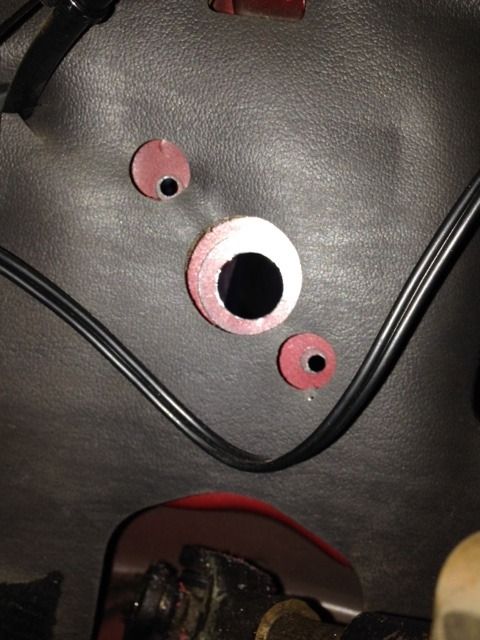
This is the factory pass through hole for the clutch line:
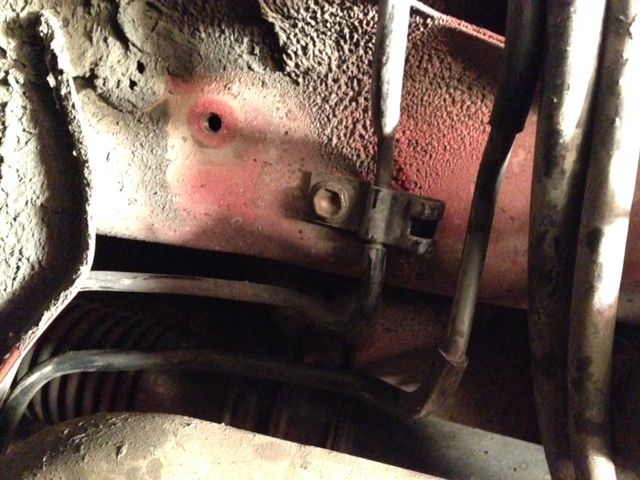
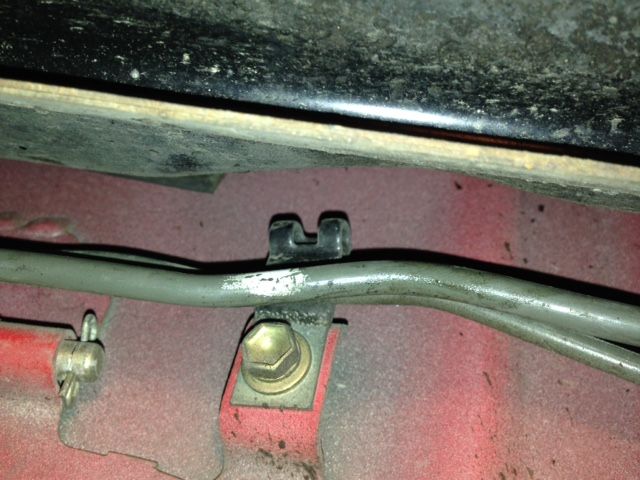
Fitting the line was not really something that could be captured easily with photographs, plus there wasn't a lot of room under the car. For this reason I have only taken pics of mounting the clutch line to the existing brackets (luckily the auto brackets are the same as the manual ones, just with an extra space in the bracket.
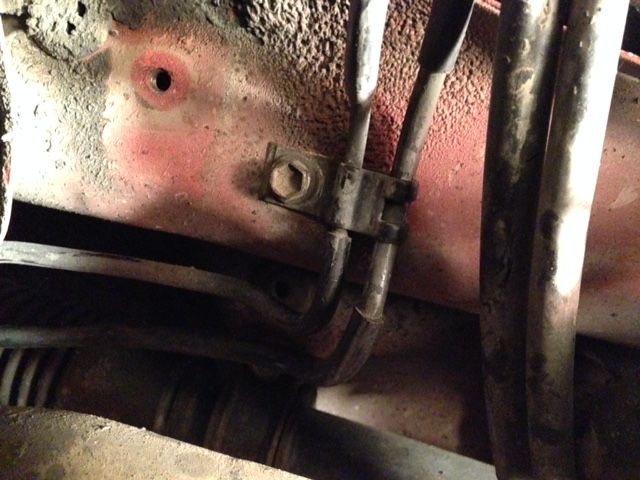
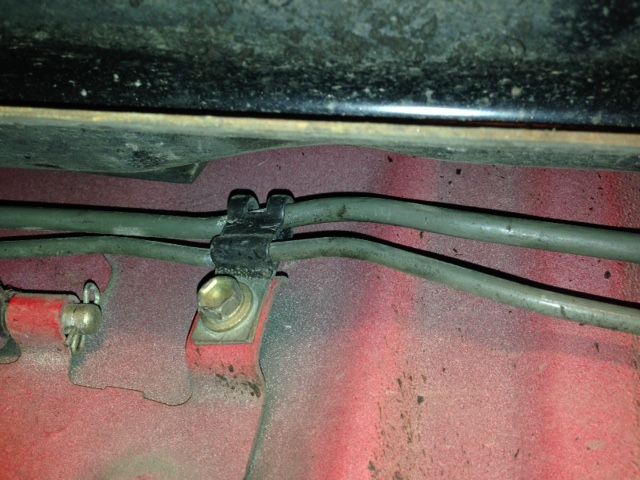
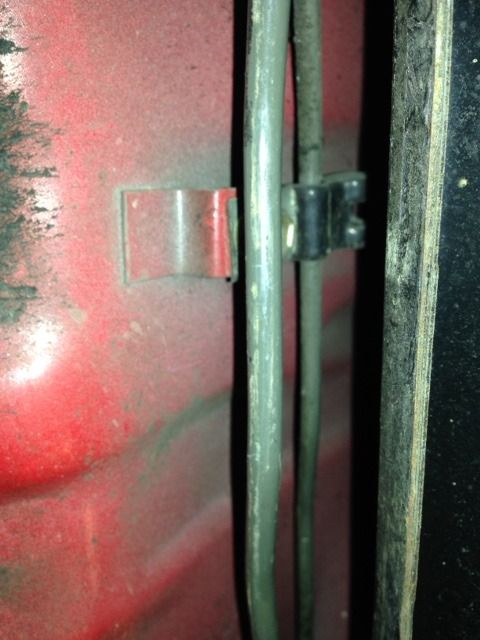
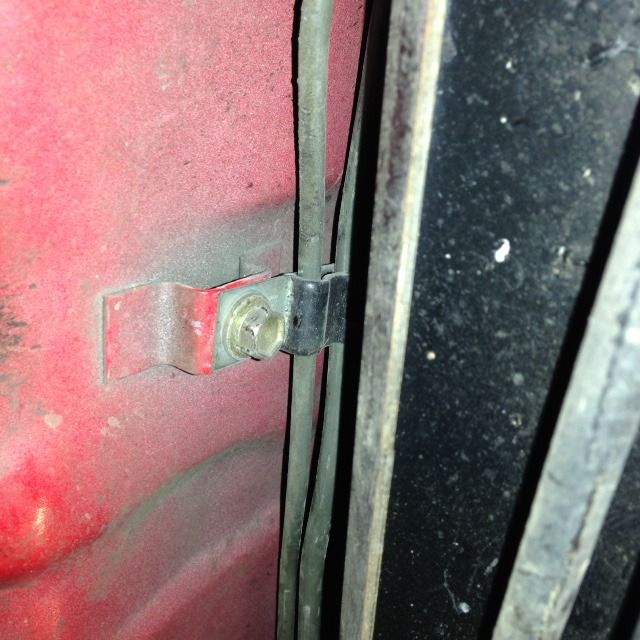
Here you can see the line came out very close to its proper position, it will be fine to bend it slightly to its final position:
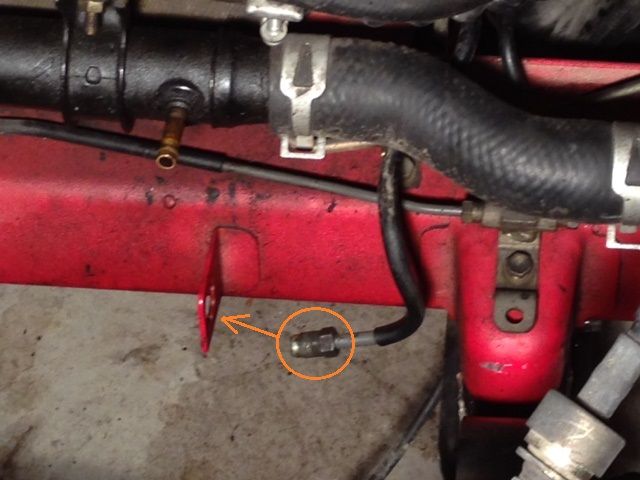
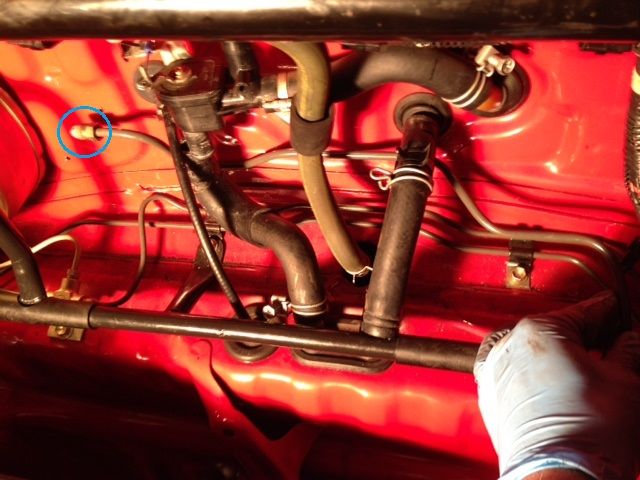
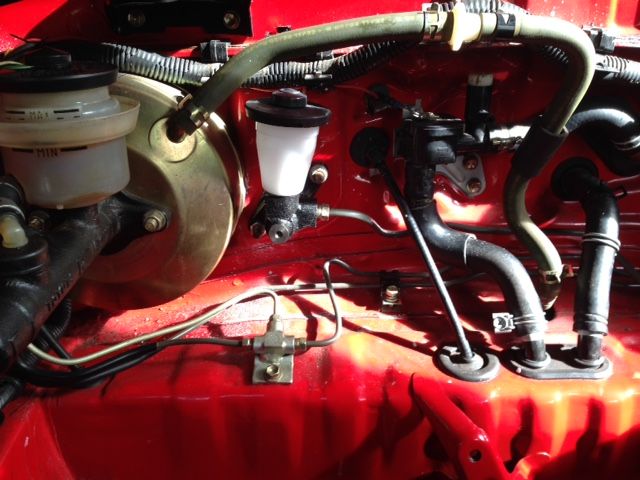
Front section of line, blue circle shows where lines connects into the clutch master cylinder (not yet installed):
Not the most interesting pictures, but it was literally just me spending 3-4 hours trying to thread the line through various obstacles, finding out it wasn't possible without removing certain parts and repeating.
I'm glad its done though, probably the hardest part of a manual swap in an MR-2.
As you might remember from the pics of the engine when I first got it; it was pretty dirty and oily. Its an old engine and chances are the oil seals have never been replaced, so I thought I better address this.
Removing cam timing gears:
Notice the oil:
With the cover removed its clear to see the camshaft seal was leaking:
Removing old seal:
Inserting new seal:
Both seals in and head cleaned:
Front main seal:
Repainted the backing/cover plate with high heat paint:
Made a nice robo skull image:
Fitted:
Torquing cam sprocket bolts (47Nm if I recall?):
New Toyota waterpump:
All my money is disapearing, so I didn't buy the whole pump assembly. Reusing the old pump backing:
I noticed that the water pipe which I cleaned up had started to rust slightly already, I must have rubbed off some anti corossion coating? So cleaned it up again, primer and high heat black paint:
Vacuum caps for vacuum nips on ITB's (Going to get vac signal from T3 ITB adapter ports):
Okay now for the main update. I managed to install the clutch hardline which runs from the front of the car to the rear. I knew it was going to be a pain and it was. Nothing too complicated but have to remove a number of components (Under body covers, E-brake adjuster/splitter mechanism, front chassis support, front sway bar mounts, fuel tank straps, front heater hoses).
Lifted car in preparation:
The hydraulic line is split into two sections, one short section from the clutch master to the under body of the car, then a second section which connects to the first and then runs to the engine bay of the car.
This is the factory pass through hole for the clutch line:
Fitting the line was not really something that could be captured easily with photographs, plus there wasn't a lot of room under the car. For this reason I have only taken pics of mounting the clutch line to the existing brackets (luckily the auto brackets are the same as the manual ones, just with an extra space in the bracket.
Here you can see the line came out very close to its proper position, it will be fine to bend it slightly to its final position:
Front section of line, blue circle shows where lines connects into the clutch master cylinder (not yet installed):
Not the most interesting pictures, but it was literally just me spending 3-4 hours trying to thread the line through various obstacles, finding out it wasn't possible without removing certain parts and repeating.
I'm glad its done though, probably the hardest part of a manual swap in an MR-2.
-
TNR
- Club Member - MR2OCNZ
- Posts: 161
- Joined: Sun Sep 13, 2015 6:03 pm
- Stomping Ground: Auckland
- Prime Mover: AW11
- First name: TNR
Re: TNR's AW11 (Finally!)
A small update:
I am swapping my tail lights for facelift ones. As you guys probably know this means the original lock is no longer usable as it doesn't protrude out enough.
Of course you can simply put in a facelift lock but then your original key won't work obviously.
I thought I would try to re-pin the facelift lock using the pins/wafers from my original lock. To do this I went to a junk yard and found a facelift boot lock.
Here are two pics showing the lock with facelift and pre-facelift lights.
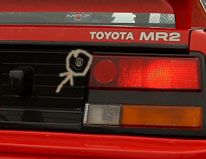
Pre-facelift:
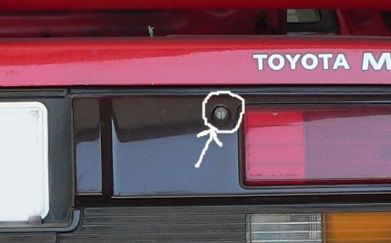
Facelift (Note that the lock now needs to protude much further because the light is now over it):
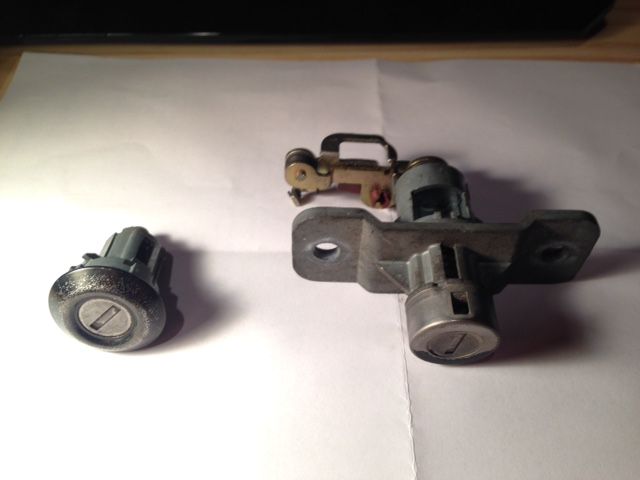
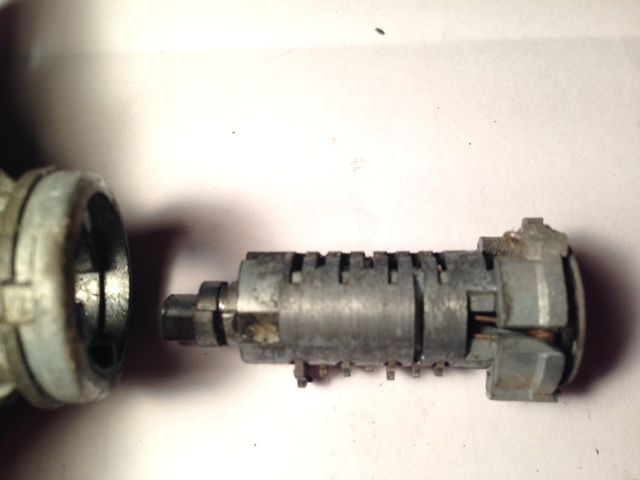
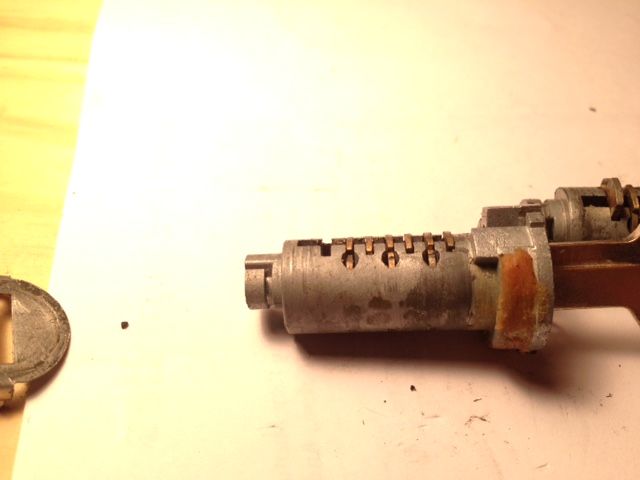
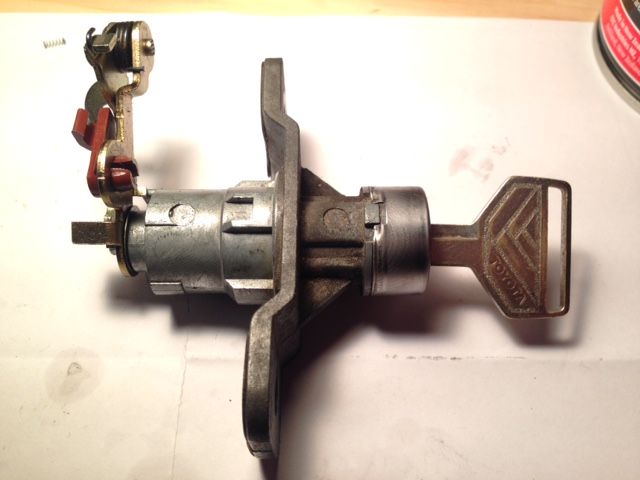
Old lock on left, facelight on right (Tail piece actuator has already been removed from old lock in this pic):
In order to remove the barrel the front cover must be removed:
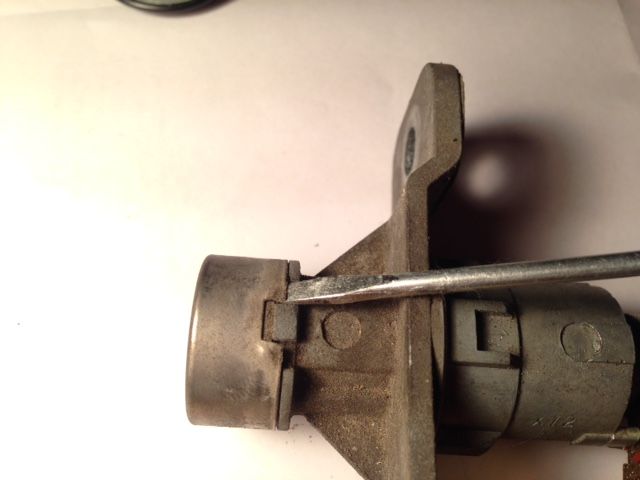
C clip holding actuator must also be removed:
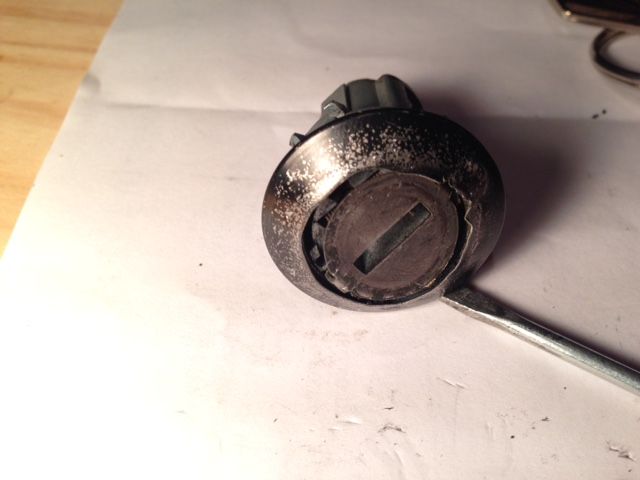
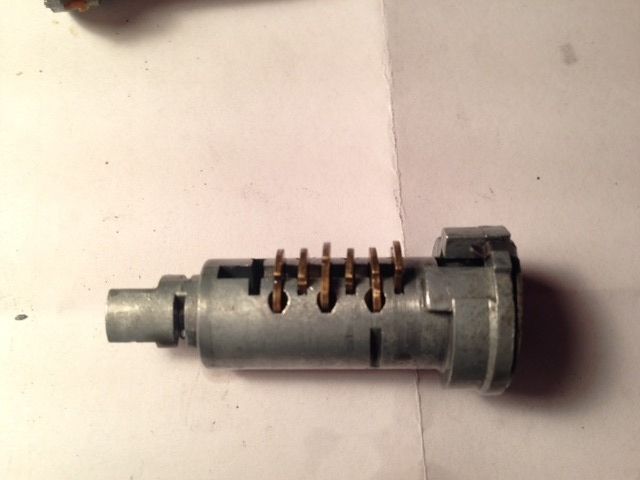
Now the barrel can be removed, to do so insert the key and pull it out (doesn't have to be the exact key for the lock):
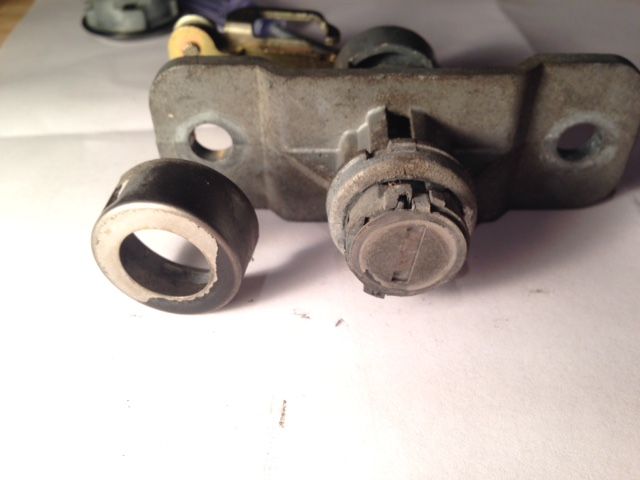
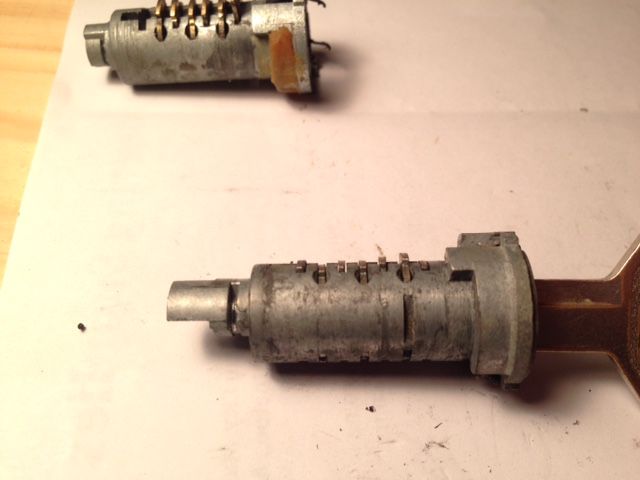
Original lock has a cover which was too difficult to remove with damaging, perhaps replacement cover can be found but I wont be using this lock anymore:
Original on left, facelift on right (Note: facelift lock uses 7 pins while original uses 6 but still have the slot for 7th, at least on mine):
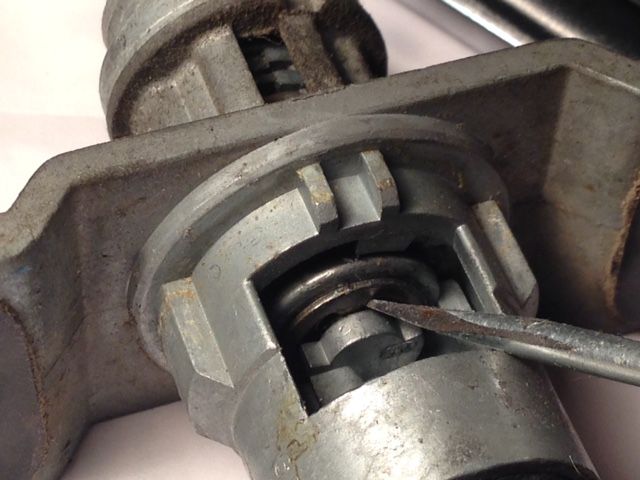
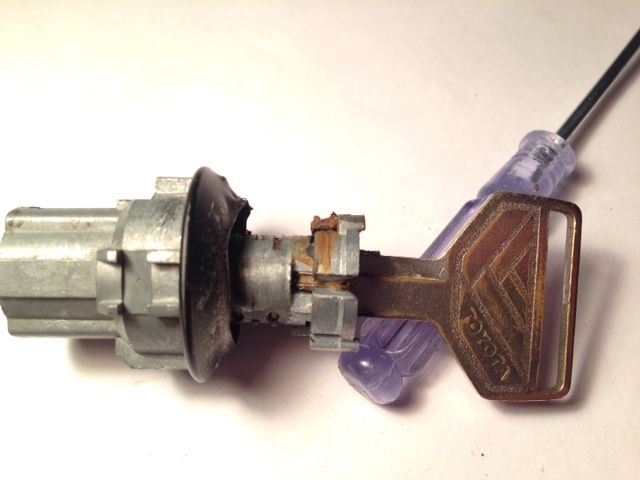
Key in original lock, notice that all the pins are pulled down into the core (flush) allowing it to spin in the barrel:
Alternatively the same key placed in the facelift lock, see how one pin is not pulled down all the way. This prevents the core form rotating in the barrel:
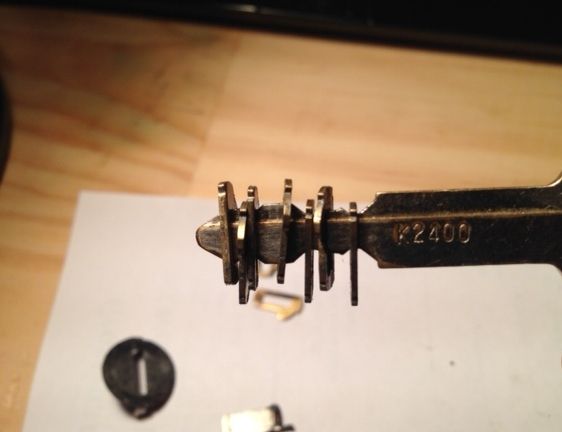
Pic showing how key is inserted in pins/wafers:
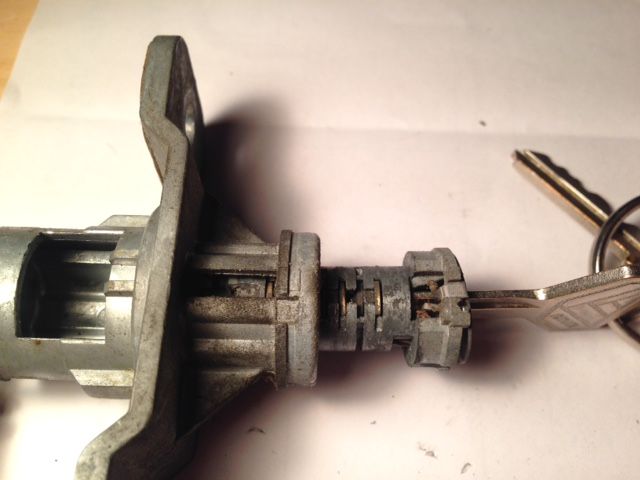
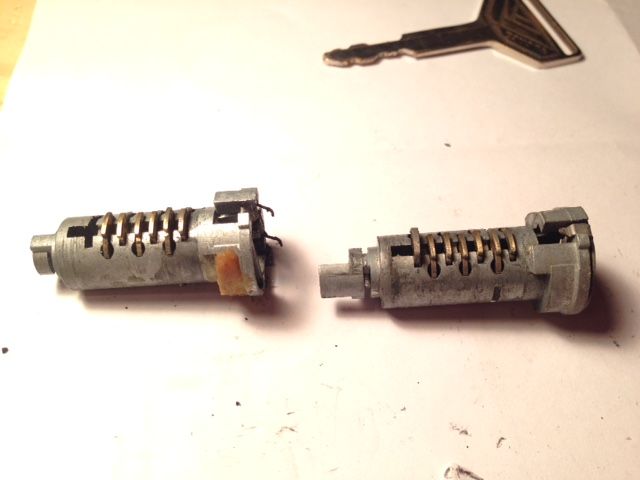
Pins/wafers and springs removed from both locks, as mentioned before the original lock had 6 pins while facelift has 7:
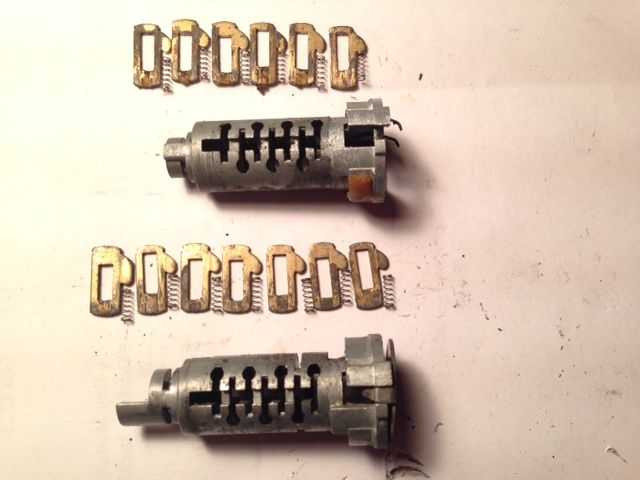
Here are the pins/wafers from my original lock fitted to the facelift lock, make sure to remove the spring from any slot that is not being used or else it could come loose and jam everything.
Cleaned everything up too.
It works!
Here are the original pre-facelift tail lights (sorry for shitty pics):
And now the facelift ones:
I am swapping my tail lights for facelift ones. As you guys probably know this means the original lock is no longer usable as it doesn't protrude out enough.
Of course you can simply put in a facelift lock but then your original key won't work obviously.
I thought I would try to re-pin the facelift lock using the pins/wafers from my original lock. To do this I went to a junk yard and found a facelift boot lock.
Here are two pics showing the lock with facelift and pre-facelift lights.
Pre-facelift:
Facelift (Note that the lock now needs to protude much further because the light is now over it):
Old lock on left, facelight on right (Tail piece actuator has already been removed from old lock in this pic):
In order to remove the barrel the front cover must be removed:
C clip holding actuator must also be removed:
Now the barrel can be removed, to do so insert the key and pull it out (doesn't have to be the exact key for the lock):
Original lock has a cover which was too difficult to remove with damaging, perhaps replacement cover can be found but I wont be using this lock anymore:
Original on left, facelift on right (Note: facelift lock uses 7 pins while original uses 6 but still have the slot for 7th, at least on mine):
Key in original lock, notice that all the pins are pulled down into the core (flush) allowing it to spin in the barrel:
Alternatively the same key placed in the facelift lock, see how one pin is not pulled down all the way. This prevents the core form rotating in the barrel:
Pic showing how key is inserted in pins/wafers:
Pins/wafers and springs removed from both locks, as mentioned before the original lock had 6 pins while facelift has 7:
Here are the pins/wafers from my original lock fitted to the facelift lock, make sure to remove the spring from any slot that is not being used or else it could come loose and jam everything.
Cleaned everything up too.
It works!
Here are the original pre-facelift tail lights (sorry for shitty pics):
And now the facelift ones:
-
mickeyduck

- Life Member - MR2OCNZ
- Posts: 6144
- Joined: Mon Apr 25, 2005 11:30 am
- Stomping Ground: Auckland
- Prime Mover: More than one MR2
- First name: Charlie
Re: TNR's AW11 (Finally!)
Nice explanation regards the locks. Having had a pre-facelift AW once and prefering the looks of the facelift lights etc, I'm sure there'll be a few folk out there that find that post useful. 
#8^) Charlie the certified Westie
Retired - President 2012 - 2018
Retired - Committee Member 2009 - 2018
Retired - Auckland Area Coordinator 2009 - 2018
Retired - Webmaster, Forum Host & Admin 2010 - 2018 - Now it's mknz
Financial Club Member since 2004 and thanks to *84vvt and co-conspirators, Life Member since April 2017
100+ MR2OCNZ runs and counting... When going hard, good rubber's your best protection against unwanted accidents. Buy good tyres!
When you're nearing the end of the drag-strip and you have no 'chute, you may as well keep your foot to the floor... Live life. There ain't no second pass.
-
TNR
- Club Member - MR2OCNZ
- Posts: 161
- Joined: Sun Sep 13, 2015 6:03 pm
- Stomping Ground: Auckland
- Prime Mover: AW11
- First name: TNR
Re: TNR's AW11 (Finally!)
Thanks Charlie, I'd be happy if it can be of use to someone else. It really isn't difficult to do.mickeyduck wrote:Nice explanation regards the locks. Having had a pre-facelift AW once and prefering the looks of the facelift lights etc, I'm sure there'll be a few folk out there that find that post useful.
Anyway due to a lot of other commitments and a lack of motivation in winter months I have not made much progress on the car.
The lack of MR-2 related progress does allow me to mention a few things I've been doing on the side (which are still indirectly related to the project).
First off I sold my M52b28 swapped E34. This was my first true project car in the sense that I did the engine swap myself and upgraded many parts. I was double minded about selling it, but at least I should have enough $$ to be able to complete the MR-2 project without being held up for monetary reasons now.
Here are some pics of it:
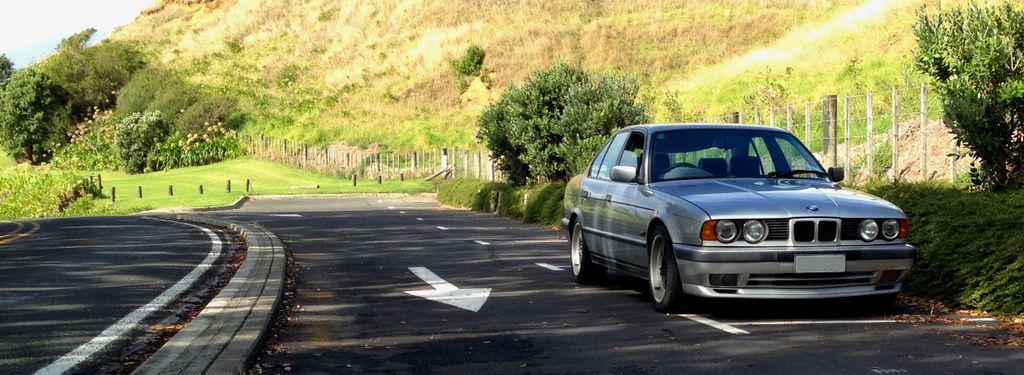
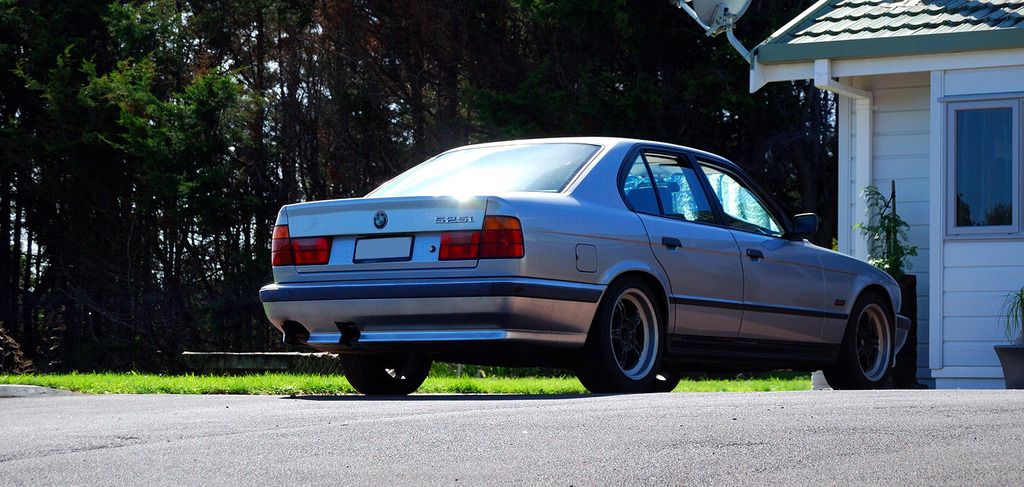
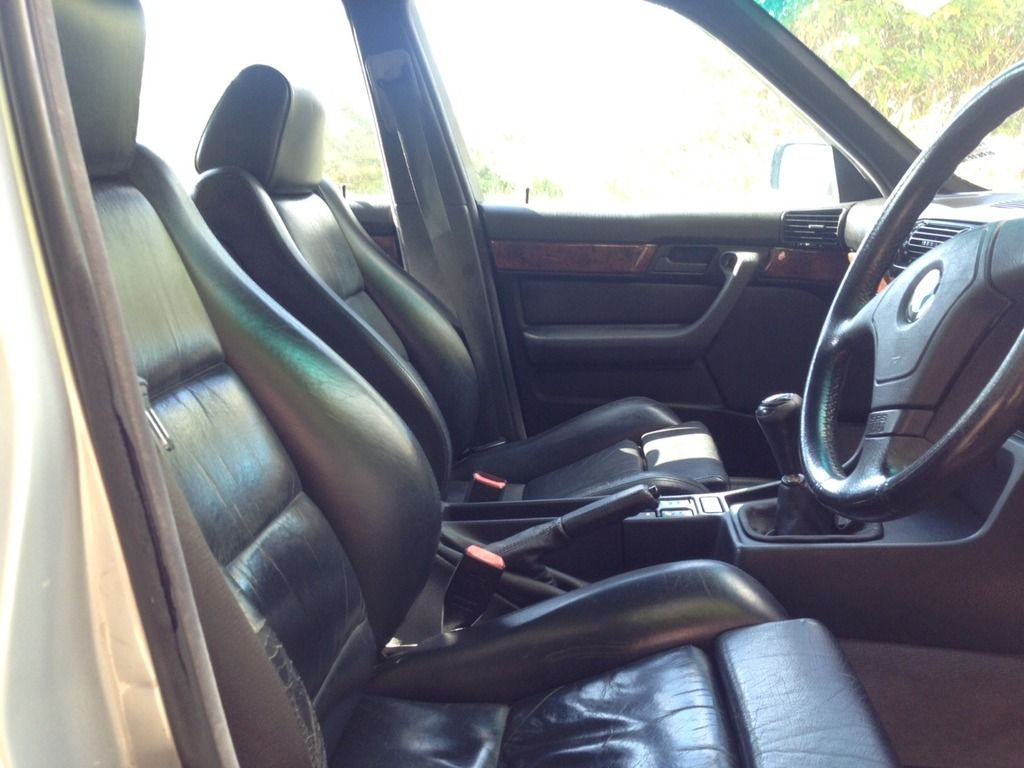
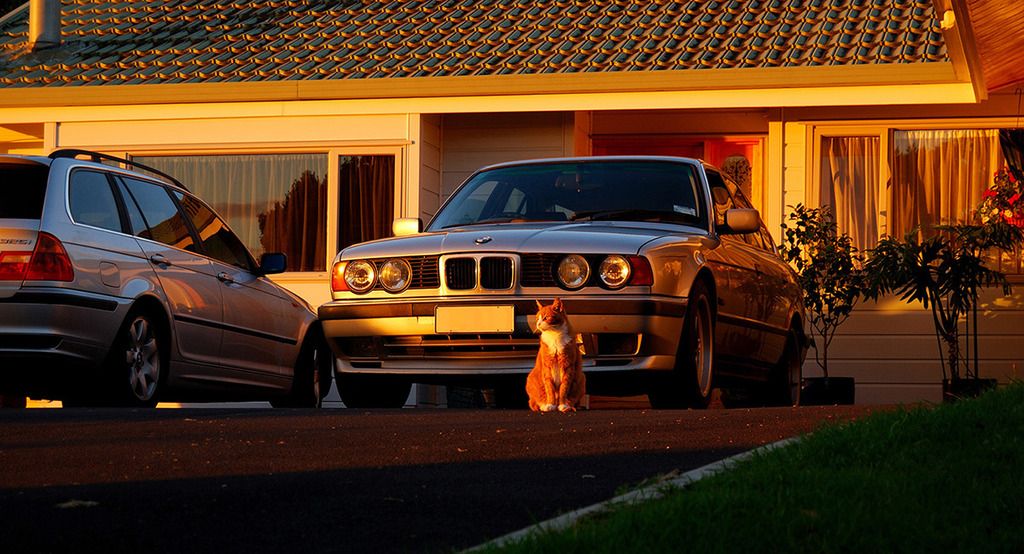
Anyway its gone to a new home now.
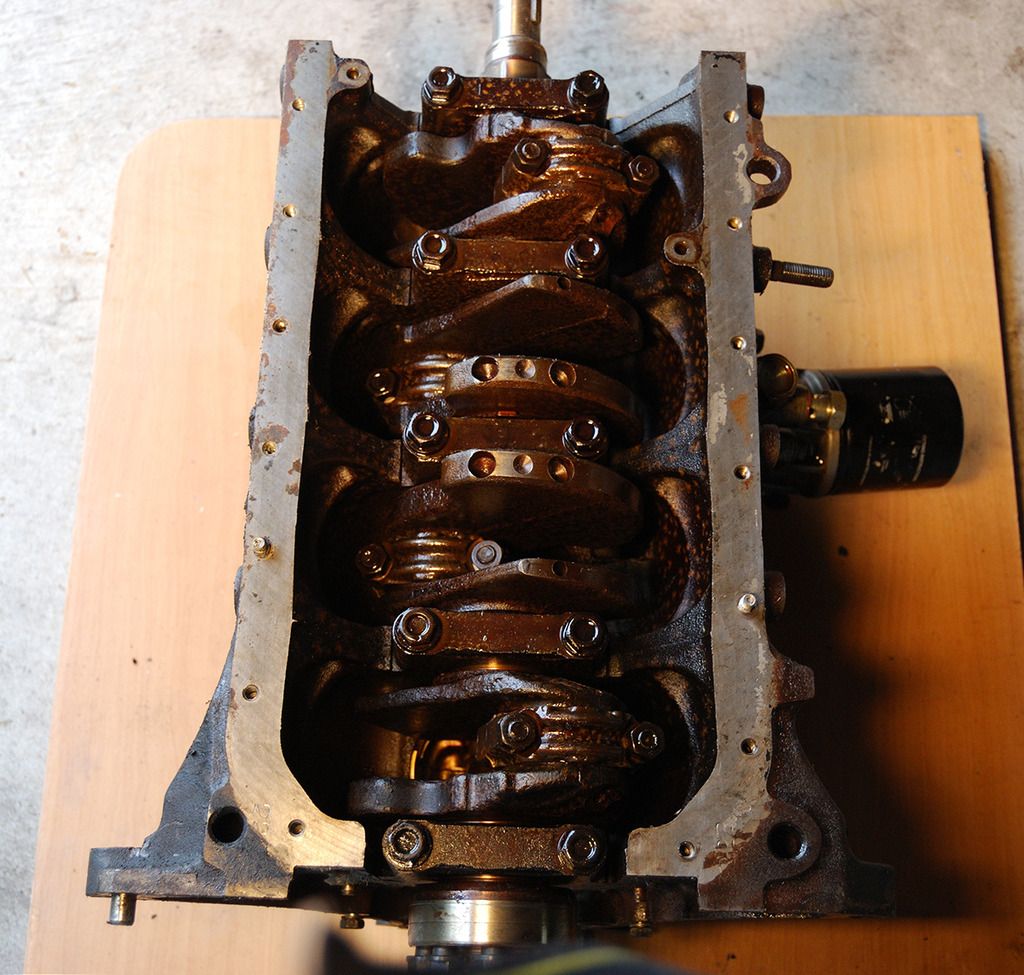
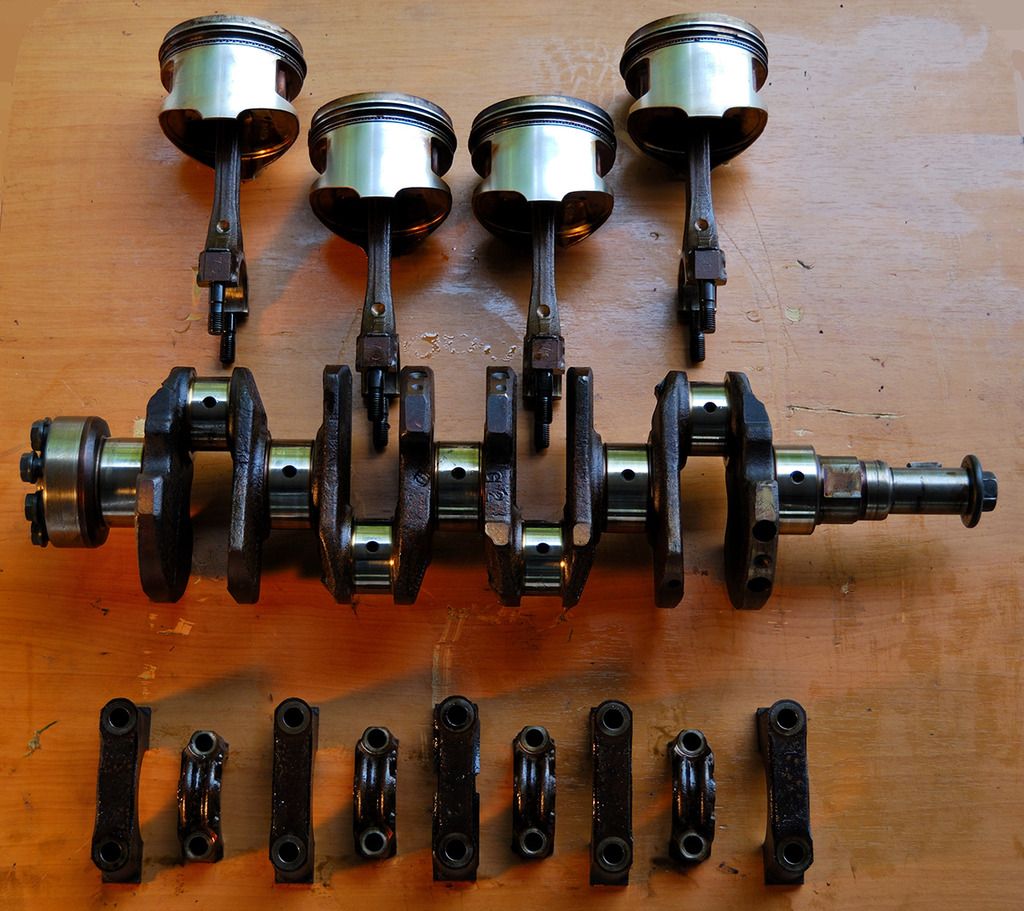
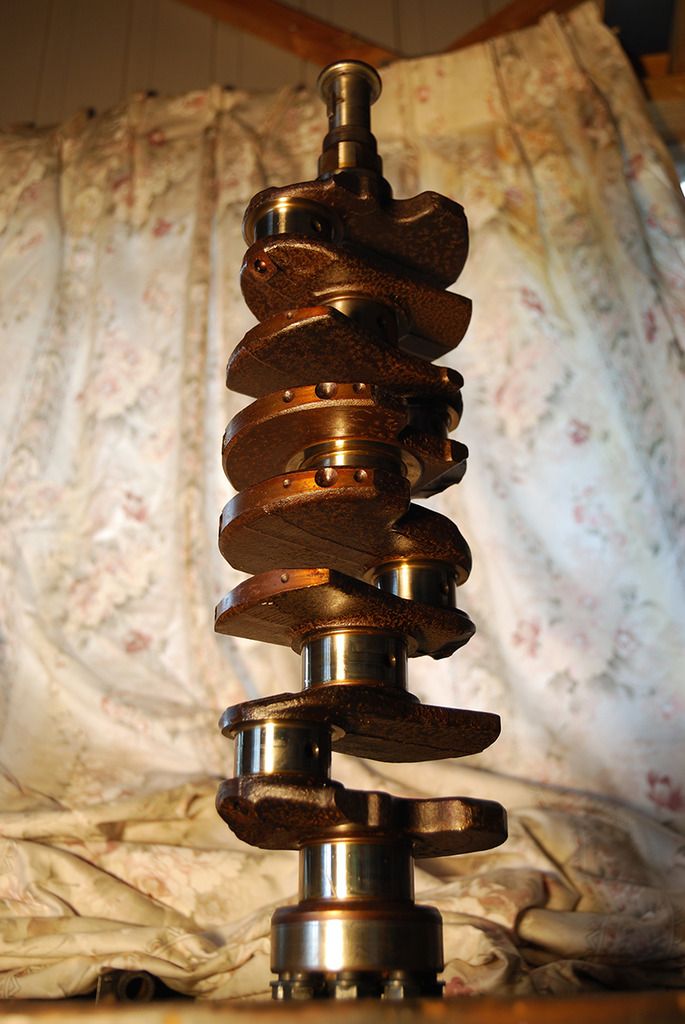
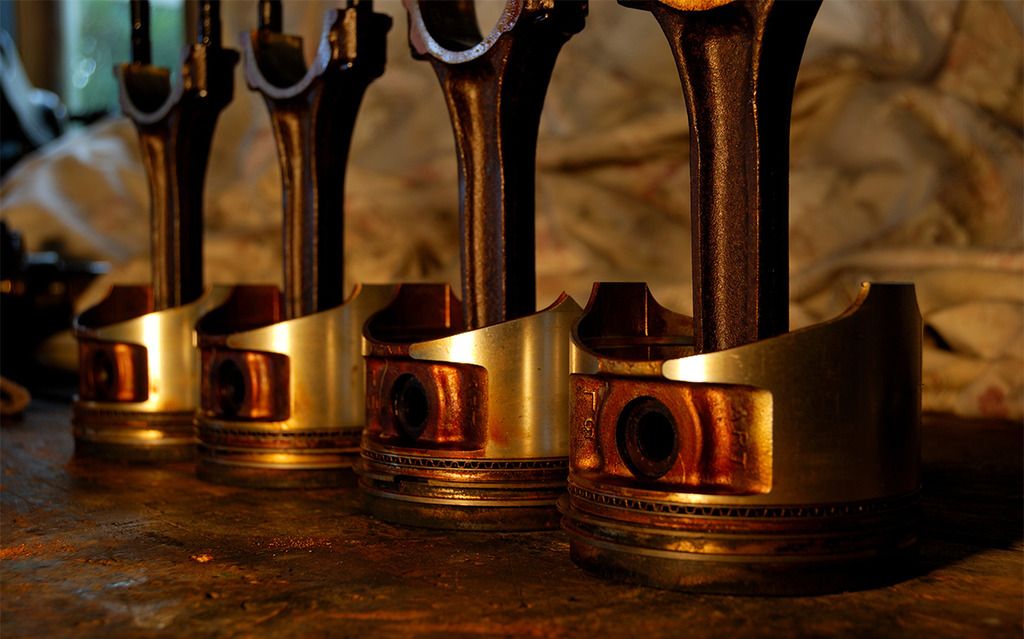
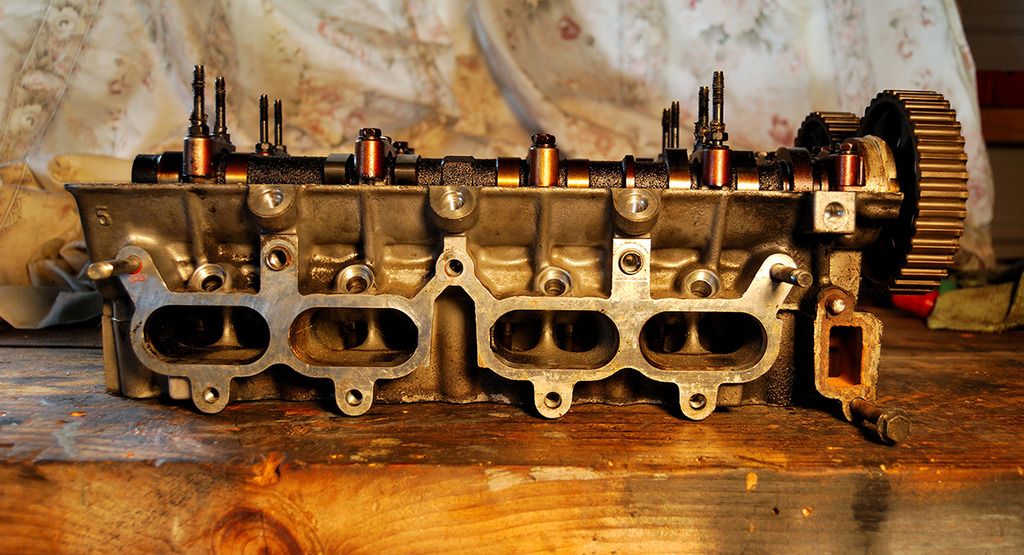
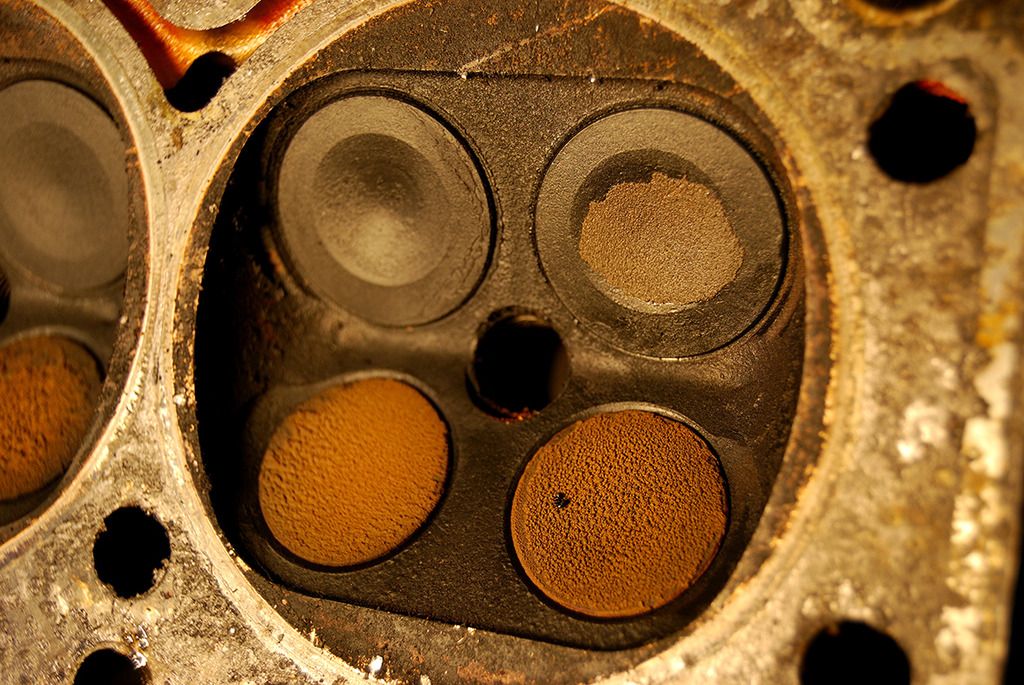
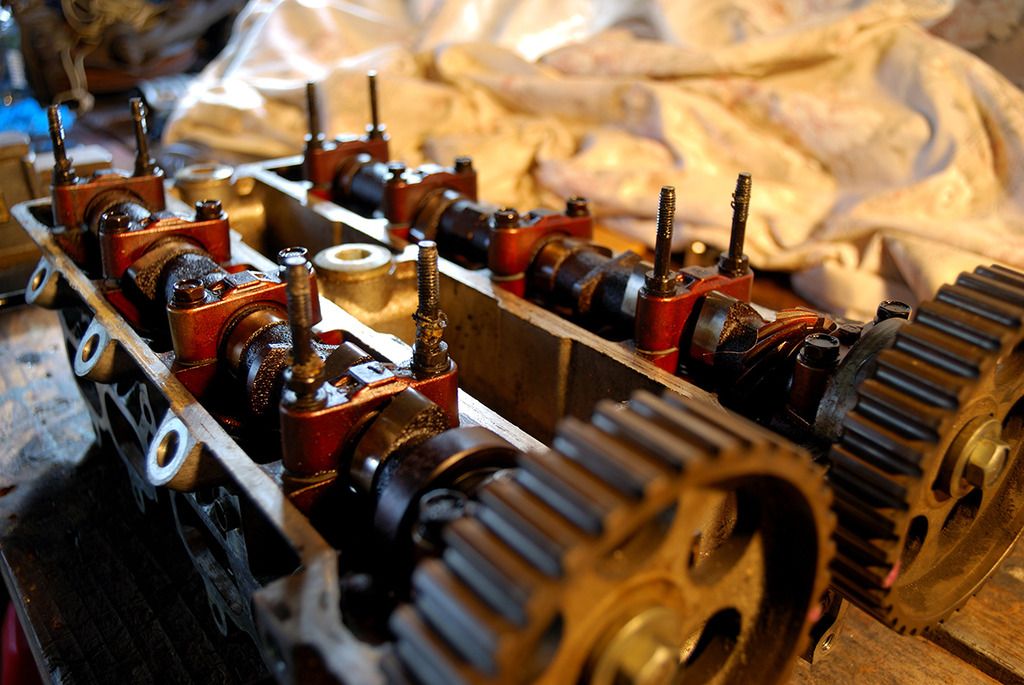
I also took some time to further disassemble the old 4AGE from the MR-2 (overheated engine). I took some photos during the process.
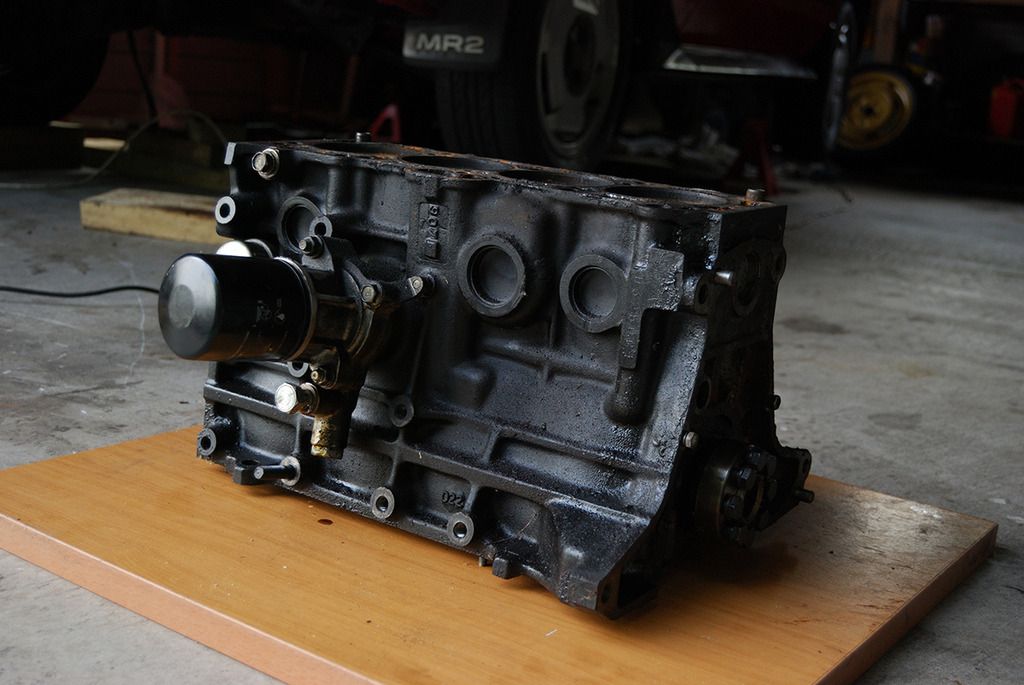
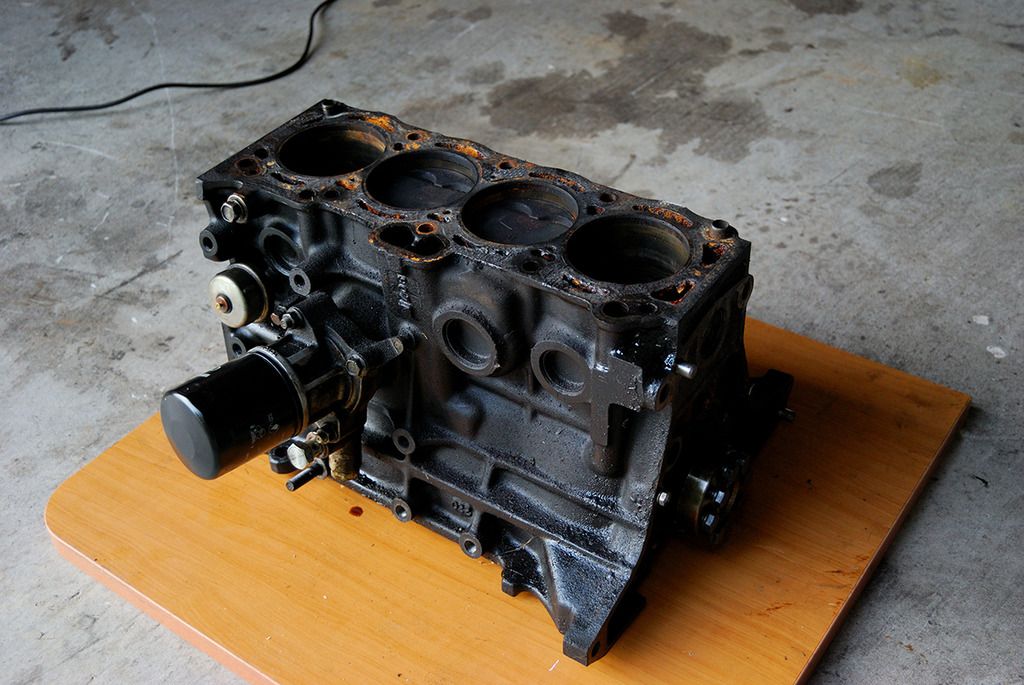
The surface rust spots are caused by water in the oil (due to head gasket failure):
Well that's it for this update.
By the way, the main damage I found from the overheating was that the pistons are seized on the piston pins. Meaning the pistons don't rock on the rods unless your force them to.
Last edited by TNR on Thu Aug 25, 2016 6:46 pm, edited 1 time in total.
-
TNR
- Club Member - MR2OCNZ
- Posts: 161
- Joined: Sun Sep 13, 2015 6:03 pm
- Stomping Ground: Auckland
- Prime Mover: AW11
- First name: TNR
Re: TNR's AW11 (Finally!)
Alright, as mentioned in my previous post I don't have much time to work on the car now a days. So my updates won't be as large.
Anyway I finally bought the clutch master cylinder which I needed to be able to install the clutch pedal and complete the manual conversion.
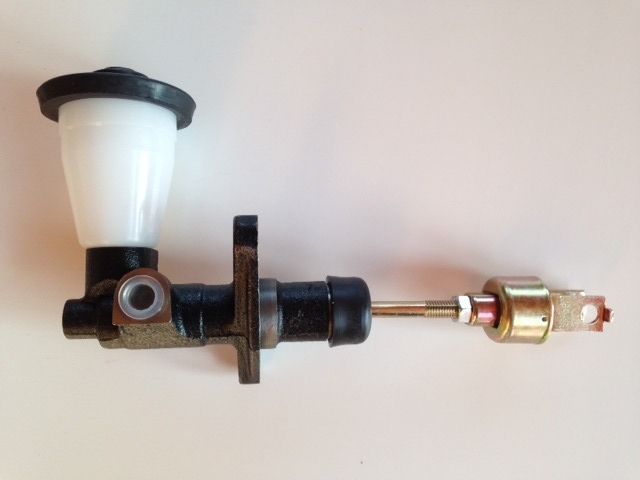
I had to file out the holes by hand as I didn't have a large enough drill bit (for the center hole):
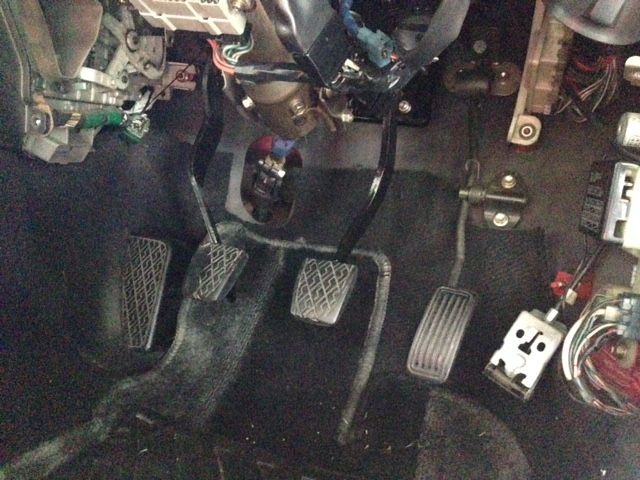
Three pedals, finally.
Before the engine blew I had taken the car for a WOF, everything was fine apart from it needing new tires. Instead of buying new tires I though I'd find a nice set of aftermarket wheels with tires (was already planning to do this at some point).
Just yesterday I picked up a set of ATS Type 5's from up north. They need a bit of restoration but I already knew this before buying them, seller was kind enough to send detailed pics etc.
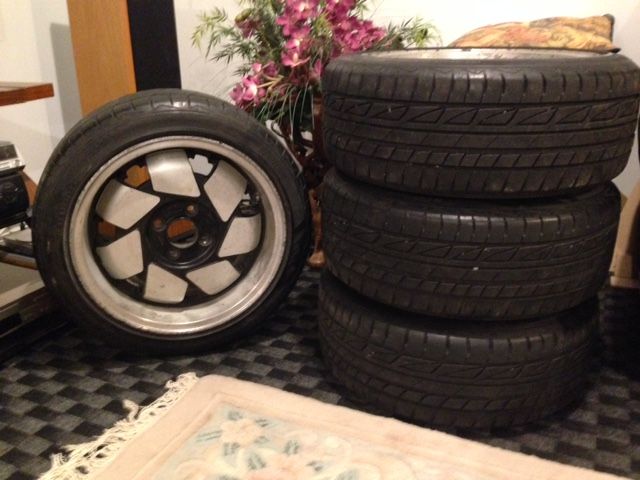
Specs are:
15" x 7"
4 x 100PCD
ET30
57.1mm center bore.
Some center bore rings and they should be good. The tire aspect ratio is one size too small but what can you do, its hard to find the right tire size, with good tread..on wheels you like.
Also they are bridgestone's. I'll just change them once they wear out.
Anyway I finally bought the clutch master cylinder which I needed to be able to install the clutch pedal and complete the manual conversion.
I had to file out the holes by hand as I didn't have a large enough drill bit (for the center hole):
Three pedals, finally.
Before the engine blew I had taken the car for a WOF, everything was fine apart from it needing new tires. Instead of buying new tires I though I'd find a nice set of aftermarket wheels with tires (was already planning to do this at some point).
Just yesterday I picked up a set of ATS Type 5's from up north. They need a bit of restoration but I already knew this before buying them, seller was kind enough to send detailed pics etc.
Specs are:
15" x 7"
4 x 100PCD
ET30
57.1mm center bore.
Some center bore rings and they should be good. The tire aspect ratio is one size too small but what can you do, its hard to find the right tire size, with good tread..on wheels you like.
Also they are bridgestone's. I'll just change them once they wear out.
-
Joel

- Life Member - MR2OCNZ
- Posts: 1078
- Joined: Tue Jun 28, 2005 8:37 pm
- Stomping Ground: Auckland
- Prime Mover: AW11
- First name: Joel
Re: TNR's AW11 (Finally!)
I have a spare set of hub centric rings that are 57.1mm - 67.1mm
You can have them if they're any use to you.
You can have them if they're any use to you.
Check out my posters http://www.hiveposters.storenvy.com
-
TNR
- Club Member - MR2OCNZ
- Posts: 161
- Joined: Sun Sep 13, 2015 6:03 pm
- Stomping Ground: Auckland
- Prime Mover: AW11
- First name: TNR
Re: TNR's AW11 (Finally!)
Hi, that's very generous but the wheels I bought are 57.1mm center bore and the AW11 hub size is 54.1mm from what I've read.Joel wrote:I have a spare set of hub centric rings that are 57.1mm - 67.1mm
You can have them if they're any use to you.
So I need 57.1mm - 54.1mm.
I found a set on Ebay which are ready made and and only about $25 so it shouldn't be an issue.
Last time I had to get a custom set made for my CRX because nobody had the size I needed, cost me about $110.00.
Anyway really appreciate the offer, maybe someone else on here might need them.
-
85AW20v

- Club Member - MR2OCNZ
- Posts: 888
- Joined: Fri May 21, 2004 10:25 pm
- Stomping Ground: Bay Of Plenty
- Prime Mover: AW11
- First name: Simon
Re: TNR's AW11 (Finally!)
Have a look here as well....
http://www.trademe.co.nz/motors/car-par ... 946623.htm
http://www.trademe.co.nz/motors/car-par ... 946623.htm
See ya
Simon
AW11 Racecar - 860kg
Simon
AW11 Racecar - 860kg
-
TNR
- Club Member - MR2OCNZ
- Posts: 161
- Joined: Sun Sep 13, 2015 6:03 pm
- Stomping Ground: Auckland
- Prime Mover: AW11
- First name: TNR
Re: TNR's AW11 (Finally!)
Thanks for the link 85AW20v. I did manged to find some in the right size, will see how it goes when they arrive.
Another small update:
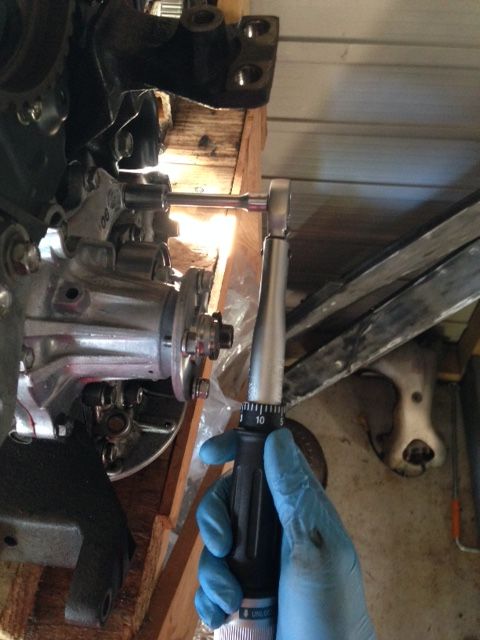
Installing the water pump, with new O-rings of course:
Torqued to spec give by the BGB:
Water pump inlet O-ring:
Inlet pipe:
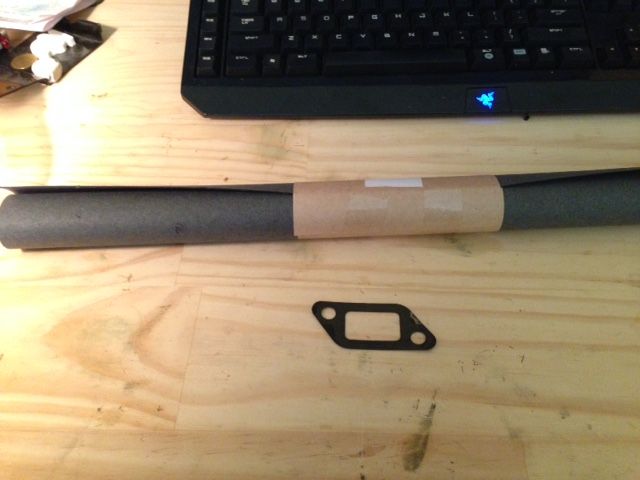
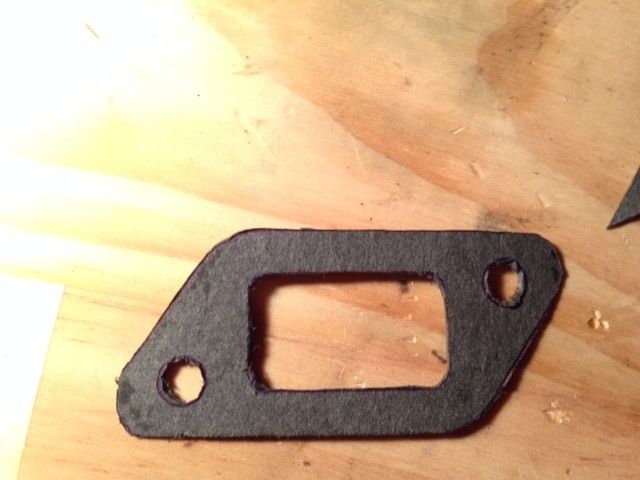
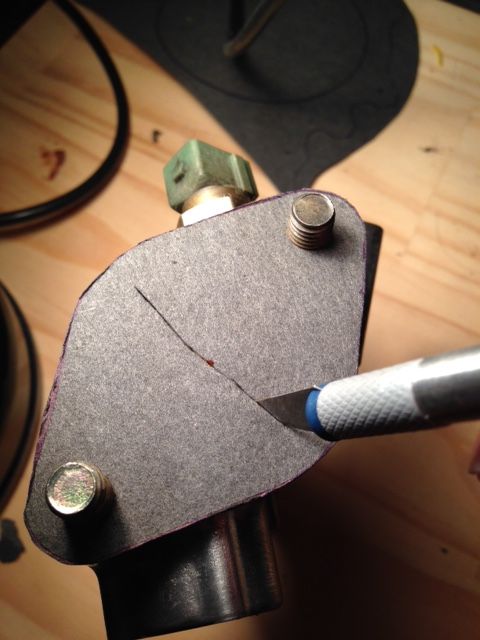
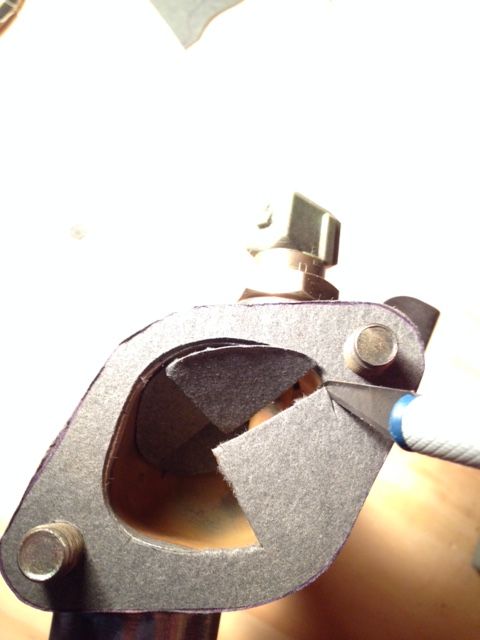
There are quite a few misc. gaskets which needed to be replaced. I thought I would try to make my own using gasket paper which is supposedly designed for this purpose (from BNT).
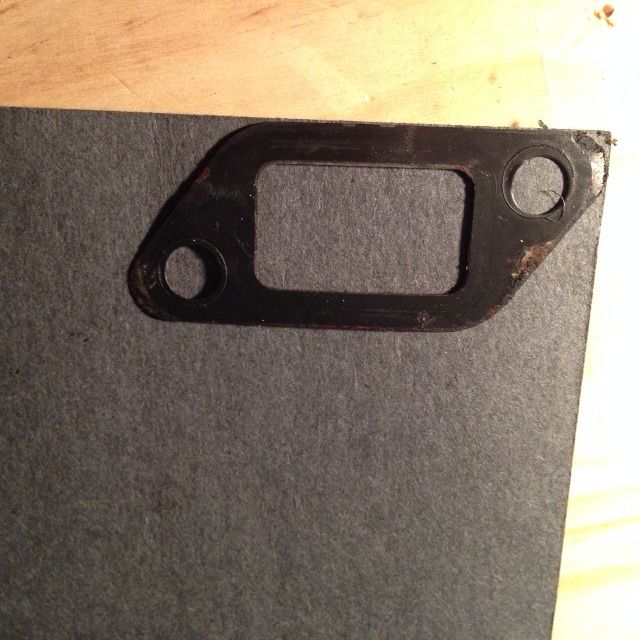

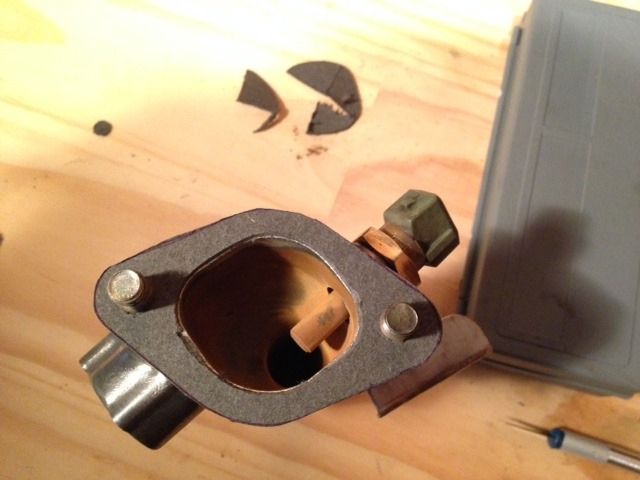
Another one for the heater outlet:
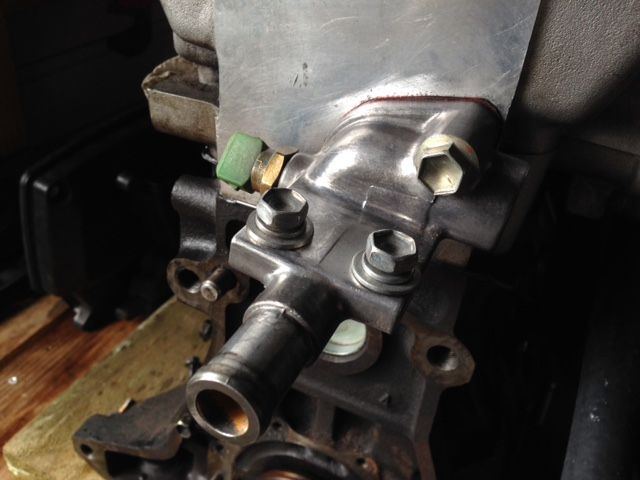
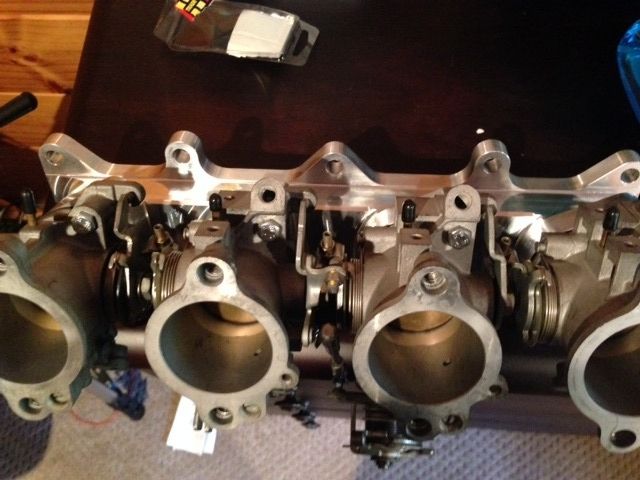
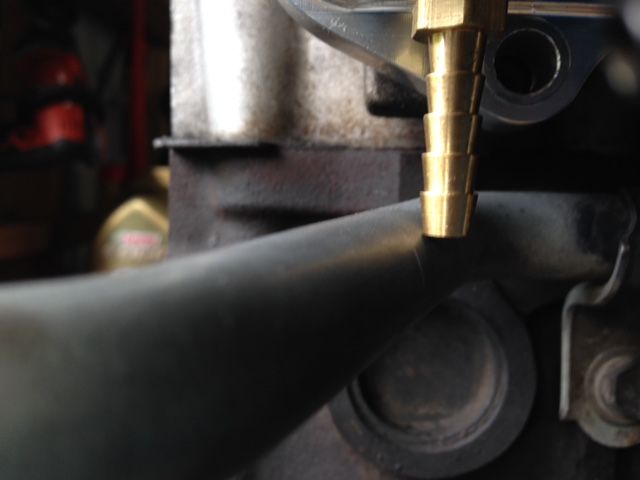
Now when test fitting the bypass pipe with the ITB's there was a little problem:
As you can see circled in red, the water fitting and ITB adapter are very close and actually touching. If I recall correctly it wasn't allowing the adapter to mount up perfect to the head either:
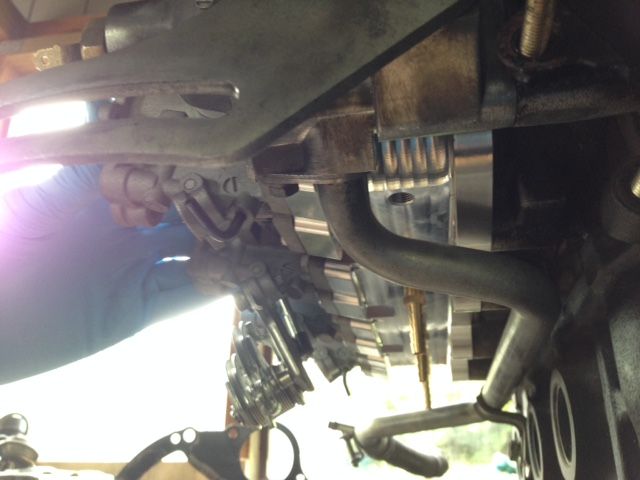
There were also some issues of interference with the vacuum barbs, the gap between the bottom of adapter and top of pipe is less than it seems:
This one was minor:
So firstly I filed down the ITB adapter so that it could mount flush with the head and have a little clearance from the water fitting. It seems like not much, but this was enough:
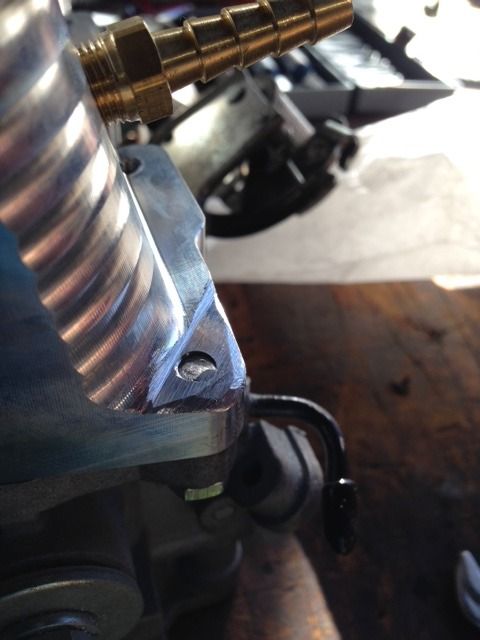
Next I tried to bend the water pipe so that it wouldn't interfere with the vacuum barbs. It was easy to bend the last part to avoid the barb on cyl 4, but the other one was more difficult.
I found it difficult to bend it and keep the mounting holes in the right position, it also needed quite a bit of force since it was already bent into an S shape on that side so I couldn't do it while bolted into the engine.
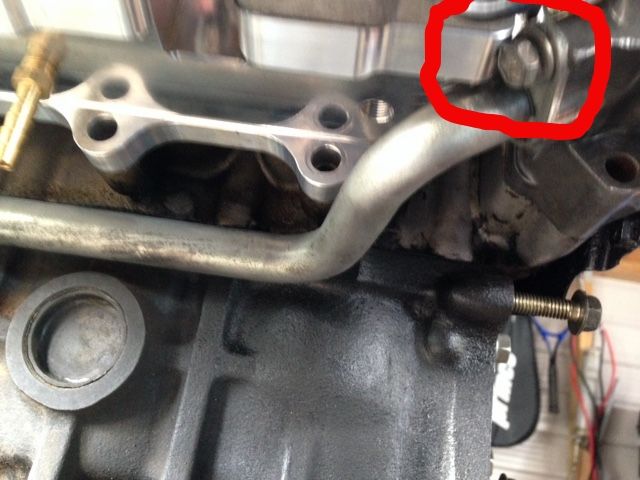
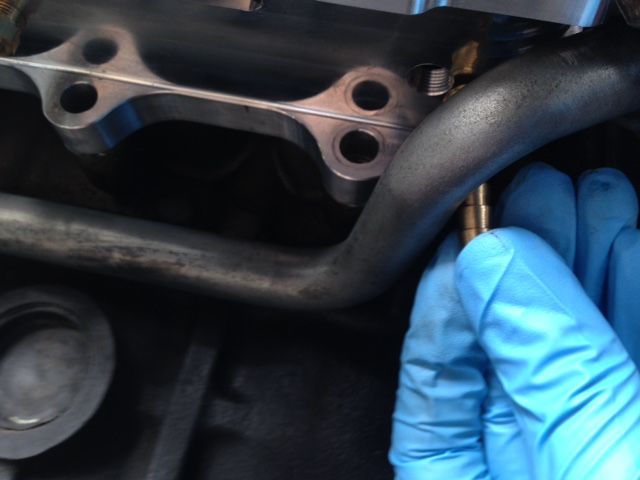
So although I don't like it, this is what I ended up doing, cut off the pipe leaving a good length to attach some heater hose to.
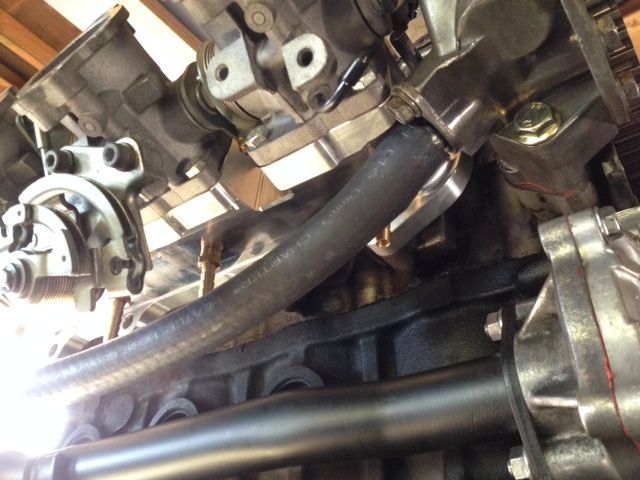
I'm still not that pleased with it, will of course have to find a way to secure it and stop it from flying around.
I may find another pipe and try again, however, when I bent the pipe enough it had some stress marks on it seemed like it wouldn't be a good idea to use it.
The bend required looks a lot less in the pics. I tried using a shorter vacuum barb but there is not enough length with the pipe there directly under it.
--UPDATE: I'll probably try to use an angled vacuum barb and see if it works (I did try with a 90 degree but of course you have to spin it to get it in and it interferes with the front flange of the adapter).
Anyway engine bay has been cleaned and is almost ready:

That's about it for the progress.
I also spent some time cleaning up the garage which seems to get messy and chaotic too often. I happened to take a pic comparing the relative sizes of the auto vs. manual trans:
Auto on left: Manual one is not too difficult to pick up for me (I got stick arms), but the auto... no way.

Also here is a random shot/teaser of how the wheels look which I mentioned before. The tires are one aspect ratio too small which is creating more wheel gap, its just what the wheels came with though:
Interior is also back together after all the covers were removed from shifter/clutch pedal install:
Another small update:
Installing the water pump, with new O-rings of course:
Torqued to spec give by the BGB:
Water pump inlet O-ring:
Inlet pipe:
There are quite a few misc. gaskets which needed to be replaced. I thought I would try to make my own using gasket paper which is supposedly designed for this purpose (from BNT).
Another one for the heater outlet:
Now when test fitting the bypass pipe with the ITB's there was a little problem:
As you can see circled in red, the water fitting and ITB adapter are very close and actually touching. If I recall correctly it wasn't allowing the adapter to mount up perfect to the head either:
There were also some issues of interference with the vacuum barbs, the gap between the bottom of adapter and top of pipe is less than it seems:
This one was minor:
So firstly I filed down the ITB adapter so that it could mount flush with the head and have a little clearance from the water fitting. It seems like not much, but this was enough:
Next I tried to bend the water pipe so that it wouldn't interfere with the vacuum barbs. It was easy to bend the last part to avoid the barb on cyl 4, but the other one was more difficult.
I found it difficult to bend it and keep the mounting holes in the right position, it also needed quite a bit of force since it was already bent into an S shape on that side so I couldn't do it while bolted into the engine.
So although I don't like it, this is what I ended up doing, cut off the pipe leaving a good length to attach some heater hose to.
I'm still not that pleased with it, will of course have to find a way to secure it and stop it from flying around.
I may find another pipe and try again, however, when I bent the pipe enough it had some stress marks on it seemed like it wouldn't be a good idea to use it.
The bend required looks a lot less in the pics. I tried using a shorter vacuum barb but there is not enough length with the pipe there directly under it.
--UPDATE: I'll probably try to use an angled vacuum barb and see if it works (I did try with a 90 degree but of course you have to spin it to get it in and it interferes with the front flange of the adapter).
Anyway engine bay has been cleaned and is almost ready:
That's about it for the progress.
I also spent some time cleaning up the garage which seems to get messy and chaotic too often. I happened to take a pic comparing the relative sizes of the auto vs. manual trans:
Auto on left: Manual one is not too difficult to pick up for me (I got stick arms), but the auto... no way.
Also here is a random shot/teaser of how the wheels look which I mentioned before. The tires are one aspect ratio too small which is creating more wheel gap, its just what the wheels came with though:
Interior is also back together after all the covers were removed from shifter/clutch pedal install:
-
Statek

- Club Member - MR2OCNZ
- Posts: 590
- Joined: Sat Oct 20, 2012 12:56 pm
- Stomping Ground: Auckland
- Prime Mover: Looking for an MR2
- First name: Kris
Re: TNR's AW11 (Finally!)
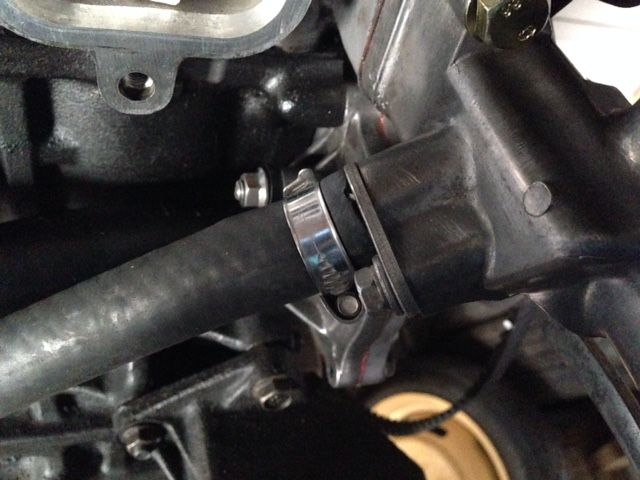
You will want to flange the end of the pipe, because as soon as the system builds pressure the hose will just pop off. Trust me, I 'figured' this out from experienceTNR wrote: I'm still not that pleased with it, will of course have to find a way to secure it and stop it from flying around.
This was before I figured it out, of course
1986 Toyota MR2 AW11 20v ST - SOLD

-
TNR
- Club Member - MR2OCNZ
- Posts: 161
- Joined: Sun Sep 13, 2015 6:03 pm
- Stomping Ground: Auckland
- Prime Mover: AW11
- First name: TNR
Re: TNR's AW11 (Finally!)
Thanks for letting me know. I'll find some way to flange or secure it better.Statek wrote:You will want to flange the end of the pipe, because as soon as the system builds pressure the hose will just pop off. Trust me, I 'figured' this out from experienceTNR wrote: I'm still not that pleased with it, will of course have to find a way to secure it and stop it from flying around.
-
85AW20v
- Club Member - MR2OCNZ
- Posts: 888
- Joined: Fri May 21, 2004 10:25 pm
- Stomping Ground: Bay Of Plenty
- Prime Mover: AW11
- First name: Simon
Re: TNR's AW11 (Finally!)
Also, think about access to tighten the hose clamp when the motor is back in the car. Nothing worse than getting the "tightener" in the wrong place. You'll also need to put the bottom alternator bolt in from the back with the nut on the belt side, otherwise you won't get the bolt out when the motor is back in the car if you need to.
See ya
Simon
AW11 Racecar - 860kg
Simon
AW11 Racecar - 860kg
-
TNR
- Club Member - MR2OCNZ
- Posts: 161
- Joined: Sun Sep 13, 2015 6:03 pm
- Stomping Ground: Auckland
- Prime Mover: AW11
- First name: TNR
Re: TNR's AW11 (Finally!)
Thanks man, really appreciate these tips. I have made mistakes like that before where you get everything back together, only to realize you need to take it apart again to fix some minor mistake.85AW20v wrote:Also, think about access to tighten the hose clamp when the motor is back in the car. Nothing worse than getting the "tightener" in the wrong place. You'll also need to put the bottom alternator bolt in from the back with the nut on the belt side, otherwise you won't get the bolt out when the motor is back in the car if you need to.
-
TNR
- Club Member - MR2OCNZ
- Posts: 161
- Joined: Sun Sep 13, 2015 6:03 pm
- Stomping Ground: Auckland
- Prime Mover: AW11
- First name: TNR
Re: TNR's AW11 (Finally!)
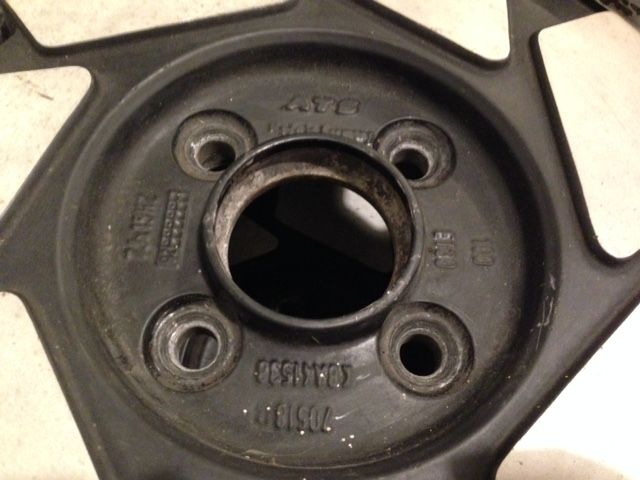
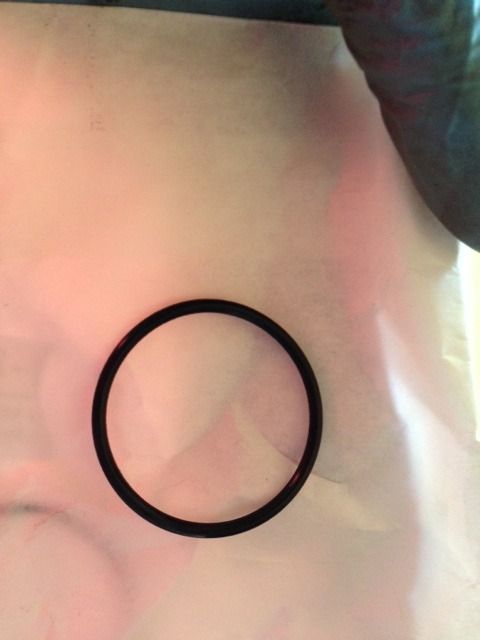
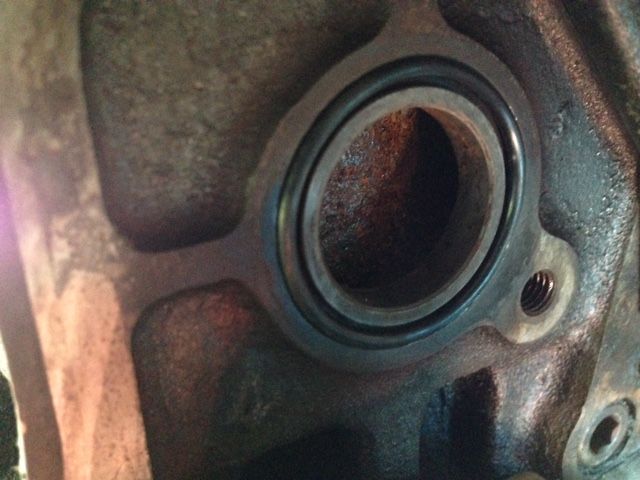
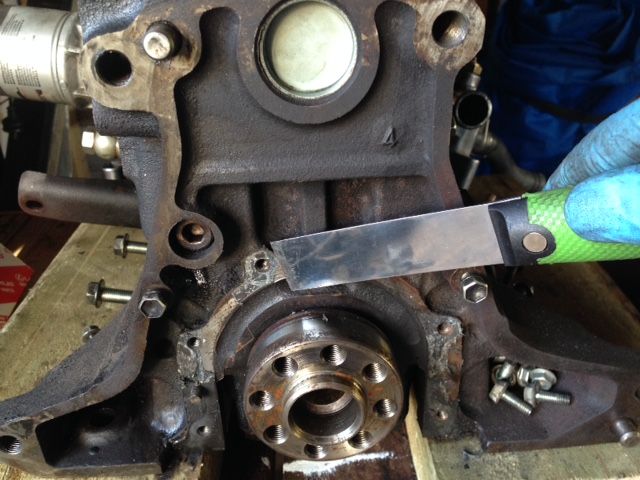
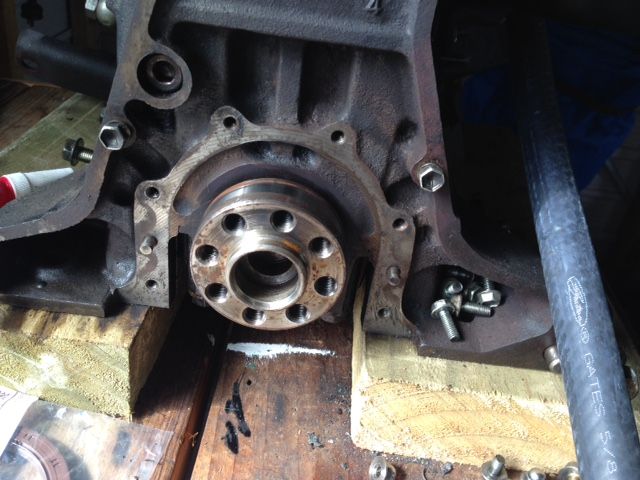
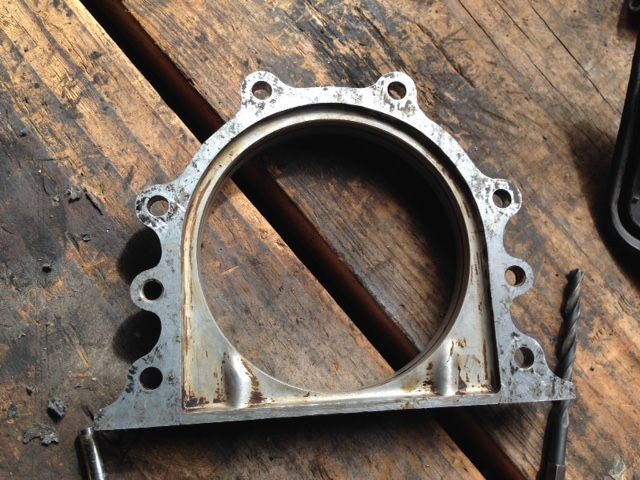
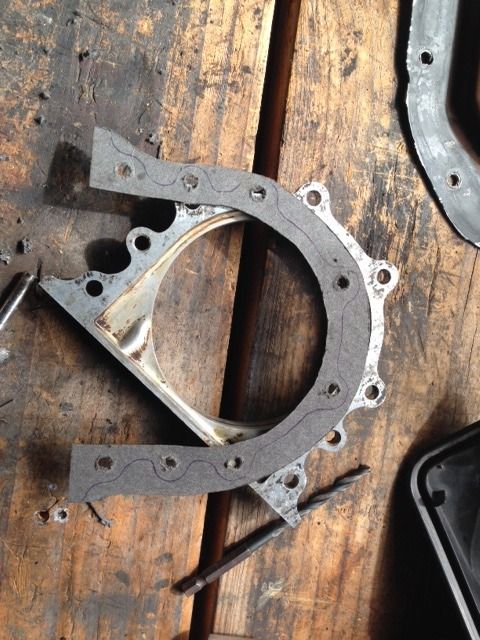
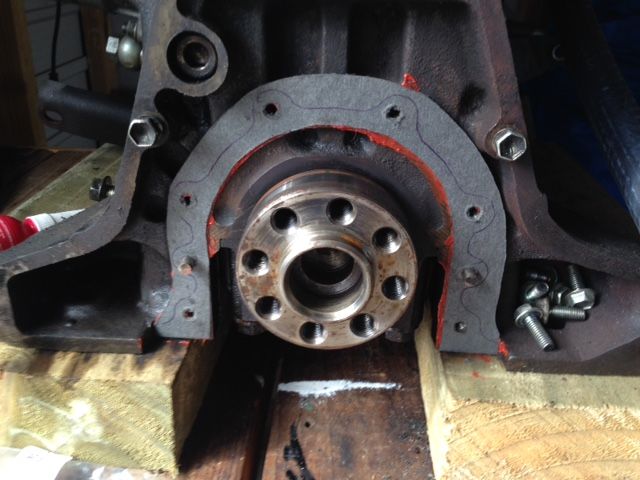
Found some time to install the rear main seal.
Cleaning up the mating surfaces:
Again I used some gasket paper to make my own gasket:
RTV for a better seal:
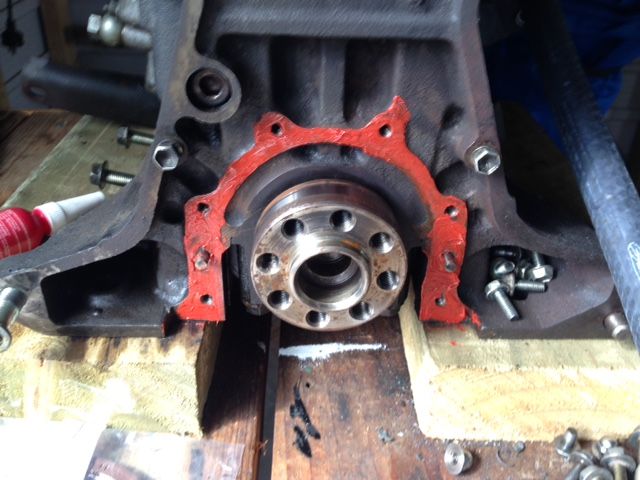
Don't worry I wiped off the excess RTV in the corner:
And the new seal finally in:
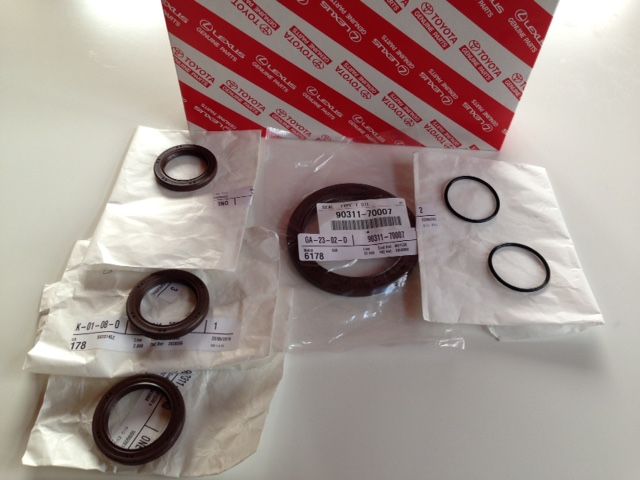
Also have been shopping a little.
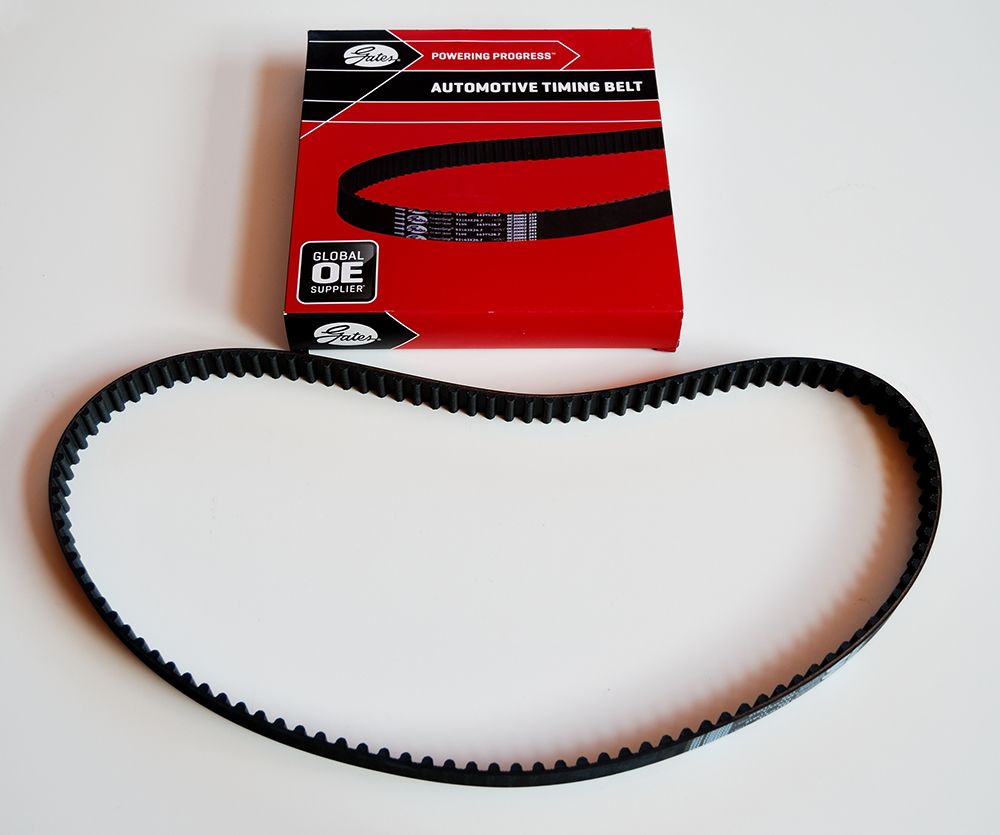
New timing belt:
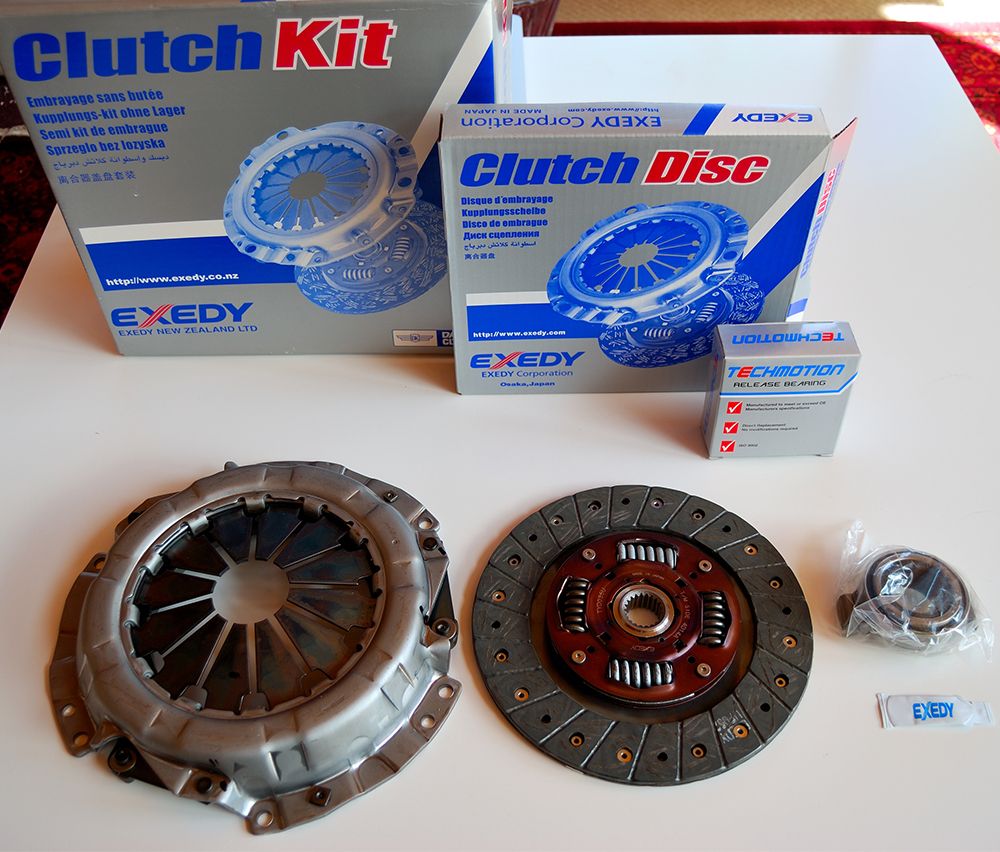
Brand new Exedy clutch kit for a blacktop (since I'm using black top flywheel):
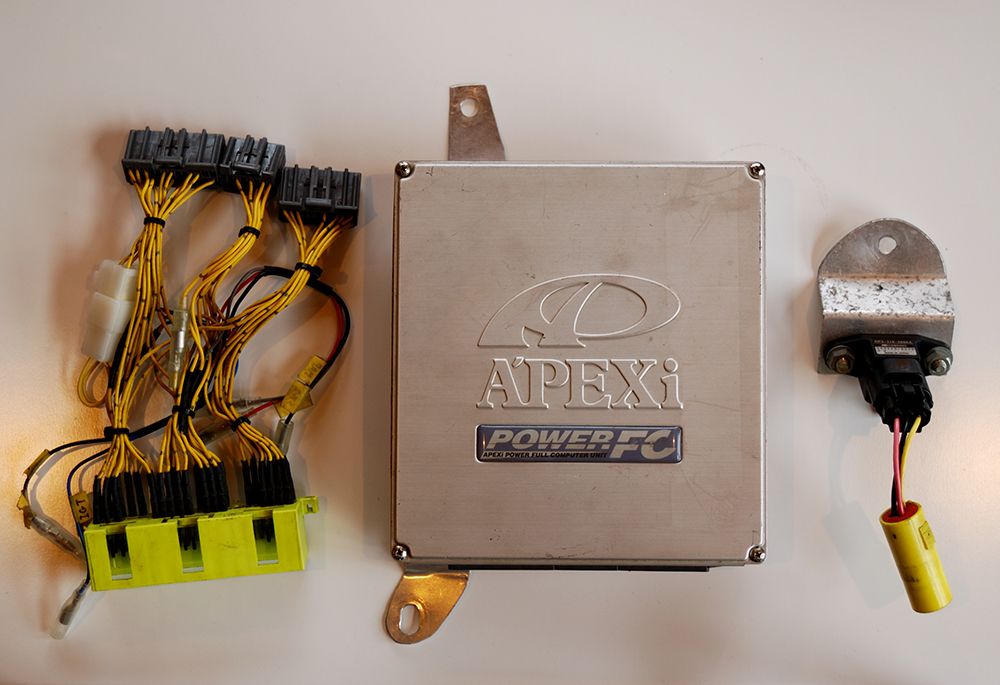
And finally something a bit more fun. An Apexi Power FC made to be plug and play for the 4AGE 16V bigport (Specifically for the AE86 but should be workable with the AW11).
Apparently they don't make this for the 4AGE any more, I just hope it'll work and save me some money and time buying a brand new ECU and wiring it in.
My actual plan is to try the stock ECU to see how it copes with the ITBs (JDM map ecu), according to a few internet people it can cope relatively well as long as you use a vacuum manifold (of course). Who knows, we will see.
Even if it does run I will eventually switch to the Power FC and get it tuned.
Cleaning up the mating surfaces:
Again I used some gasket paper to make my own gasket:
RTV for a better seal:
Don't worry I wiped off the excess RTV in the corner:
And the new seal finally in:
Also have been shopping a little.
New timing belt:
Brand new Exedy clutch kit for a blacktop (since I'm using black top flywheel):
And finally something a bit more fun. An Apexi Power FC made to be plug and play for the 4AGE 16V bigport (Specifically for the AE86 but should be workable with the AW11).
Apparently they don't make this for the 4AGE any more, I just hope it'll work and save me some money and time buying a brand new ECU and wiring it in.
My actual plan is to try the stock ECU to see how it copes with the ITBs (JDM map ecu), according to a few internet people it can cope relatively well as long as you use a vacuum manifold (of course). Who knows, we will see.
Even if it does run I will eventually switch to the Power FC and get it tuned.