Malcolm's 3SGTE AW11

Want a thread dedicated to your car?
Got a seriously pimped-out ride? Building an extreme performance MR2? Post here!

Moderator: Moderators

Forum rules
This section of the forum is a great resource if you're looking for ideas, and it's a cool way of obtaining technical information that may otherwise not have been posted. (Members can use the Search functionality at top right of the forum to speed up finding things) Please respect others' contributions and don't diss anyone - keep comments helpful, factual, positive and polite. One thread per vehicle or owner please - don't start lots of threads about just one car. And if you need assistance with your car and want to host a spanner day, please use the appropriate section of the forum: http://mr2.org.nz/phpbb3/viewforum.php?f=35 Thank you.
User avatar
Malcolm
Club Member - MR2OCNZ
Posts: 638
Joined: Mon May 24, 2010 8:24 pm
Stomping Ground: Auckland
Prime Mover: AW11
First name: Malcolm

Re: Malcolm's 3SGTE AW11

Post by Malcolm »

Been a while since the last update... I managed to achieve a bit over the Xmas break, and in the past two weeks I've worked really hard to get the car ready to be on the club display at the 4 and Rotors (which was today!)

I finally got back around to working on the bonnet mould. I made some changes to the edges to make them more defined, and fixed some damage where someone decided to run it over with their car... Here it is after fixing up and painting with Duratec
Image

Then it needed to be sanded and buffed
Image

Until it looked like this
Image

After 4 layers of mould release wax and some PVA release agent, lay up time! Fibres cut for the outer skin:
Image

Most of the core cut:
Image

The plan was to do the central vent bit with carbon because I may want to leave it as bare carbon when I paint everything, but the rest is just fibreglass. I decided the extra cost of carbon wasn't worth it for a street car, and I had no plans to do a completely bare carbon bonnet (not sure if I have enough faith in my laminating skills anyway!)
Image

All the rest of the outer skins and most of the core down:
Image

At this point I left it to cure overnight. The following day I did the last of the core (just on the vent) and the outer skins. For the whole thing I used black pigment in the resin because it makes it look a tonne better, plus it hopefully means not needing to paint the inside. Here it is all cured. The odd texture is because I covered it in peel ply, which is a fabric that has a few uses, but is very useful to give a good finish to the "B" side of a wet-laminated part. Once it's cured you peel off the peel ply which gives it a course texture to either laminate further on to if needed
Image

Finally, out of the mould:
Image

It came out really easily which was nice, and looks pretty good.
Image
Image

User avatar
born disturbed
Club Member - MR2OCNZ
Posts: 284
Joined: Mon Feb 11, 2008 11:29 pm
Stomping Ground: Auckland
Prime Mover: AW11
First name: Jared

Re: Malcolm's 3SGTE AW11

Post by born disturbed »

Really impressive mate, well done!!
Twisty road fiend

88 AW11 G-limited mountain groover
85 NZ new AW11 future race project :)
2007 Suzuki SV1000S torque monster!

User avatar
Malcolm
Club Member - MR2OCNZ
Posts: 638
Joined: Mon May 24, 2010 8:24 pm
Stomping Ground: Auckland
Prime Mover: AW11
First name: Malcolm

Re: Malcolm's 3SGTE AW11

Post by Malcolm »

I also redid my door speaker installation. It was always a bit rough and I was pretty keen to try and improve the mid-bass reproduction from the speakers. I sealed up the access holes inside the doors (no pics I don't think) with some ~3mm plastic sheet, then made new baffles that were more rigid that the previous setup. Not much more to say, just pics:
Image
Image
Image
Image
Image
Image

I also made this up to fill the stereo hole
Image

Headunit is now a tablet which I am mounting in the driver's sunvisor. The panel includes an Aux in (switch above it switches between the tablet or the Aux in as the audio source). Other knob is volume control, switches are amp on and intercooler water pump on. The big space on the left is reserved for an LCD display from the Arduino and some other bits

Over the past year I've slowly collected and swapped odd interior bits here and there as I've found stuff in better condition than what I had. I'm finally starting to feel like the interior is looking fairly clean.
Image

User avatar
Malcolm
Club Member - MR2OCNZ
Posts: 638
Joined: Mon May 24, 2010 8:24 pm
Stomping Ground: Auckland
Prime Mover: AW11
First name: Malcolm

Re: Malcolm's 3SGTE AW11

Post by Malcolm »

Other little things I did in the past week:
- wrapped the wiring loom in the boot
- painted the boot
- carpeted the boot
- tidied up the frunk (bit of paint + a general clean)
- quick tidy up on the front lip (it's still rugged and broken, but at least not so obvious now)
- tidy up on the old bonnet (mostly a rattle can paint job to make it look tidier until I get the fibreglass bonnet on)

It's probably looking about the best it has in many years right now! After my success with the bonnet I'm feeling pretty keen to get back onto the one piece engine/boot lid, but I've got several other things I should finish first!
Image

User avatar
Malcolm
Club Member - MR2OCNZ
Posts: 638
Joined: Mon May 24, 2010 8:24 pm
Stomping Ground: Auckland
Prime Mover: AW11
First name: Malcolm

Re: Malcolm's 3SGTE AW11

Post by Malcolm »

Well, I'm long overdue for an update on this...

I've been focussed on trying to finish off all the work I need to do before painting the car. The major things are:
- finish off the bonnet
- decide what I'm doing with the fuel filler/left hand side air intake (waiting to hear back from the certifier on this)
- sort out the engine/boot lid
- fit the Aerotech front lip

The bonnet is now all but done. Figuring out everything on the underside turned out to be a huge pain. Aligning the hinge plates was quite a headache, I ended up making a very funky looking jig to hold them in the right position so I could laminate them onto the bonnet.
Image
Image
Image

The catch was also lots of work (I wanted a factory look, not interested in bonnet pins), but I managed to come up with what I think is a fairly elegant solution - again it was quite a headache to get the position and angles right. Making the inner surface that meets the bonnet seal was the final hurdle, and that is 90% complete now. All that remains is to put a layer of glass over all the foam and I could start painting it.
Image

So with that nearly done, I've turned my attention to the engine/boot lid. I had a go at making a one-piece lid ages ago (check out the date stamp on the photo!), but to be honest - it was shithouse and I never used it.
Image

Tonight I started butchering it to have another attempt. This part goes in the bin
Image

This part is still good and useable
Image
Image

So I went to the sheet metal fabricators down the road from work and bought a piece of .9mm steel, which I traced the shape of the engine lid on to and then carefully cut out with an angle grinder
Image
Image

I need to make a little bit of framing to help hold it in the right shape, but that should be pretty straightforward. The lid is going to have a large, rearward facing vent on it. Plan is to make the lid out of steel, then reproduce it in fibreglass, then add the vent afterwards. It'll be pretty unique (I haven't seen any other AW with the design that I have in mind). I'm tossing up whether to make a mould for the lid, or whether to just make it straight off the steel piece (bit of an unusual manufacturing method, but should be faster than making another mould!)

User avatar
Malcolm
Club Member - MR2OCNZ
Posts: 638
Joined: Mon May 24, 2010 8:24 pm
Stomping Ground: Auckland
Prime Mover: AW11
First name: Malcolm

Re: Malcolm's 3SGTE AW11

Post by Malcolm »

I found a mock-up I did in 2005 that shows roughly what I'm thinking
Image

User avatar
thelinuxwarrior
Club Member - MR2OCNZ
Posts: 152
Joined: Tue Dec 25, 2012 2:46 pm
Stomping Ground: Auckland
Prime Mover: SW20
First name: Shane

Re: Malcolm's 3SGTE AW11

Post by thelinuxwarrior »

Looks awesome, I want to go on a fibreglass spree with the track car at some point :D
Might have to ask you for some pointers..

Been meaning to ask for ages, with your front radiator mod, I'm assuming you cut the front firewall.
What were the requirements to get it certed, did you have to add a bar or anything?
Been planning to do something similiar on the sw for ages, but just wanting to make sure certifying isn't going to be a problem
before the angle grinder is started. :D

User avatar
Malcolm
Club Member - MR2OCNZ
Posts: 638
Joined: Mon May 24, 2010 8:24 pm
Stomping Ground: Auckland
Prime Mover: AW11
First name: Malcolm

Re: Malcolm's 3SGTE AW11

Post by Malcolm »

Thanks. I didn't have any problems with getting it certified, I reinforced the perimeter of the cutout in the firewall with 19mm square steel tubing. There's some info on my old website here http://fasterthanjesus.net/sw11/r8.html" onclick="window.open(this.href);return false; and here http://fasterthanjesus.net/sw11/r14.html" onclick="window.open(this.href);return false;

Here's some pics of the frame
Image
Image
Image

User avatar
Malcolm
Club Member - MR2OCNZ
Posts: 638
Joined: Mon May 24, 2010 8:24 pm
Stomping Ground: Auckland
Prime Mover: AW11
First name: Malcolm

Re: Malcolm's 3SGTE AW11

Post by Malcolm »

More updates:
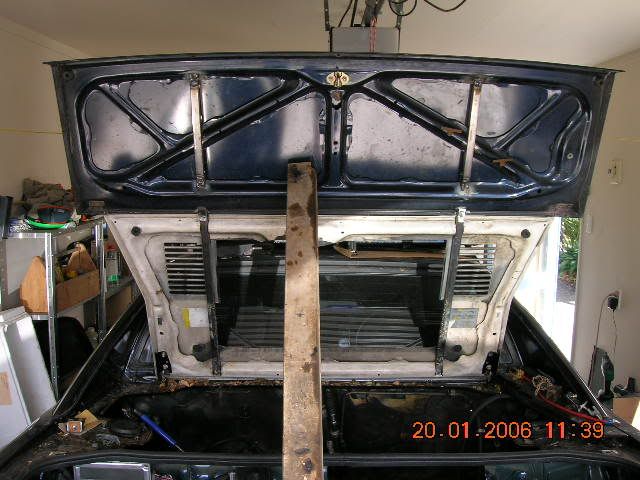
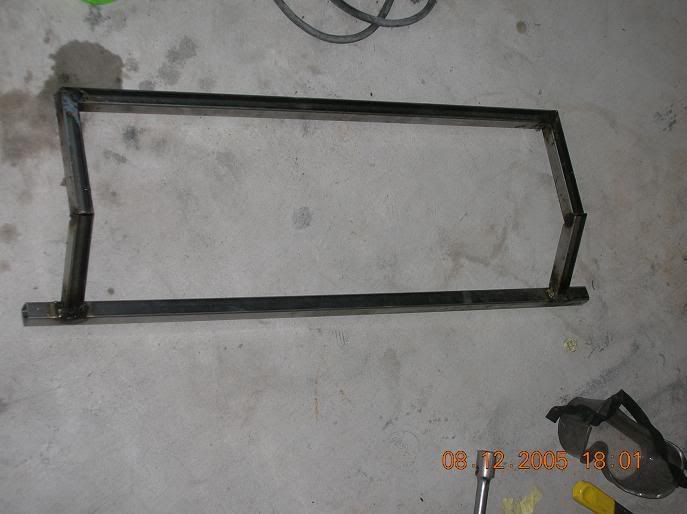
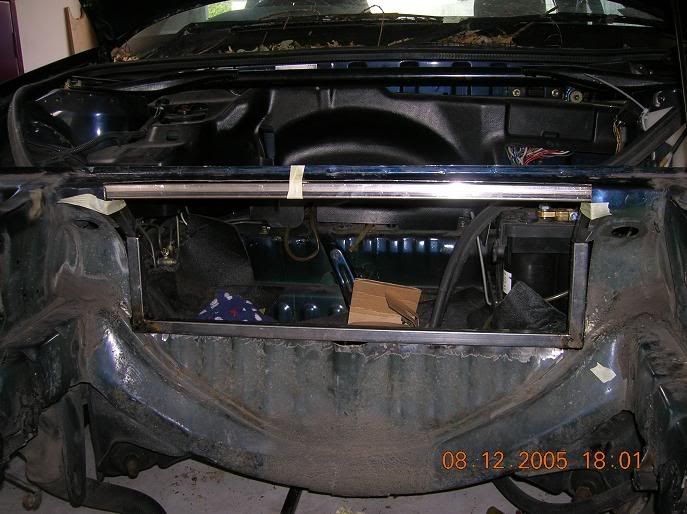
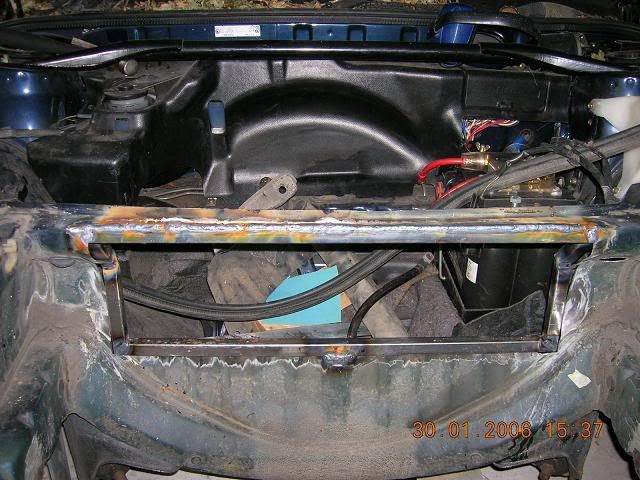
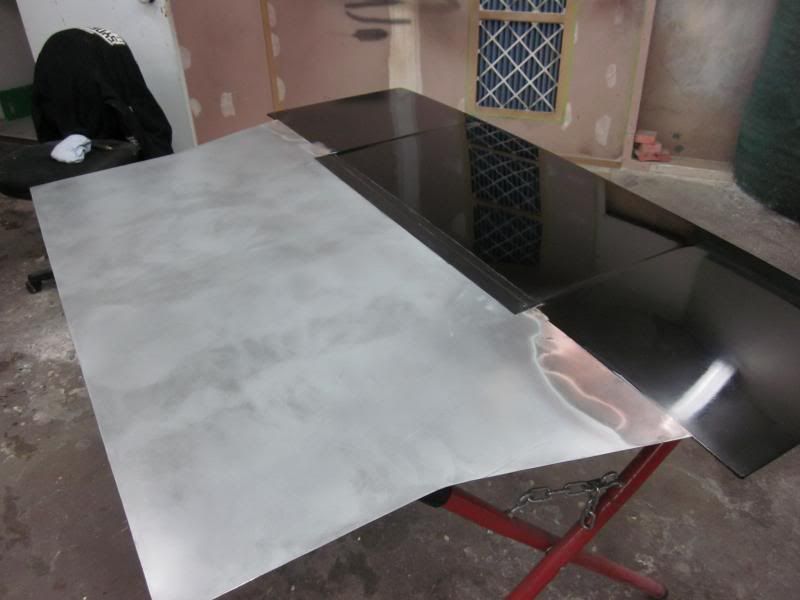
I've nearly finished the engine lid. Following on from the last post, I finished the framing on the mould so it would bolt to the hinges to help locate everything:
Image
Image
Image

I then put the steel sheet on to finish off the top side, smoothed out the join with body filler and polished & waxed it
Image
Image

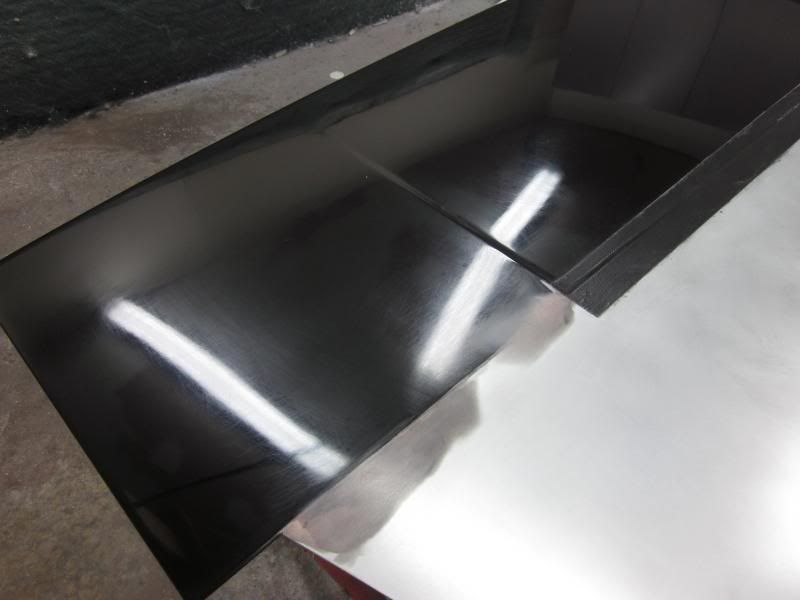
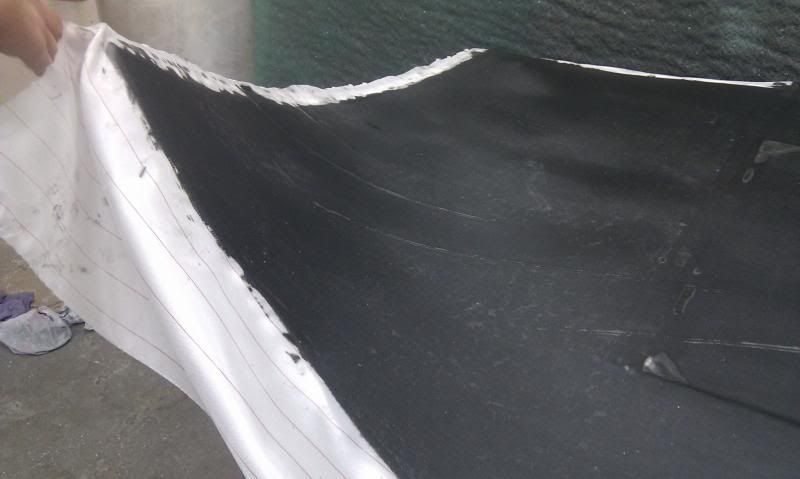
I wasn't sure how well the fibreglass would release from the unpainted steel, but decided it would probably be ok with wax, given it's not a porous surface. I didn't take too many pics of the layup process, but I did it a fairly unusual way. First I laid up skin of two layers of 200gsm woven glass. Each layer was a single, continuous piece of cloth so there would be no variation in thickness. Finally I covered it in peel-ply to give it a flatter surface. This picture shows how floppy this skin turned out - kinda like a laminated poster or something.
Image

Next step was to remove this skin from the mould (thankfully it released very easily), then lay down another skin just the same with 2 layers of cloth. This time however, after laying down the cloth I added a layer of 3mm foam core while the resin was still wet.
Image

Then, while the resin was still wet I painted more resin onto the foam core and then put the first (already cured) skin on top. This came out really well and allowed me to make a nice, stiff but lightweight piece straight off a male mould/plug without having to make a complete female mould. It doesn't look like I've taken a good picture of the lid at this stage.

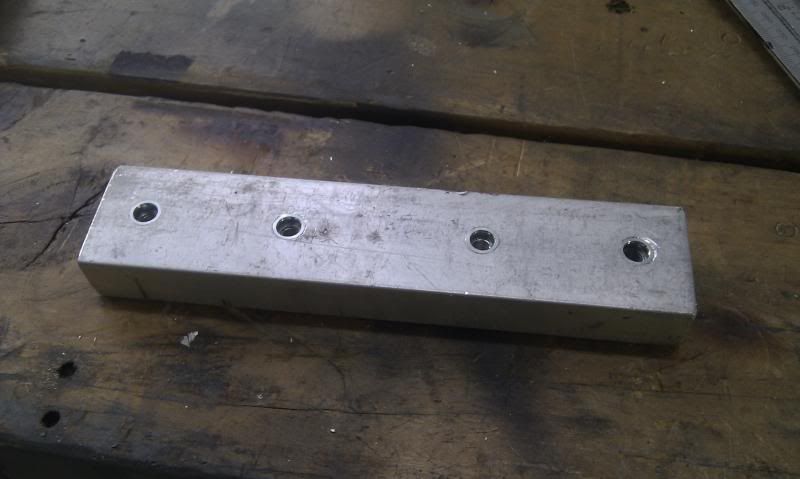
Next step was to make the hinge mounts. I found some suitable aluminium box section and put some stainless rivnuts in it
Image

Cut the piece into two and bolted them to the hinges
Image

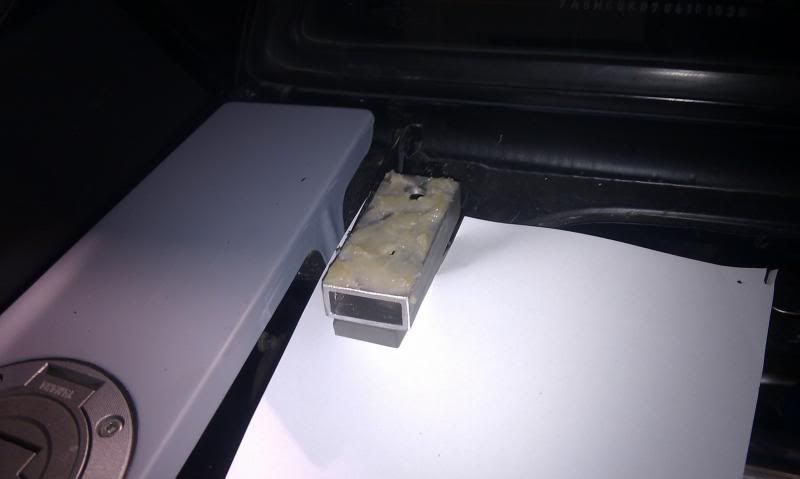
Put some Plexus glue on the top face
Image

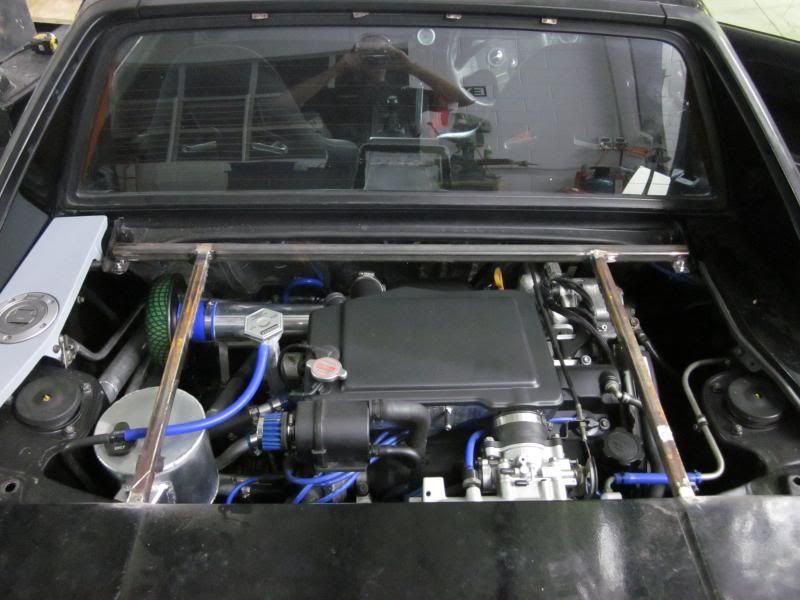
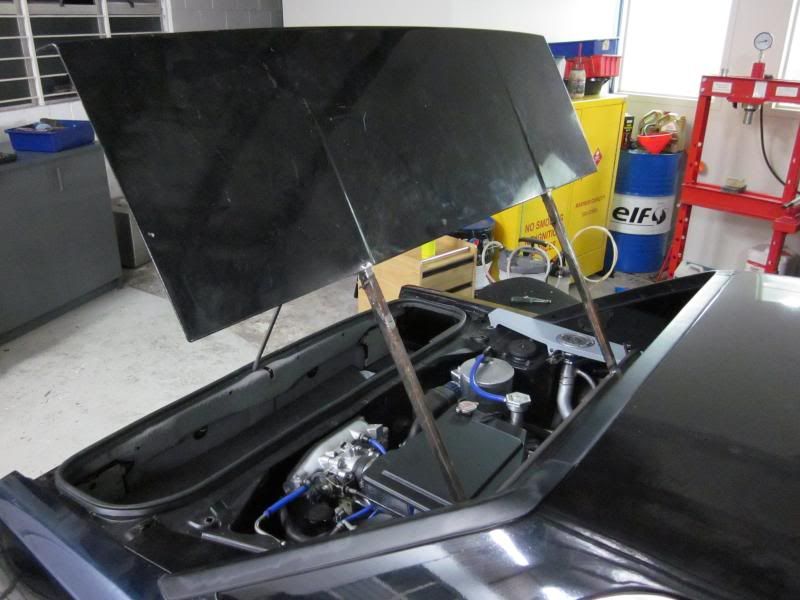
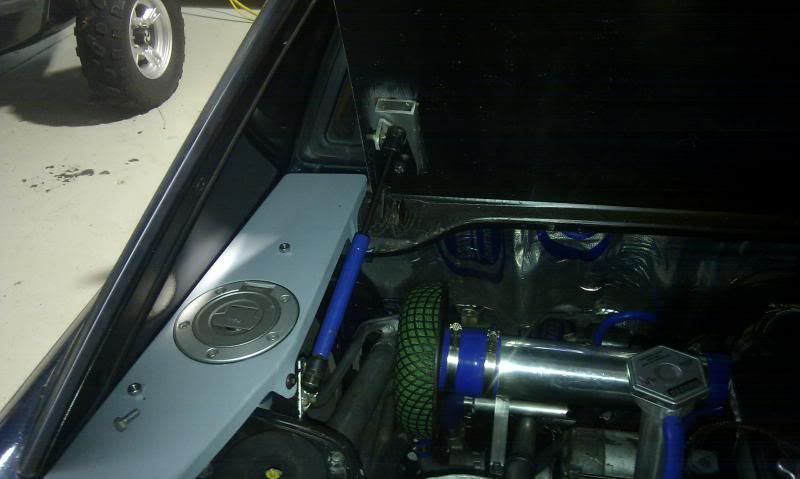
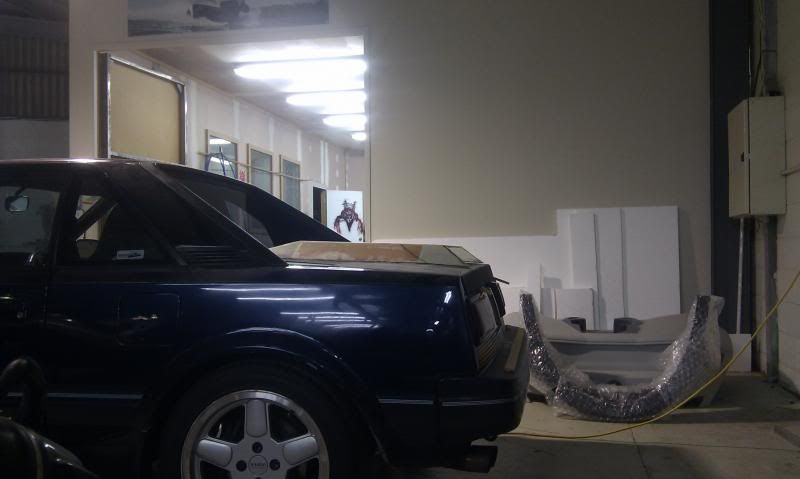
Then I sat the lid into place and let the glue cure. Here's the lid being held up quite happily but the little twos'r'us gas strut. You can also see the green foam I've attached to make the sealing surface for the boot. I don't have a picture but I've also attached the boot catch to hold it down, using the same method as I did for the hinge mounts
Image
Image

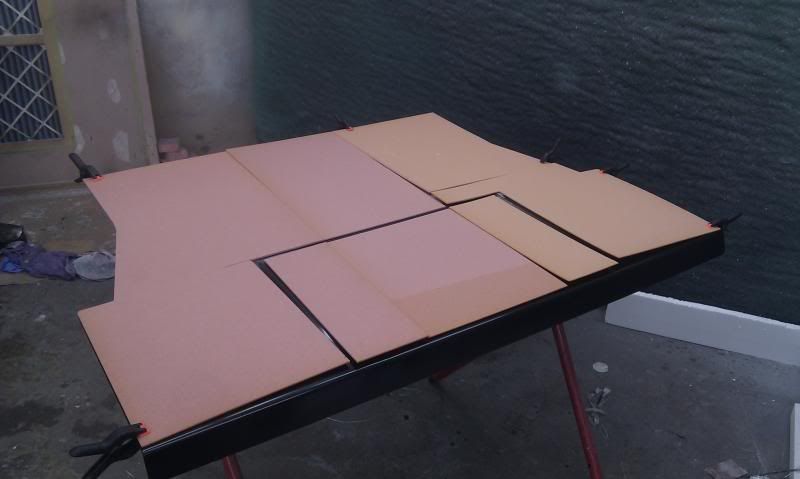
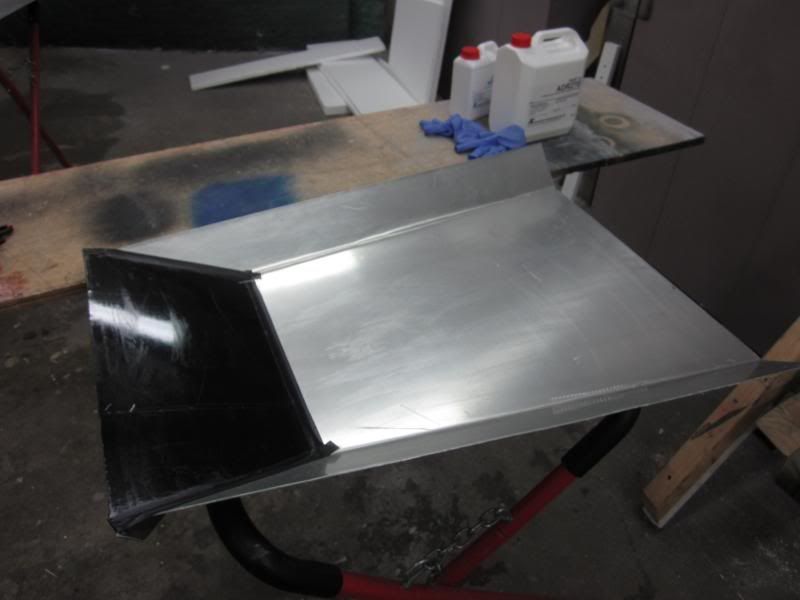
So the other part of this engine lid is the vent. I half made a mould for this using some aluminium sheet a few years ago. I finished that off and modified it slightly with the black plastic sheet you can see in this picture
Image

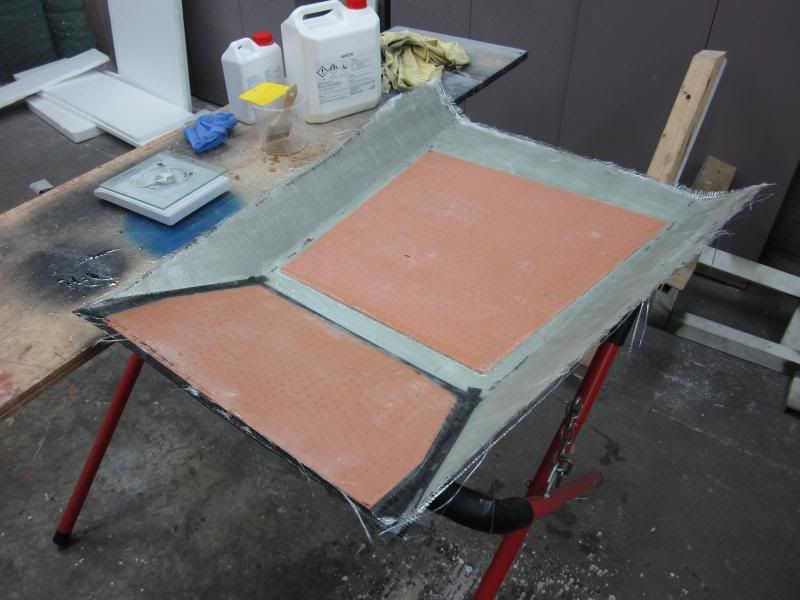
I laid this up with two layers of 200gsm cloth, then some 3mm core, then another two layers of cloth. I forgot to pigment the resin on this, so it's translucent and you can clearly see where I've placed the core. I went back and added some core on the sides too because they were too floppy.
Image

Some pics of the vent test fitted on the lid
Image
Image
Image

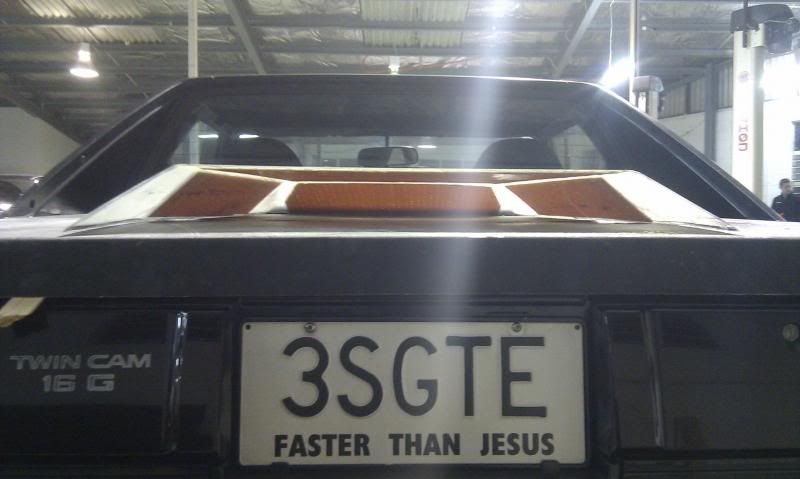
Since those pics I've trimmed it a little so it's about 3/4 of the height that it is here. I just need to finish trimming it up to make sure it's symmetric and then I'll laminate it to the engine lid. Pretty stoked with how it's gone so far - as always more work than I expected but it's getting there. I think the finished weight will be around 3.5-4kg, which along with the removal of one latch and one set of hinges could be a weight saving of around 10-12kg I think.

User avatar
Ash Kelly Barr
Club Member - MR2OCNZ
Posts: 838
Joined: Sun Dec 29, 2013 10:12 am
Stomping Ground: Auckland
Prime Mover: AW11
First name: Ash

Re: Malcolm's 3SGTE AW11

Post by Ash Kelly Barr »

Up that's f@$"en dope bro! Good work!
I like fuel fill spot too
Toyota motors:
Current - 89 AW11 factory manual SC
Sold - 74 Toyota Crown wagon (MS63), Holden 308, TH400 trans

User avatar
Malcolm
Club Member - MR2OCNZ
Posts: 638
Joined: Mon May 24, 2010 8:24 pm
Stomping Ground: Auckland
Prime Mover: AW11
First name: Malcolm

Re: Malcolm's 3SGTE AW11

Post by Malcolm »

Ash Kelly Barr wrote:Up that's f@$"en dope bro! Good work!
I like fuel fill spot too
Thanks. I'm actually going to go back to the stock fuel filler because I would have to get the car re-certed for that mod and TBH I don't feel like it's worth the hassle or expense (the reason for doing it was to put a vent on the rear passenger side quarter panel for the air intake, but I don't think I want to spend $500 on a cert just for that!).

User avatar
flying_wedge
Club Member - MR2OCNZ
Posts: 1696
Joined: Sat Aug 06, 2005 5:07 pm
Stomping Ground: Christchurch
Prime Mover: AW11
First name: Mark

Re: Malcolm's 3SGTE AW11

Post by flying_wedge »

Sweet work - I like how it's coming together!
No spoiler I take it?
Where do you get your foam from? That's the kind of thing I need for playing around with panels.
Pretty sure you will be due for a re-cert one day, just do the side vent and filler then.

It would be nice if my skills were at your level of composite/fabrication and making stuff :shock:
Image

User avatar
mickeyduck
Life Member - MR2OCNZ
Posts: 6144
Joined: Mon Apr 25, 2005 11:30 am
Stomping Ground: Auckland
Prime Mover: More than one MR2
First name: Charlie

Re: Malcolm's 3SGTE AW11

Post by mickeyduck »

I liked your filler mod too Malcolm. It's one I've wanted to do for ages... But as you say, $

Re the engine lid... I hope it vents ok. The air that comes off the roof circulates by flowing forward over the engine lid which is why the stock vents face forwards, but I'm sure you knew that... With a bit of luck your vent is far enough back to simply work in with the air leaving the car. Though perhaps a venturi or even a wing might assist in extracting that hot air too? Just thought I might throw that in there for your consideration mate.

Imagine an intake at the roof rear edge, flowing along the top of the engine lid, exiting where yours does, acting as a venturi... Dunno how you'd build it so as to open the lid (clip off?) but I'm sure it'd work.

Or use a wing in similar fashion to how an F1 car uses the "monkey seat" (to suck the exhaust gases up and along the bottom of the wing). In your case, to suck the engine heat out via your vent...

Coming together nicely. Looking forward to seeing your AW on runs again. And at the next 4nR show of course, if you're into it. :wink: 8)
#8^) Charlie the certified Westie
Retired - President 2012 - 2018
Retired - Committee Member 2009 - 2018
Retired - Auckland Area Coordinator 2009 - 2018
Retired - Webmaster, Forum Host & Admin 2010 - 2018 - Now it's mknz

Financial Club Member since 2004 and thanks to *84vvt and co-conspirators, Life Member since April 2017 8)
100+ MR2OCNZ runs and counting... When going hard, good rubber's your best protection against unwanted accidents. Buy good tyres!
When you're nearing the end of the drag-strip and you have no 'chute, you may as well keep your foot to the floor... Live life. There ain't no second pass. :twisted:

User avatar
Malcolm
Club Member - MR2OCNZ
Posts: 638
Joined: Mon May 24, 2010 8:24 pm
Stomping Ground: Auckland
Prime Mover: AW11
First name: Malcolm

Re: Malcolm's 3SGTE AW11

Post by Malcolm »

flying_wedge wrote:Sweet work - I like how it's coming together!
No spoiler I take it?
Where do you get your foam from? That's the kind of thing I need for playing around with panels.
Pretty sure you will be due for a re-cert one day, just do the side vent and filler then.

It would be nice if my skills were at your level of composite/fabrication and making stuff :shock:
Thanks, yep plan is for no spoiler, although I'm not dead set on that. The foam is from a fibreglass supplies place just up the road from my work. Its pretty cheap if you're using fairly thin stuff like this (I think I paid $5 a sheet for the 3mm stuff and 30 per square metre for the 16mm), but if you wanted something thicker for making large 3d shapes you might be better off getting some bits of polystyrene that is used for underfloor insulation in houses.

Not sure if I'll need to re-cert in the future, I think that would only be the case if I decided to get height adjustable suspension or a more significant brake upgrade... Next step is to paint the car, so I hope not to be doing any more bodywork after that!

User avatar
Malcolm
Club Member - MR2OCNZ
Posts: 638
Joined: Mon May 24, 2010 8:24 pm
Stomping Ground: Auckland
Prime Mover: AW11
First name: Malcolm

Re: Malcolm's 3SGTE AW11

Post by Malcolm »

mickeyduck wrote:I liked your filler mod too Malcolm. It's one I've wanted to do for ages... But as you say, $

Re the engine lid... I hope it vents ok. The air that comes off the roof circulates by flowing forward over the engine lid which is why the stock vents face forwards, but I'm sure you knew that... With a bit of luck your vent is far enough back to simply work in with the air leaving the car. Though perhaps a venturi or even a wing might assist in extracting that hot air too? Just thought I might throw that in there for your consideration
That is something I gave a bit of thought to, including wondering if putting a spoiler back on would help. A couple of observations that made me decide not to worry about it:
1. I know that people say air flows down through the lid and into the engine bay, but I don't buy this. If you've ever driven an aw11 without the engine lid latched, it flies open at around 100kmh due to the pressure differential between the top and bottom. This shows air is flowing up through the engine bay and out the engine lid. I'm not sure how this is affected by the presence of the rear visor.
2. Although its not incredibly effective, the factory spoiler is positioned around the same point as the outlet of my vent. If air was flowing predominantly downward or forwards at this point it then the spoiler would probably increase drag, but apparently it decreases the coefficient of drag of the car.

Having said that, in my experience aerodynamics are never as simple as we'd like to think and often a change you make can have the exact opposite effect of what you may intuitively expect. Its possible that the interaction between the bonnet vent and the modified engine lid could change things completely... for now I'll stick with a bit of intuition but when its done I'll actually be quite keen to out some wool tufts and a gopro on and find out whats going on for sure!

Post Reply