Keep up the good work. It's definitely going to look great when it's complete.
CJs SW20
Moderator: Moderators
Forum rules
This section of the forum is a great resource if you're looking for ideas, and it's a cool way of obtaining technical information that may otherwise not have been posted. (Members can use the Search functionality at top right of the forum to speed up finding things) Please respect others' contributions and don't diss anyone - keep comments helpful, factual, positive and polite. One thread per vehicle or owner please - don't start lots of threads about just one car. And if you need assistance with your car and want to host a spanner day, please use the appropriate section of the forum: http://mr2.org.nz/phpbb3/viewforum.php?f=35 Thank you.
This section of the forum is a great resource if you're looking for ideas, and it's a cool way of obtaining technical information that may otherwise not have been posted. (Members can use the Search functionality at top right of the forum to speed up finding things) Please respect others' contributions and don't diss anyone - keep comments helpful, factual, positive and polite. One thread per vehicle or owner please - don't start lots of threads about just one car. And if you need assistance with your car and want to host a spanner day, please use the appropriate section of the forum: http://mr2.org.nz/phpbb3/viewforum.php?f=35 Thank you.
-
GDII

- Forum Moderator - MR2OCNZ
- Posts: 5740
- Joined: Sun Jul 10, 2011 5:13 pm
- Stomping Ground: Wellington
- Prime Mover: SW20
- First name: Phill
Re: CJs SW20
I know what you mean. I can't really say I've been saving weight on my build as it's not a track car either. All I have been doing is adding weight to mine but most of the weight is adding factory parts that were missing. 
Keep up the good work. It's definitely going to look great when it's complete.
Keep up the good work. It's definitely going to look great when it's complete.
1990 SW20 MR2 G-Limited (GEN4 3SGTE Installed)
2000 AE111R Corolla Wagon NZ New Daily
1996 AE101R Corolla Sprint NZ New Selling Soon
1990 EP81 Starlet XL (Sold)
1990 EE90 Corolla XL (Sold)
Instagram https://www.instagram.com/sw20glimited/
2000 AE111R Corolla Wagon NZ New Daily
1996 AE101R Corolla Sprint NZ New Selling Soon
1990 EP81 Starlet XL (Sold)
1990 EE90 Corolla XL (Sold)
Instagram https://www.instagram.com/sw20glimited/
-
CJ

- Club Member - MR2OCNZ
- Posts: 1400
- Joined: Wed Aug 17, 2005 6:55 pm
- Stomping Ground: Waikato
- Prime Mover: SW20
- First name: CJ
Re: CJs SW20
Got the suspension all back on. Got the hub to the right height and started torquing things back down.
Thinking I might take it to the shop and get an alignment done though. They can torque the bolts with the correct weight of the car on them. May have thrown settings out while stripping it all back too.
All looking pretty mean though.
Polished up the outer edge of the spacers while i was at it. Thats the only bit visible with the wheels on.
-
GDII
- Forum Moderator - MR2OCNZ
- Posts: 5740
- Joined: Sun Jul 10, 2011 5:13 pm
- Stomping Ground: Wellington
- Prime Mover: SW20
- First name: Phill
Re: CJs SW20
Definitely get a wheel alignment done. The wheel base on my car was way out side to side when I did the bushes and as you said you should do up the bolts with weight on the wheels. That looks really good. Now, just don't drive it anymore.... The good thing about painting all those bits is that you can just wipe off the dust with a cloth when you want to shine it back up.
1990 SW20 MR2 G-Limited (GEN4 3SGTE Installed)
2000 AE111R Corolla Wagon NZ New Daily
1996 AE101R Corolla Sprint NZ New Selling Soon
1990 EP81 Starlet XL (Sold)
1990 EE90 Corolla XL (Sold)
Instagram https://www.instagram.com/sw20glimited/
2000 AE111R Corolla Wagon NZ New Daily
1996 AE101R Corolla Sprint NZ New Selling Soon
1990 EP81 Starlet XL (Sold)
1990 EE90 Corolla XL (Sold)
Instagram https://www.instagram.com/sw20glimited/
-
mickeyduck

- Life Member - MR2OCNZ
- Posts: 6144
- Joined: Mon Apr 25, 2005 11:30 am
- Stomping Ground: Auckland
- Prime Mover: More than one MR2
- First name: Charlie
Re: CJs SW20
+1GDII wrote:Definitely get a wheel alignment done.
If you're like me you have a guy with your car's set-up in his wheel alignment computer already...
Looking REALLY good CJ. Can't wait to see it back out and about mate.
Can't wait to see mine back out and about either, LOL...
#8^) Charlie the certified Westie
Retired - President 2012 - 2018
Retired - Committee Member 2009 - 2018
Retired - Auckland Area Coordinator 2009 - 2018
Retired - Webmaster, Forum Host & Admin 2010 - 2018 - Now it's mknz
Financial Club Member since 2004 and thanks to *84vvt and co-conspirators, Life Member since April 2017
100+ MR2OCNZ runs and counting... When going hard, good rubber's your best protection against unwanted accidents. Buy good tyres!
When you're nearing the end of the drag-strip and you have no 'chute, you may as well keep your foot to the floor... Live life. There ain't no second pass.
-
CJ
- Club Member - MR2OCNZ
- Posts: 1400
- Joined: Wed Aug 17, 2005 6:55 pm
- Stomping Ground: Waikato
- Prime Mover: SW20
- First name: CJ
Re: CJs SW20
mmmmickeyduck wrote:+1GDII wrote:Definitely get a wheel alignment done.
If you're like me you have a guy with your car's set-up in his wheel alignment computer already...
Looking REALLY good CJ. Can't wait to see it back out and about mate.
Can't wait to see mine back out and about either, LOL...
-
CJ
- Club Member - MR2OCNZ
- Posts: 1400
- Joined: Wed Aug 17, 2005 6:55 pm
- Stomping Ground: Waikato
- Prime Mover: SW20
- First name: CJ
Re: CJs SW20
Got a new oil filter on and some new 10w60 Castrol.
Put some new Redline MT90 in the transmission.
Dropped the car back onto its wheels again. Its been a while.
I am re-painting the rear caps on the back bumper so theyre not on yet. Its taking some effort in this crap weather.
Put some new Redline MT90 in the transmission.
Dropped the car back onto its wheels again. Its been a while.
I am re-painting the rear caps on the back bumper so theyre not on yet. Its taking some effort in this crap weather.
-
CJ
- Club Member - MR2OCNZ
- Posts: 1400
- Joined: Wed Aug 17, 2005 6:55 pm
- Stomping Ground: Waikato
- Prime Mover: SW20
- First name: CJ
Re: CJs SW20
Pulled apart the rear lights to clean the dirt and crap out of them.
Put some cutting compound on the clear covers.
Decided to do them in black this time around too. Im liking the change. Looks a little closer to stock actually. Bit more like atenza or axela lights.
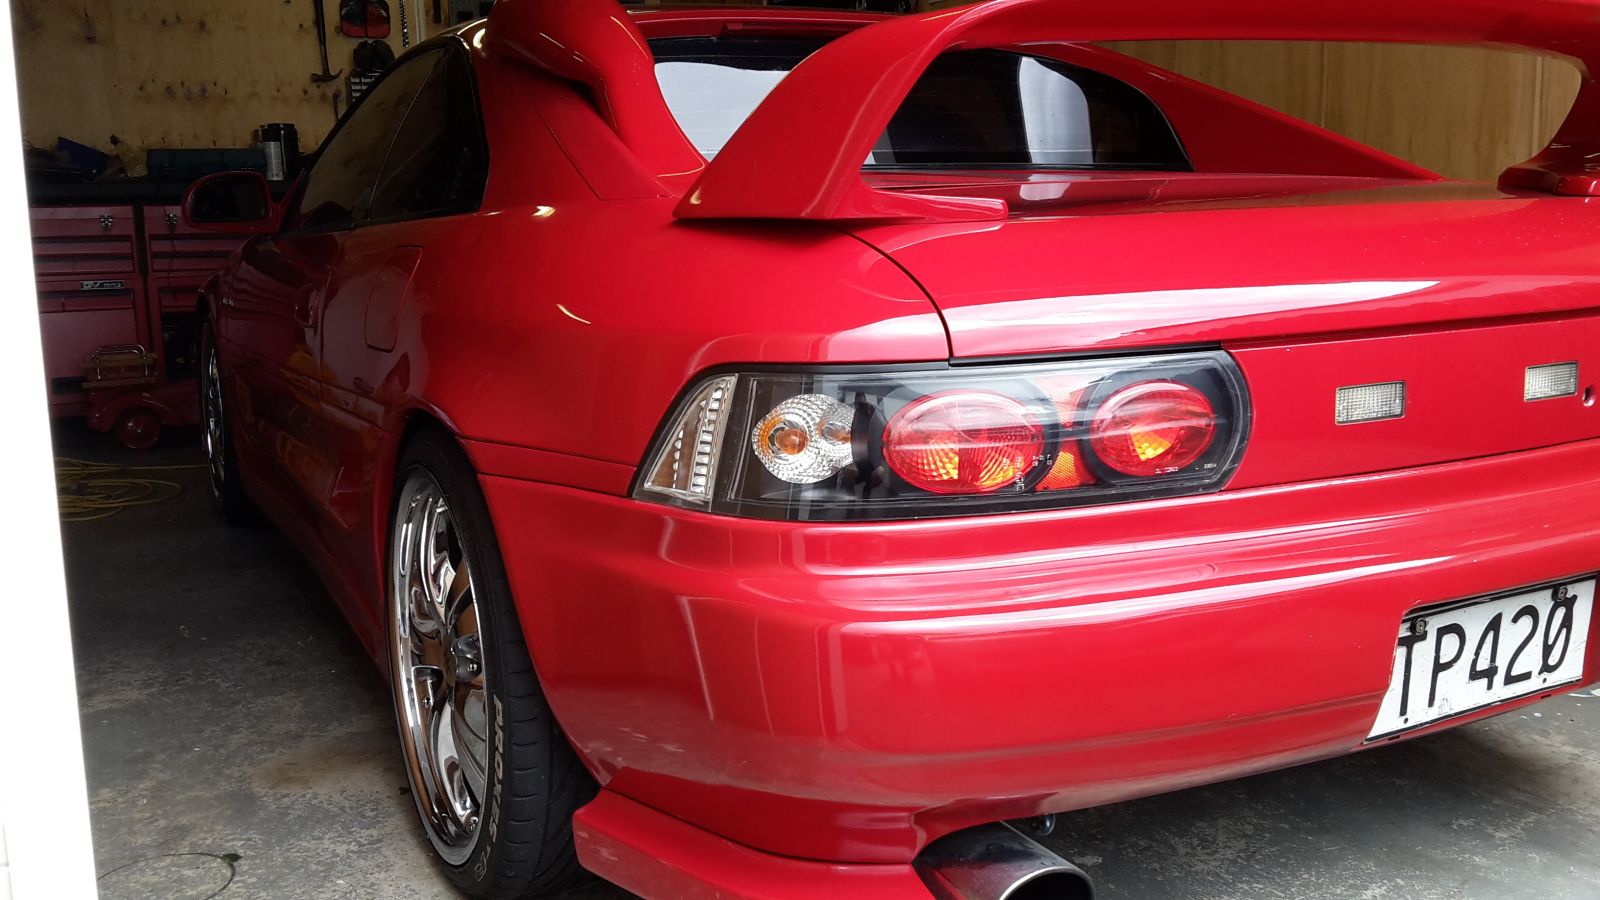
Put some cutting compound on the clear covers.
Decided to do them in black this time around too. Im liking the change. Looks a little closer to stock actually. Bit more like atenza or axela lights.
-
CJ
- Club Member - MR2OCNZ
- Posts: 1400
- Joined: Wed Aug 17, 2005 6:55 pm
- Stomping Ground: Waikato
- Prime Mover: SW20
- First name: CJ
Re: CJs SW20
Think i worked out why my brakes didnt feel so good on Taupo..
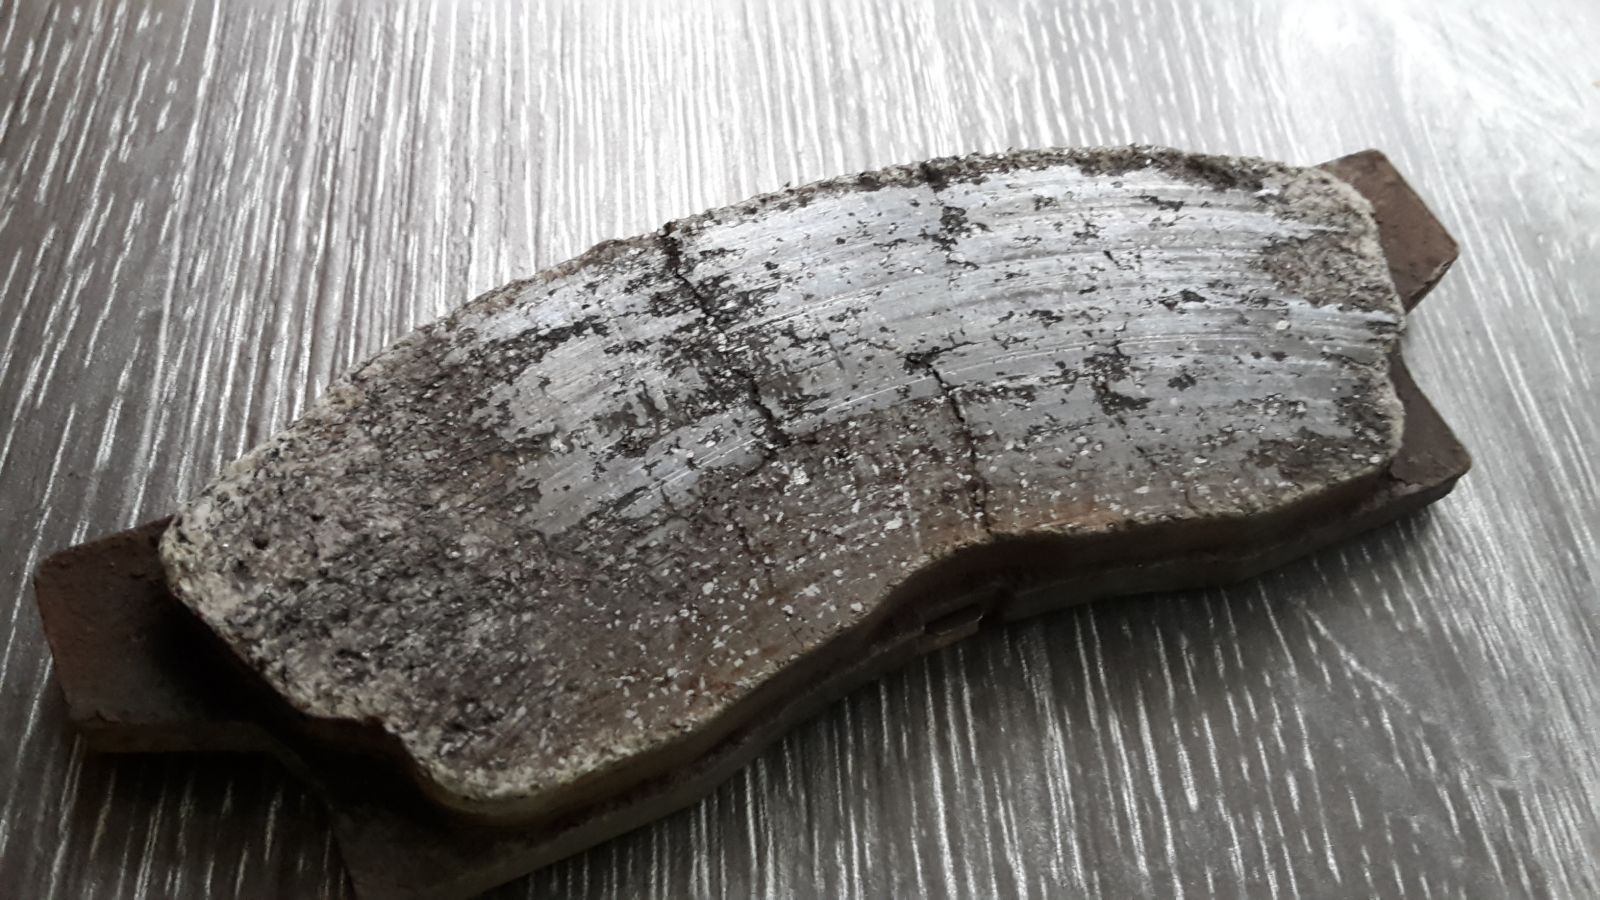
Got some new yellow stuff on order. Comtemplating some new rotors, so will look into that.
Funny, when i asked the receptionist, she said, "oh, youre not the first person. Did you cook yours at Taupo as well.".....(ashamed silence). "little bit", I said.
Got some new yellow stuff on order. Comtemplating some new rotors, so will look into that.
Funny, when i asked the receptionist, she said, "oh, youre not the first person. Did you cook yours at Taupo as well.".....(ashamed silence). "little bit", I said.
-
CJ
- Club Member - MR2OCNZ
- Posts: 1400
- Joined: Wed Aug 17, 2005 6:55 pm
- Stomping Ground: Waikato
- Prime Mover: SW20
- First name: CJ
Re: CJs SW20
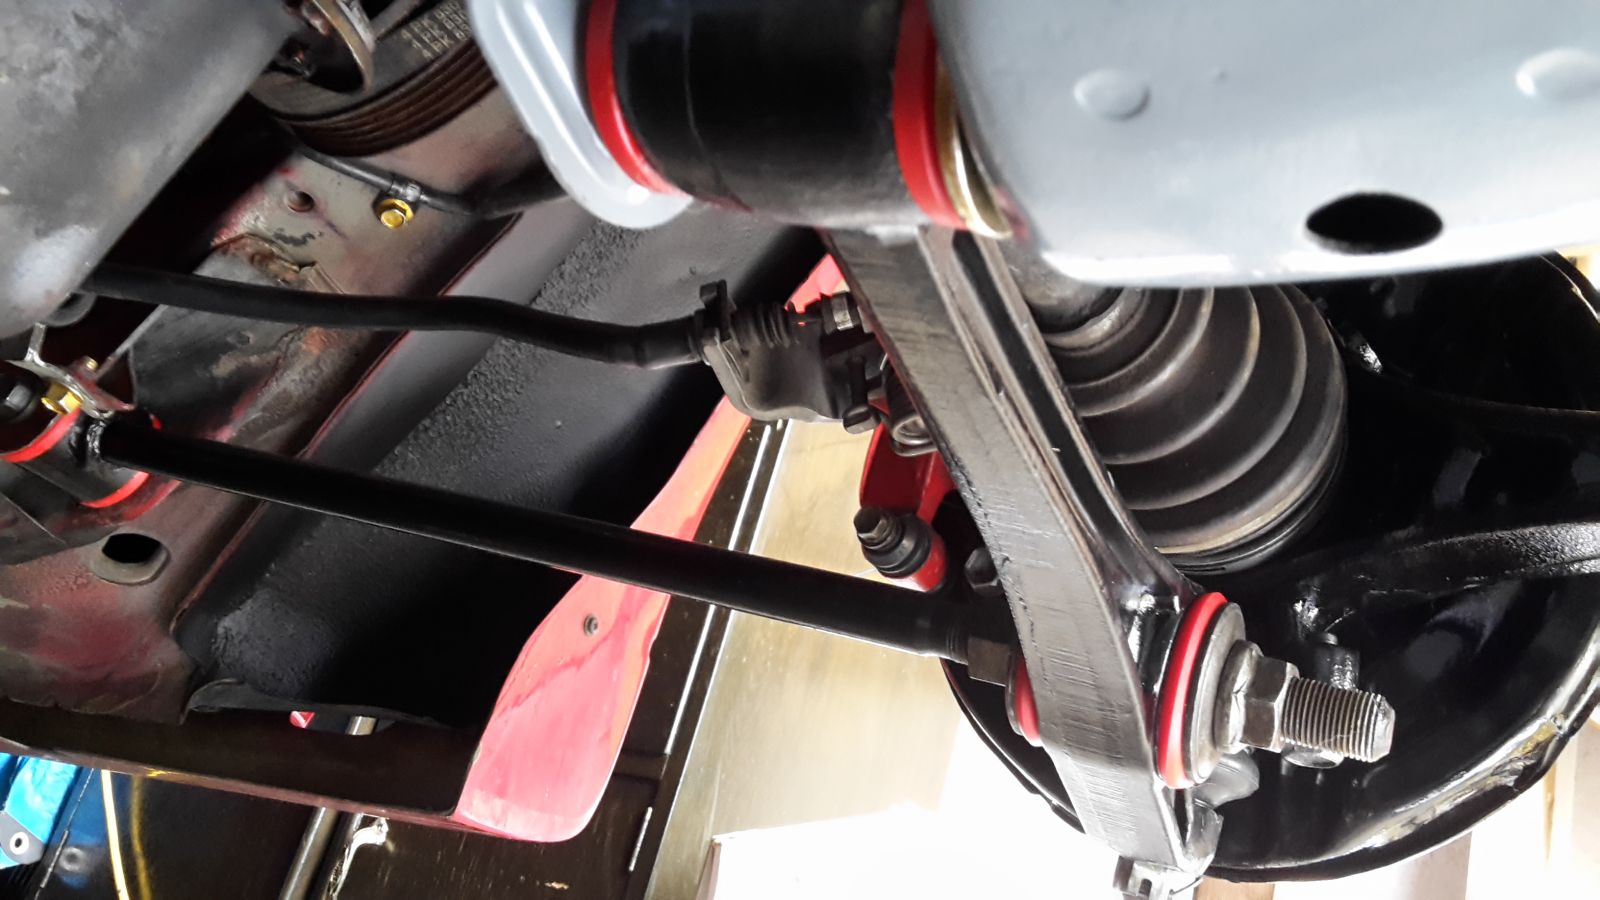
A little while ago i started stripping out the front suspension for a re-con.
Heres a bit of a before look so you can get the idea.

I wanted to pull it out because:
a/ my brake pads were shot from Taupo racing.
b/ I was aware that my front shocks didnt feel right throwing them into the corners.
c/ mechanic at my shop pointed out the wear on my tyres showed a camber on the wheels. Suggested there was something else worn in there but couldnt tell what.
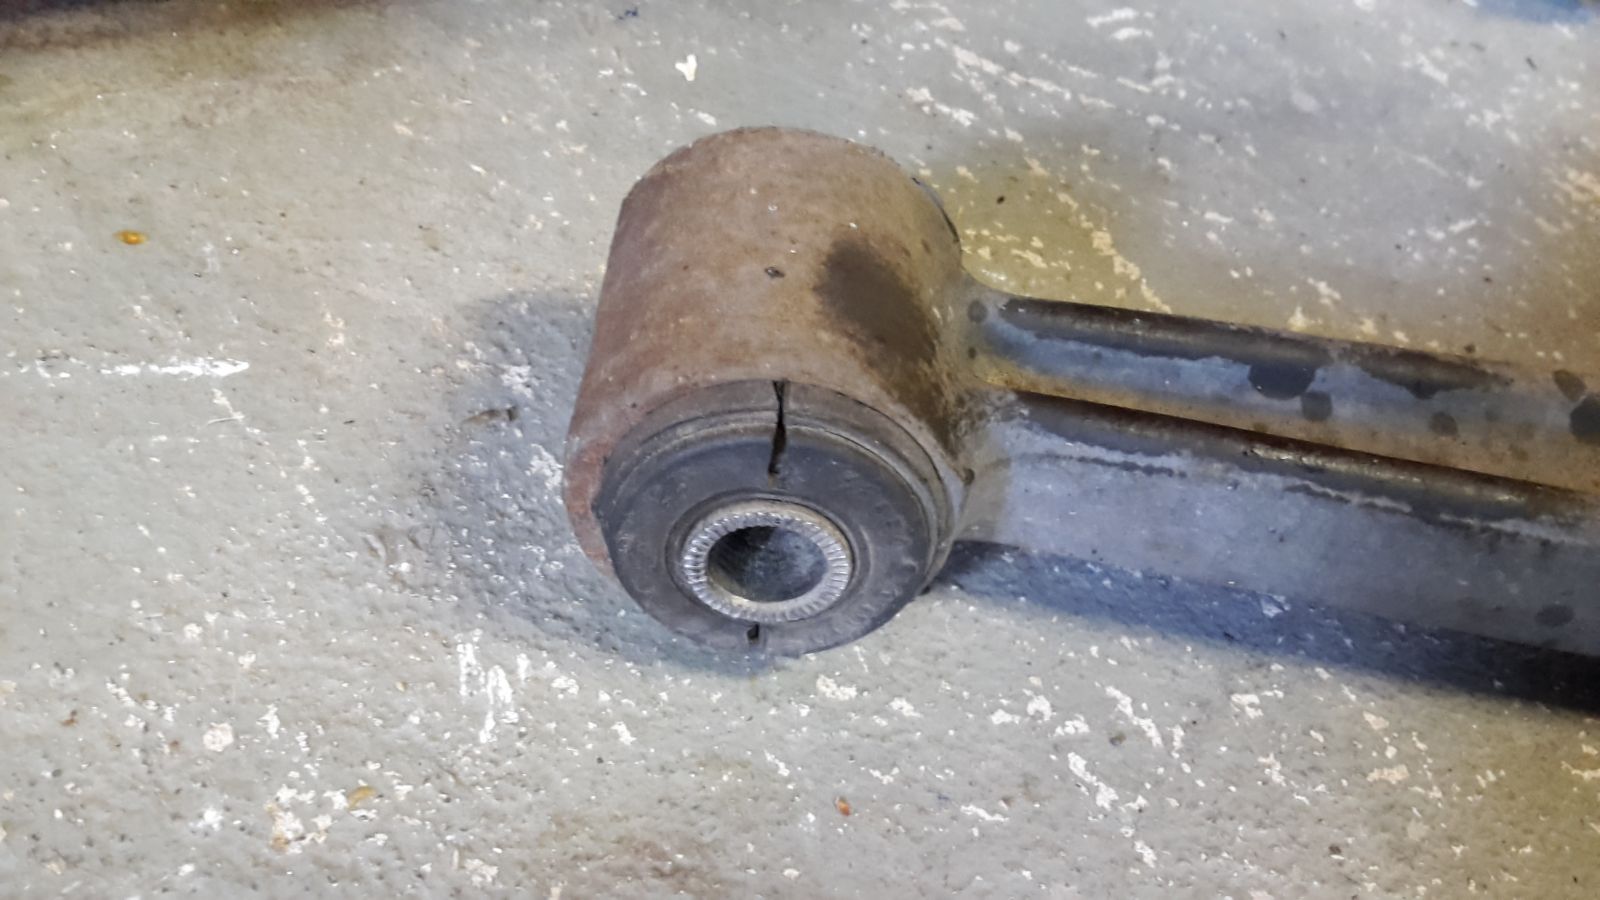
So. got the strut bar off. It was nice and straight and the bushing actually not too bad. If its original, its held up bloody well. I certainly havent ever replaced it. But its getting Urethane anyways..


Control arm also pretty good. The internal collar isnt malformed or worn. But again,.Urethane going in.
The shock cover is completely disintegrated. While not a massive problem, its not great as it allows dirt and water to get into the shock insert lessening its life.
I tested it by pushing the shock down by hand. It does return up, but slowly and quite "jittery" It should be smooth and spring back up quick with no issue.
So, this confirmed my suspicion the shocks were on their way out. Having already ordered some from NST last year, theyre good to go in.
Pulled off the bracket that connects the strut rod to the body. Gave that a clean up too along with some new bolts.

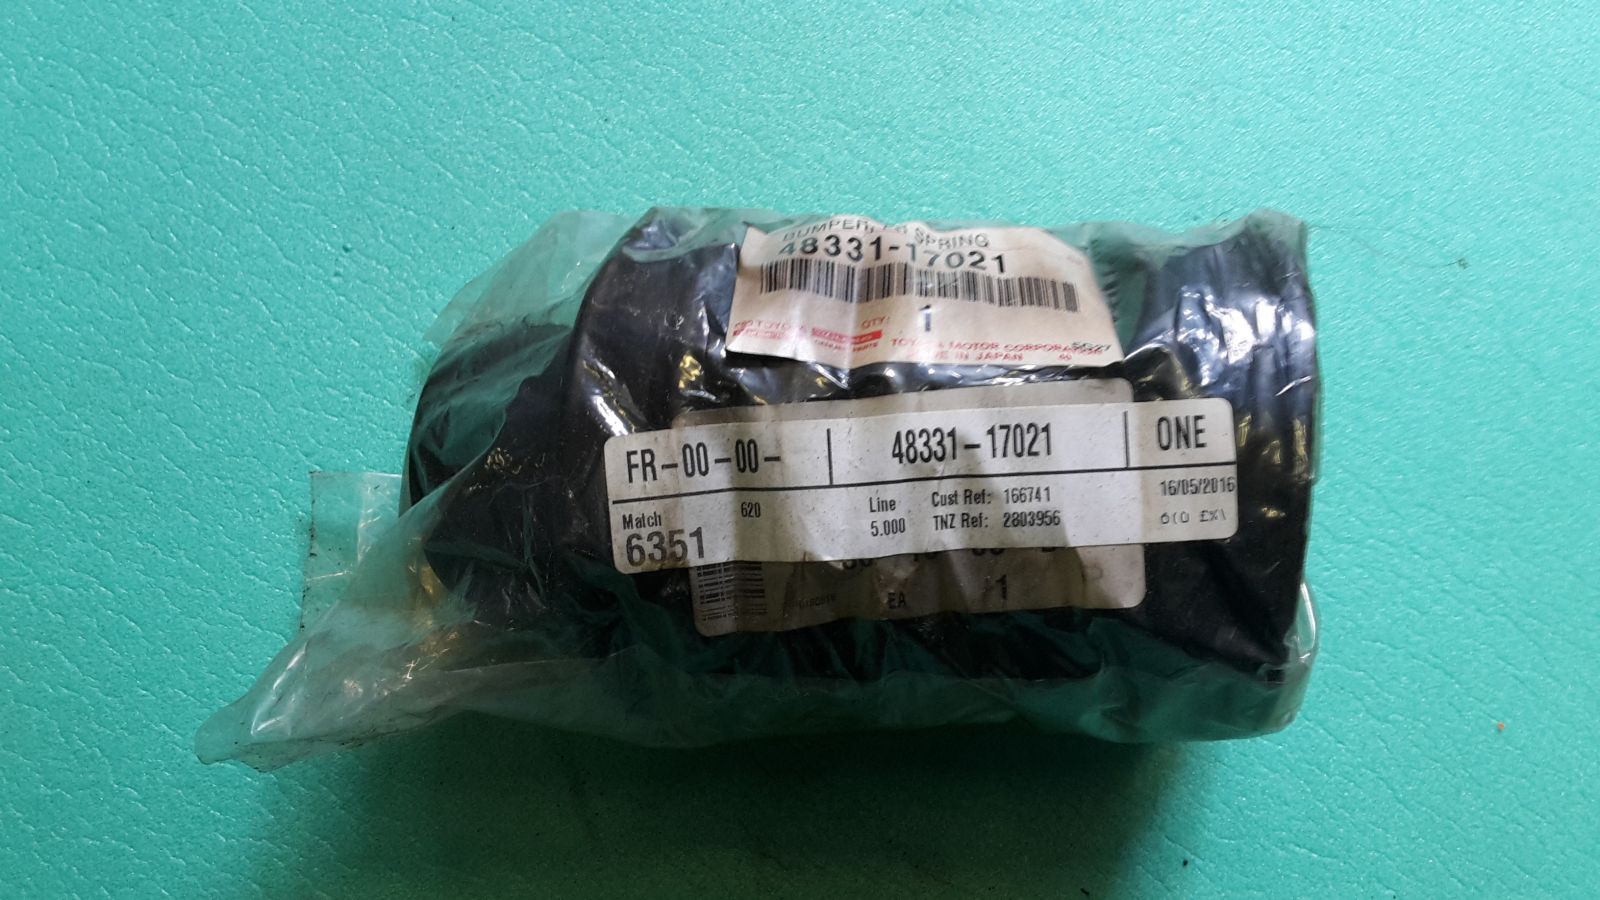
The bump stop part of the cover was fine really but best to have a new set right.. Stop the dust getting in.
Now...this is what happens when you drive around on gravel and dont clean out the underside of the car in long time.

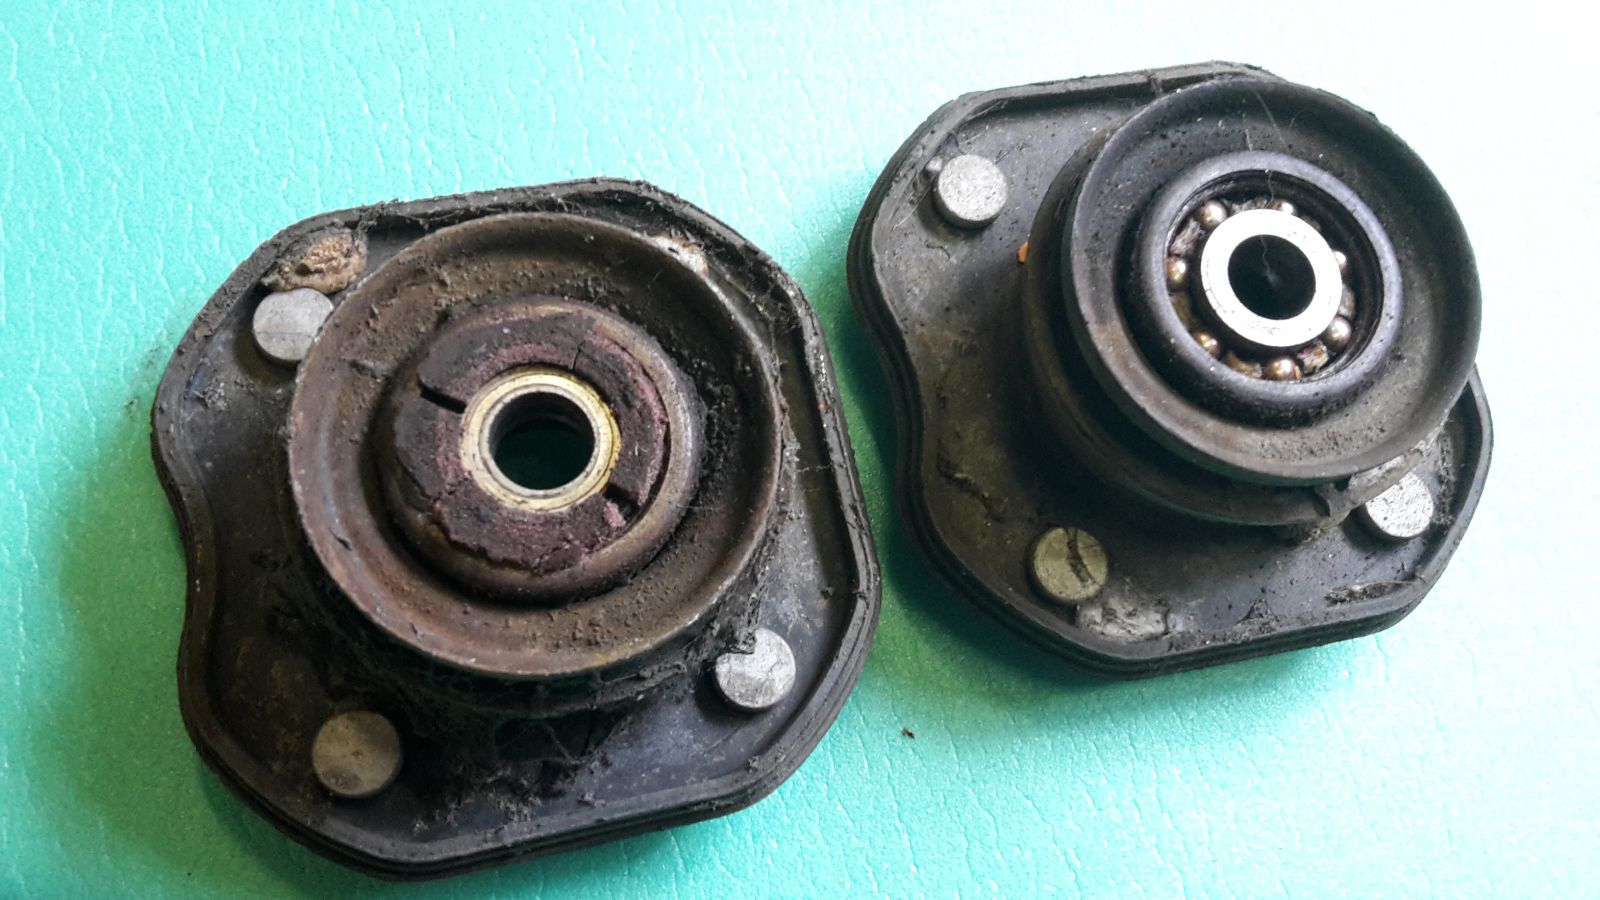
The upper shock support is stuffed. Rusted/seized. The bearings dont even turn anymore. In fact, they were so seized that where the shock insert lines up with spring support is a little hole that has 2 straight sides on it to hold it in place. This then relies on the bearings for axial movement. No bearing movement = these flat bits to get worn out.
Heres one thats been fixed, cleaned and repainted.

Heres a shot of the old upper support mounts. As you may notice, one of them has lost the dust cover all together. The one that is there is crumbling when i touch it.
So, i bought a set of brand new upper supports hoping this might help with the camber wear on the tyres. Yay, they come with new dust covers too cause i forgot to ask about that...Thanks again NST.

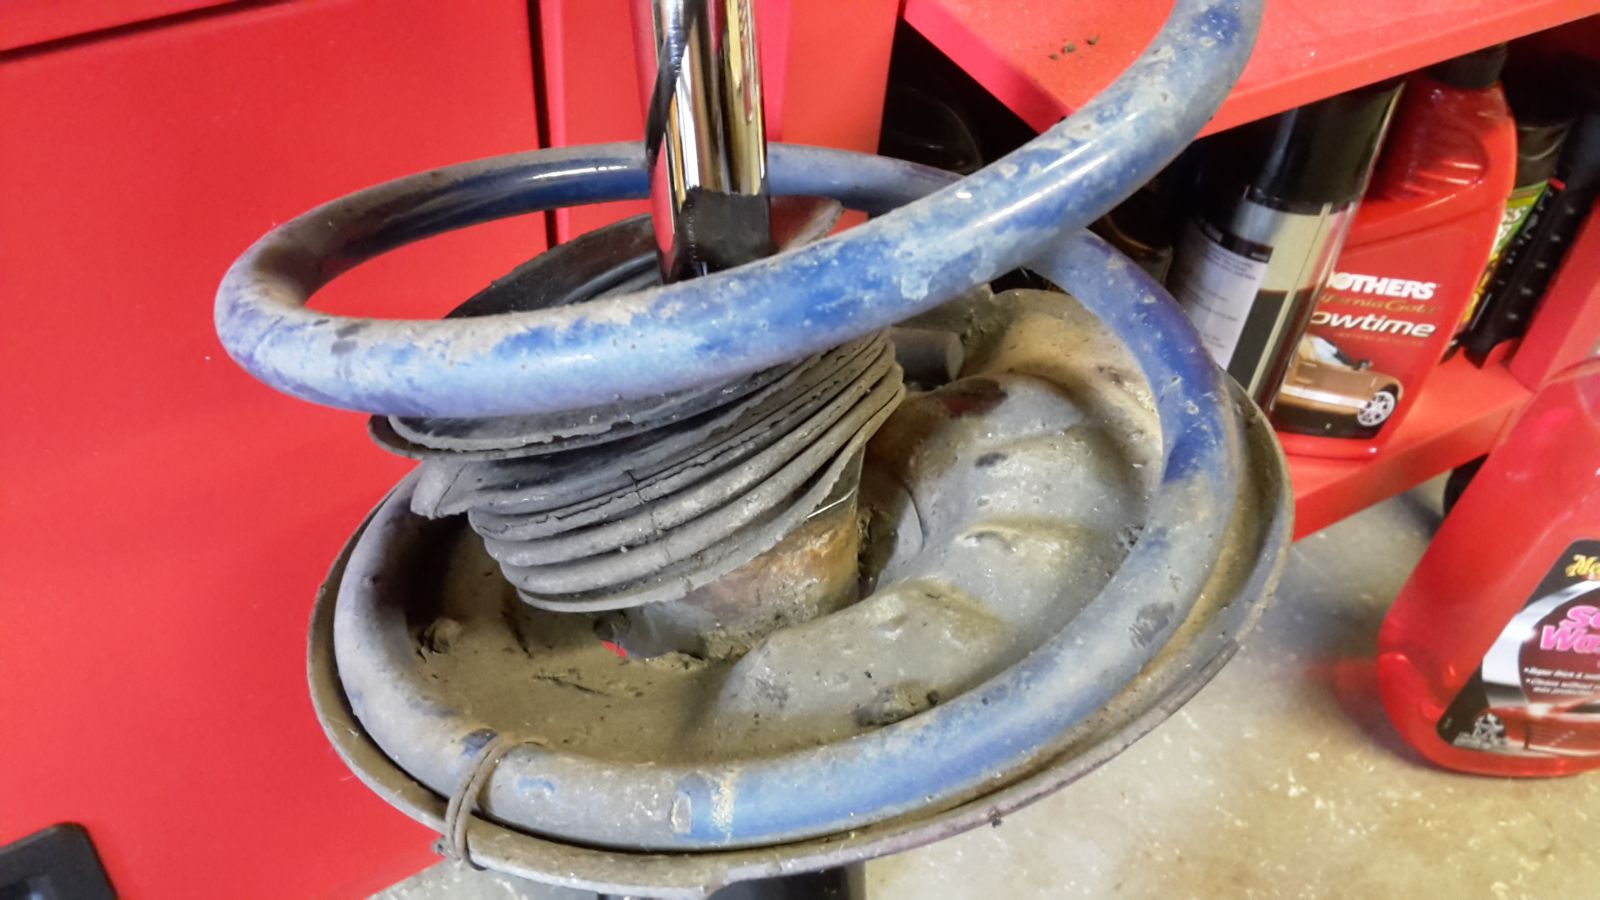
The spring insulator. A rubber cushion that sits at the top of the spring. These were both wearing. They felt normal thickness is some parts and paper thin in others.

So, 2 new insulators too please.

Cleaned up the strut rod. New Urethane bushings and new nuts/washer ex Toyota Japan too. Enamel sprayed.

Control arm all cleaned up.

Pulled the tow bracket off and gave that a clean up.
And just like i did with the rear suspension, Ive cleaned out the wheel well. Resprayed it with sound deadening/stone guard.

I spent literally a couple hours working out all the different plastic lugs that are in here holding the plastic inner liner. Theres about 4 different kinds in the end. Worked out how many i needed of each and got these from Partsouq in UAE.


These guys i have to put a shout out for because they are cheap and deliver super fast. Like a week...The stock is ex japan so legit stuff, but this company deals in all makes of cars and works out of UAE.
Using the parts catalog, you can just order directly from the picture so real easy. Ive used them twice now.
I recommend anyone whos looking for hard to find parts or wants to compare prices with Toyota NZ to check them out.
https://partsouq.com/en/catalog/genuine/locate?c=Toyota
Got the strut bracket back on, with cleaned up bolts of course.
The wheel arch liner cleaned up and coated in rubber stone guard too. All the grommets replaced and new screws to put the wheel arch liner back on.

Cleaned all around the power steering rack. Took off the brackets that hold it to the subframe and cleaned/painted those. New bolts.
Cleaned down the subframe and reprayed that in grey to match the rear subframe i did already.

Took off the body support/brace thats in there and did that too.

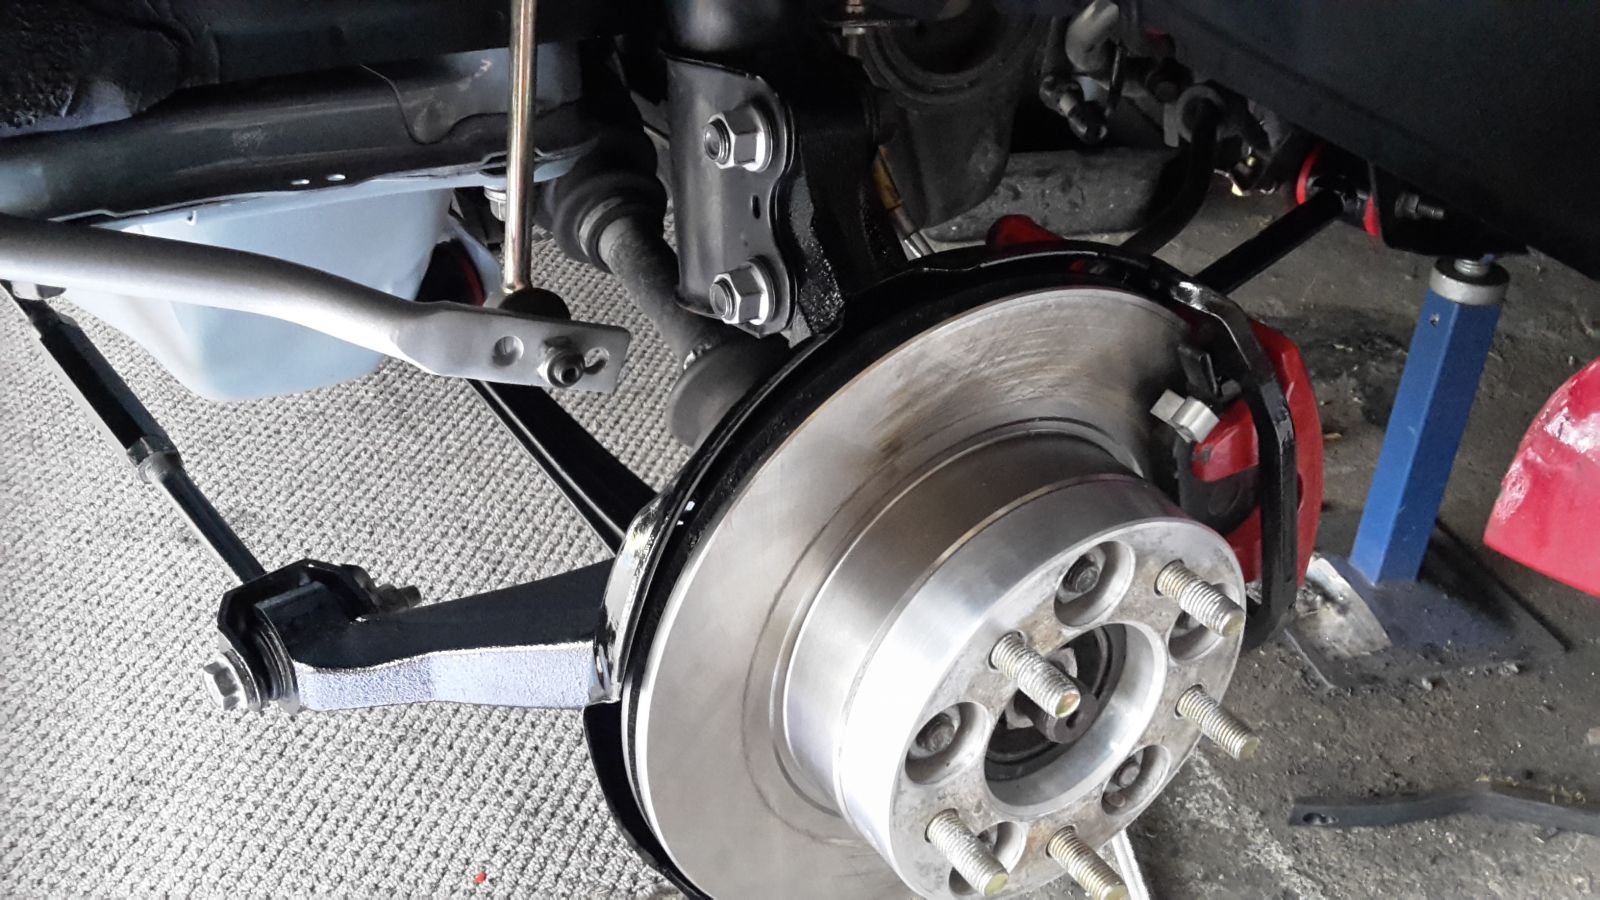
Seeing as how the calipers were out already, i gave them a clean up and a quick respray. This didnt take much as id re-coned them a little while ago with new seals etc.


As you'll notice, got some new yellow stuff pads thrown in. Hopefully these will work a little better.


Also, this time i got all new bolts for the calipers which i didnt do last time I re-cond them.

Cleaned up and repainted the hub carrier/dust shield. Bearing fine as it was replaced a little while ago.
New lower ball joints all round.

I found that my rotors were undersized for what they should be which would also explain a bit of the spongy feel on the brakes.
New rotors ready to go on.

And also, because of Taupo track i melted the hubcentric rings from the rotor being too hot.

Thought id try some new aluminium ones this time.

So. Everything is just about ready to go back on. Need to get over a bit of man flu and can get on to it.
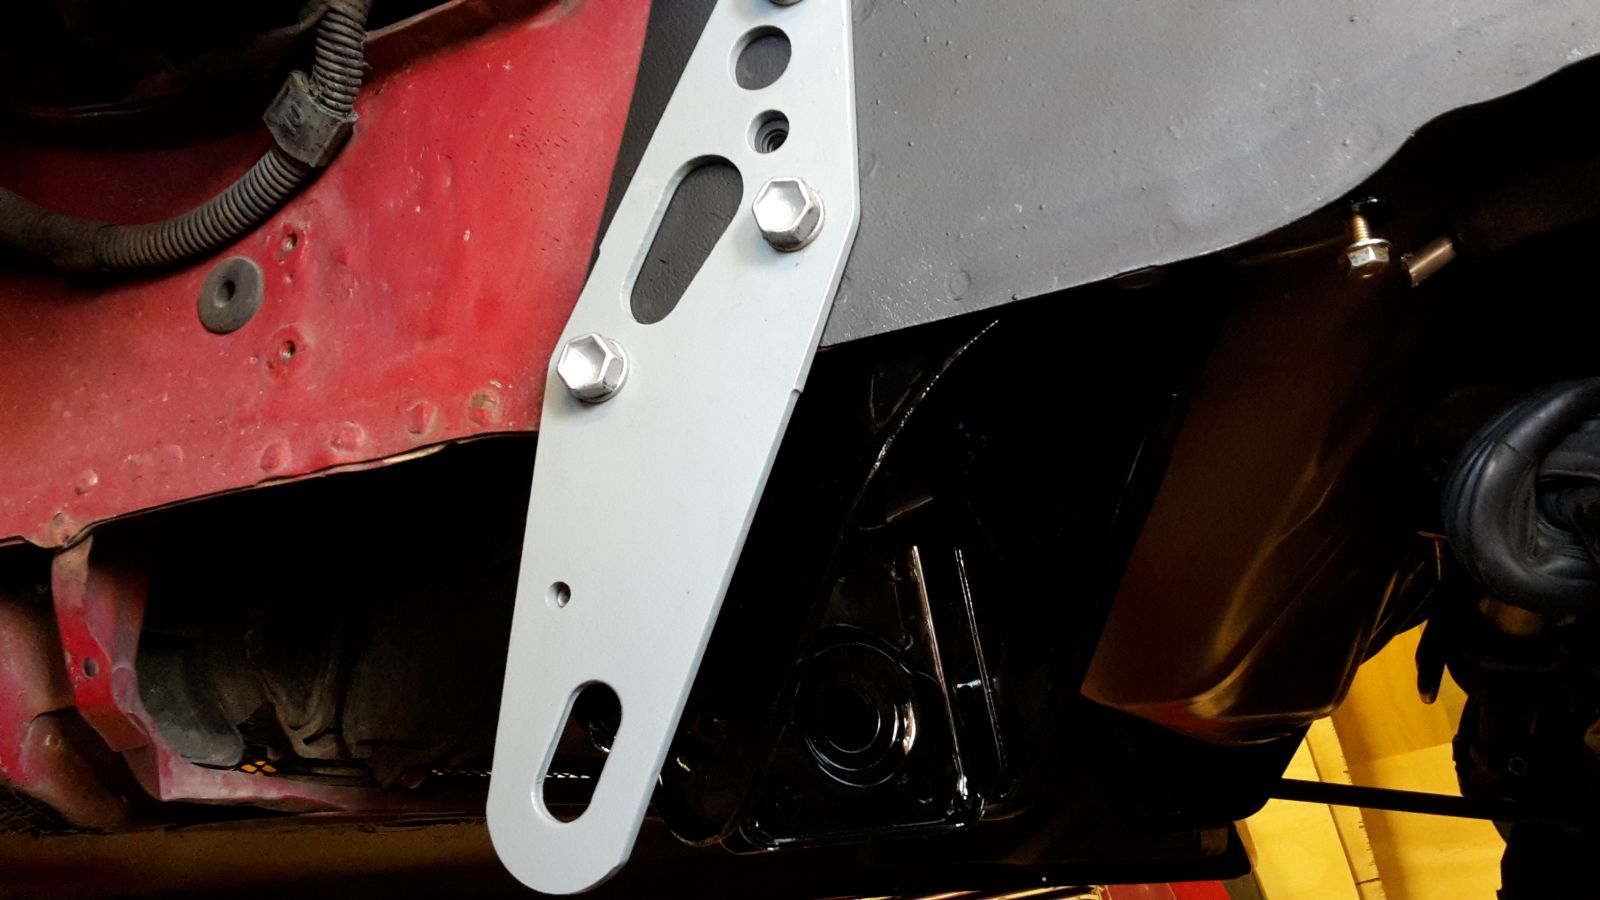
Theres one issue i havent sorted yet. That is the old story of the sway bar mounts cracking.

This is pretty common in the early gens. You can see in the picture a crack opening up all the way down the left side. The crack looks old enough to have started prior to me putting in the larger swaybar.
Only thing for it, is to weld them up and get some reinforcement brackets. Especially with the extra tension thats going to be put on it now with urethane bushings.
Will likely get a set of these.

Will get some on order from either speed source or EMS. Ive bought stuff from both of them in the past. By the time theyre here, i should have all the suspension back on.
Heres a bit of a before look so you can get the idea.
I wanted to pull it out because:
a/ my brake pads were shot from Taupo racing.
b/ I was aware that my front shocks didnt feel right throwing them into the corners.
c/ mechanic at my shop pointed out the wear on my tyres showed a camber on the wheels. Suggested there was something else worn in there but couldnt tell what.
So. got the strut bar off. It was nice and straight and the bushing actually not too bad. If its original, its held up bloody well. I certainly havent ever replaced it. But its getting Urethane anyways..
Control arm also pretty good. The internal collar isnt malformed or worn. But again,.Urethane going in.
The shock cover is completely disintegrated. While not a massive problem, its not great as it allows dirt and water to get into the shock insert lessening its life.
I tested it by pushing the shock down by hand. It does return up, but slowly and quite "jittery" It should be smooth and spring back up quick with no issue.
So, this confirmed my suspicion the shocks were on their way out. Having already ordered some from NST last year, theyre good to go in.
Pulled off the bracket that connects the strut rod to the body. Gave that a clean up too along with some new bolts.
The bump stop part of the cover was fine really but best to have a new set right.. Stop the dust getting in.
Now...this is what happens when you drive around on gravel and dont clean out the underside of the car in long time.
The upper shock support is stuffed. Rusted/seized. The bearings dont even turn anymore. In fact, they were so seized that where the shock insert lines up with spring support is a little hole that has 2 straight sides on it to hold it in place. This then relies on the bearings for axial movement. No bearing movement = these flat bits to get worn out.
Heres one thats been fixed, cleaned and repainted.
Heres a shot of the old upper support mounts. As you may notice, one of them has lost the dust cover all together. The one that is there is crumbling when i touch it.
So, i bought a set of brand new upper supports hoping this might help with the camber wear on the tyres. Yay, they come with new dust covers too cause i forgot to ask about that...Thanks again NST.
The spring insulator. A rubber cushion that sits at the top of the spring. These were both wearing. They felt normal thickness is some parts and paper thin in others.
So, 2 new insulators too please.
Cleaned up the strut rod. New Urethane bushings and new nuts/washer ex Toyota Japan too. Enamel sprayed.
Control arm all cleaned up.
Pulled the tow bracket off and gave that a clean up.
And just like i did with the rear suspension, Ive cleaned out the wheel well. Resprayed it with sound deadening/stone guard.
I spent literally a couple hours working out all the different plastic lugs that are in here holding the plastic inner liner. Theres about 4 different kinds in the end. Worked out how many i needed of each and got these from Partsouq in UAE.
These guys i have to put a shout out for because they are cheap and deliver super fast. Like a week...The stock is ex japan so legit stuff, but this company deals in all makes of cars and works out of UAE.
Using the parts catalog, you can just order directly from the picture so real easy. Ive used them twice now.
I recommend anyone whos looking for hard to find parts or wants to compare prices with Toyota NZ to check them out.
https://partsouq.com/en/catalog/genuine/locate?c=Toyota
Got the strut bracket back on, with cleaned up bolts of course.
The wheel arch liner cleaned up and coated in rubber stone guard too. All the grommets replaced and new screws to put the wheel arch liner back on.
Cleaned all around the power steering rack. Took off the brackets that hold it to the subframe and cleaned/painted those. New bolts.
Cleaned down the subframe and reprayed that in grey to match the rear subframe i did already.
Took off the body support/brace thats in there and did that too.
Seeing as how the calipers were out already, i gave them a clean up and a quick respray. This didnt take much as id re-coned them a little while ago with new seals etc.
As you'll notice, got some new yellow stuff pads thrown in. Hopefully these will work a little better.
Also, this time i got all new bolts for the calipers which i didnt do last time I re-cond them.
Cleaned up and repainted the hub carrier/dust shield. Bearing fine as it was replaced a little while ago.
New lower ball joints all round.
I found that my rotors were undersized for what they should be which would also explain a bit of the spongy feel on the brakes.
New rotors ready to go on.
And also, because of Taupo track i melted the hubcentric rings from the rotor being too hot.
Thought id try some new aluminium ones this time.
So. Everything is just about ready to go back on. Need to get over a bit of man flu and can get on to it.
Theres one issue i havent sorted yet. That is the old story of the sway bar mounts cracking.
This is pretty common in the early gens. You can see in the picture a crack opening up all the way down the left side. The crack looks old enough to have started prior to me putting in the larger swaybar.
Only thing for it, is to weld them up and get some reinforcement brackets. Especially with the extra tension thats going to be put on it now with urethane bushings.
Will likely get a set of these.
Will get some on order from either speed source or EMS. Ive bought stuff from both of them in the past. By the time theyre here, i should have all the suspension back on.
-
GDII
- Forum Moderator - MR2OCNZ
- Posts: 5740
- Joined: Sun Jul 10, 2011 5:13 pm
- Stomping Ground: Wellington
- Prime Mover: SW20
- First name: Phill
Re: CJs SW20
Wow this build is so awesome. Buying up all the new parts to replace old worn faded items.
The bushes on the these cars tend to hold up, at least the harder ones in the front and rear. Replacing with urethane makes the car far more responsive to steering inputs and I didn't find it any harsher than stock.
The bushes on the these cars tend to hold up, at least the harder ones in the front and rear. Replacing with urethane makes the car far more responsive to steering inputs and I didn't find it any harsher than stock.
1990 SW20 MR2 G-Limited (GEN4 3SGTE Installed)
2000 AE111R Corolla Wagon NZ New Daily
1996 AE101R Corolla Sprint NZ New Selling Soon
1990 EP81 Starlet XL (Sold)
1990 EE90 Corolla XL (Sold)
Instagram https://www.instagram.com/sw20glimited/
2000 AE111R Corolla Wagon NZ New Daily
1996 AE101R Corolla Sprint NZ New Selling Soon
1990 EP81 Starlet XL (Sold)
1990 EE90 Corolla XL (Sold)
Instagram https://www.instagram.com/sw20glimited/
-
CJ
- Club Member - MR2OCNZ
- Posts: 1400
- Joined: Wed Aug 17, 2005 6:55 pm
- Stomping Ground: Waikato
- Prime Mover: SW20
- First name: CJ
Re: CJs SW20
Thats promising. Im hoping it will respond well without any further jiggling.GDII wrote:Wow this build is so awesome. Buying up all the new parts to replace old worn faded items.
The bushes on the these cars tend to hold up, at least the harder ones in the front and rear. Replacing with urethane makes the car far more responsive to steering inputs and I didn't find it any harsher than stock.
-
Benckj

- Forum Moderator - MR2OCNZ
- Posts: 7150
- Joined: Thu Nov 24, 2005 12:44 pm
- Stomping Ground: Otago
- Prime Mover: More than one MR2
- First name: Jim
Re: CJs SW20
Good work CJ as your going the extra distance for replacement parts. Surprising how much damage has been done with the heat. I like the idea with the sound deadening and may have to do myself in the persuit of a quitter cab. Have another look at your steering boot as its not seated onto lip. Maybe its just the lack of clamp or could be removed for replacement/cleaning.
With the front refreshed I wonder what the plans are for the rear?
With the front refreshed I wonder what the plans are for the rear?
Jim Benck
90 rev 1 parts car
98 rev 5 GT- all the mods
90 rev 1 parts car
98 rev 5 GT- all the mods
-
CJ
- Club Member - MR2OCNZ
- Posts: 1400
- Joined: Wed Aug 17, 2005 6:55 pm
- Stomping Ground: Waikato
- Prime Mover: SW20
- First name: CJ
Re: CJs SW20
I had been moving it round to paint the tie rod.Benckj wrote:Good work CJ as your going the extra distance for replacement parts. Surprising how much damage has been done with the heat. I like the idea with the sound deadening and may have to do myself in the persuit of a quitter cab. Have another look at your steering boot as its not seated onto lip. Maybe its just the lack of clamp or could be removed for replacement/cleaning.
With the front refreshed I wonder what the plans are for the rear?
The rears done already.
-
Benckj
- Forum Moderator - MR2OCNZ
- Posts: 7150
- Joined: Thu Nov 24, 2005 12:44 pm
- Stomping Ground: Otago
- Prime Mover: More than one MR2
- First name: Jim
Re: CJs SW20
As a matter of interest did you grease the spherical bearings in the rear? I didn't find much info on this before installing the poly bushes but after I had apart it seemed logical to pull apart and grease.
Pic to what I'm talking about if others have not seen.
Pic to what I'm talking about if others have not seen.
- Attachments
-
- Image0802.jpg (110.63 KiB) Viewed 3100 times
-
- Image0803.jpg (112.19 KiB) Viewed 3100 times
Jim Benck
90 rev 1 parts car
98 rev 5 GT- all the mods
90 rev 1 parts car
98 rev 5 GT- all the mods
-
CJ
- Club Member - MR2OCNZ
- Posts: 1400
- Joined: Wed Aug 17, 2005 6:55 pm
- Stomping Ground: Waikato
- Prime Mover: SW20
- First name: CJ
Re: CJs SW20
Nah, didnt pull them apart. They still had nice movement in them so left it.Benckj wrote:As a matter of interest did you grease the spherical bearings in the rear? I didn't find much info on this before installing the poly bushes but after I had apart it seemed logical to pull apart and grease.
Pic to what I'm talking about if others have not seen.
Good to see you can re-grease them up though.