Page 33 of 142
Re: GDII's 1990 G-Limited
Posted: Tue Nov 01, 2016 8:57 am
by Benckj
That product and your attention to detail is amazing. I wouldn't have the patience to dress up parts like you do. A quick spray with tyreshine every couple months is all I can handle.
Re: GDII's 1990 G-Limited
Posted: Tue Nov 01, 2016 9:10 am
by GDII
This product lasts years, not weeks. Do it once and you won't have to think about it for a long time. Keeps the dust of your car as I know your short trip on gravel is enough to collect heaps. A quick spray with the hose and the dirt is mostly gone.
You know me, my OCD gets the better of me. It's nice to have a 26 year old car that looks mostly new and not spend silly money replacing parts that technically aren't broken but just faded. This stuff works great on the GEN1 black side stripe too.
Re: GDII's 1990 G-Limited
Posted: Tue Nov 01, 2016 9:59 am
by Benckj
I trust your recommendation. Quick search found shop which has in NZ at $200 which is rather expensive so will put onto my Christmas wish list.
http://detaildepot.co.nz/product/carpro ... boats-use/
Re: GDII's 1990 G-Limited
Posted: Tue Nov 01, 2016 10:17 am
by GDII
That stuff is for your paint. Not the same product but still in the C.Quartz range.
I am using this one for trim and wheels. Cheaper and a smaller bottle. I've only used a very small amount on my car and I haven't got many parts left that would need this coating.
http://detaildepot.co.nz/product/carpro ... rotection/
Re: GDII's 1990 G-Limited
Posted: Tue Nov 01, 2016 10:34 am
by Benckj
I see, my mistake. Yea $50 seems much more reasonable especially with your reports on how far it goes.
Re: GDII's 1990 G-Limited
Posted: Tue Nov 01, 2016 10:45 am
by DravidDavid
That's amazing! When my car is all painted and looking good, it will also be getting the mega detail. Definitely adding this to my list!
I don't think I'll use it on the wheels though. After my new ones get painted I think I'll be going the stoneguard route. It's going to be a pain in the arse wrapping them with the thick film, but I think it will be a better product in the long run for wheels. If you need stoneguard for your car, I can get it cheaper as I work in the industry. This quartz stuff looks the business for keeping rubber looking nice though. I know Mr.Shiny uses the $200 bottle glass coating stuff on his black beauty. A tad rich for me!
Re: GDII's 1990 G-Limited
Posted: Tue Nov 01, 2016 11:18 am
by GDII
I'm going to use Chemical Guys MAX COAT Wheel Guard on my wheels rather than this semi permanent coating. I'm still learning how to apply it and I don't want to ruin the wheels. A wax type product is safer for me right now as I know how it works and can be removed easily. Not that I want to remove the protection from the wheels but it's not like a paint that could easily be screwed up.
This stuff is not for rubber, it's a hard coating and will just crack off when if flexes.
Re: GDII's 1990 G-Limited
Posted: Tue Nov 01, 2016 12:13 pm
by DravidDavid
GDII wrote:I'm going to use Chemical Guys MAX COAT Wheel Guard on my wheels rather than this semi permanent coating. I'm still learning how to apply it and I don't want to ruin the wheels. A wax type product is safer for me right now as I know how it works and can be removed easily. Not that I want to remove the protection from the wheels but it's not like a paint that could easily be screwed up.
This stuff is not for rubber, it's a hard coating and will just crack off when if flexes.
Oh I thought the part around the bottom of the window was rubber. But the plastics look stunning too.

Re: GDII's 1990 G-Limited
Posted: Tue Nov 01, 2016 12:17 pm
by GDII
Well yes, it is but it's very stiff and absorbs it so may not do what I said. This isn't something that moves much really.
I think using it for tires or intake hoses and vacuum lines wouldn't be very clever. There are other products for that.
Re: GDII's 1990 G-Limited
Posted: Thu Nov 03, 2016 11:03 pm
by GDII
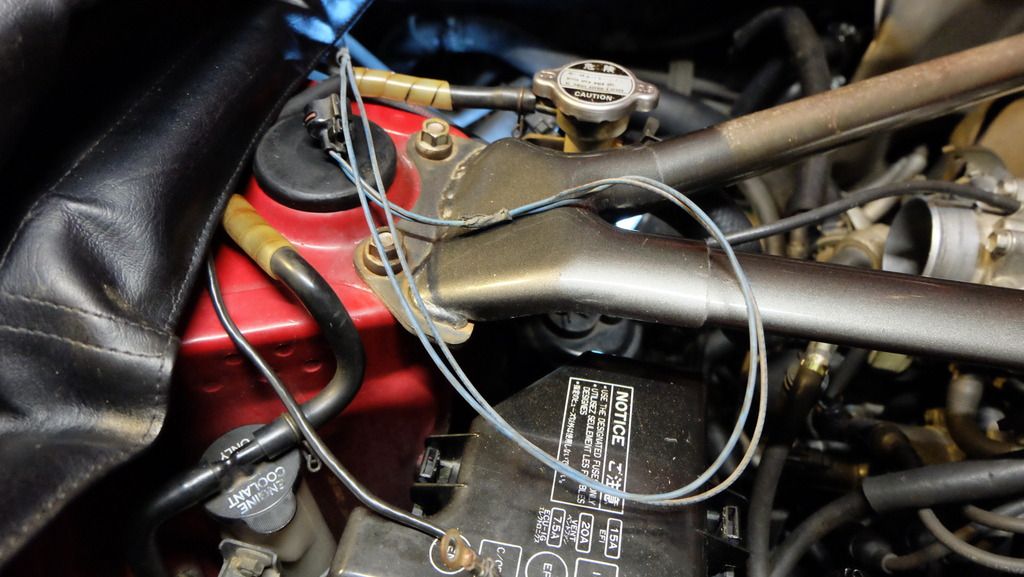
More 'new' stuff. This time it's only a small fix but a very important fix visually for the engine bay. Well, to me anyway.


The plastic loom tube covering the 2 wires for the engine bay temperature sensor was broken and so were the clips holding it to the engine lid. This like most things annoyed me so it had to be fixed. So a quick trip to pick a part to raid the MR2 there for bits. This one had the front cut off just in front of the suspension towers and didn't have much left in it worth taking. Luckily it still had a perfect condition loom tube for this wire on it. I had previously taken the clips off the other MR2 while I was there last time but forgot to take the loom tube at the same time.
Before. I had taped it up but it looked horrible. The clips were also broken so not holding the wires in place. I even had a cable tie threaded through one clip.

Loom tube removed. Full of dust so wiped that off before putting the new stuff on.
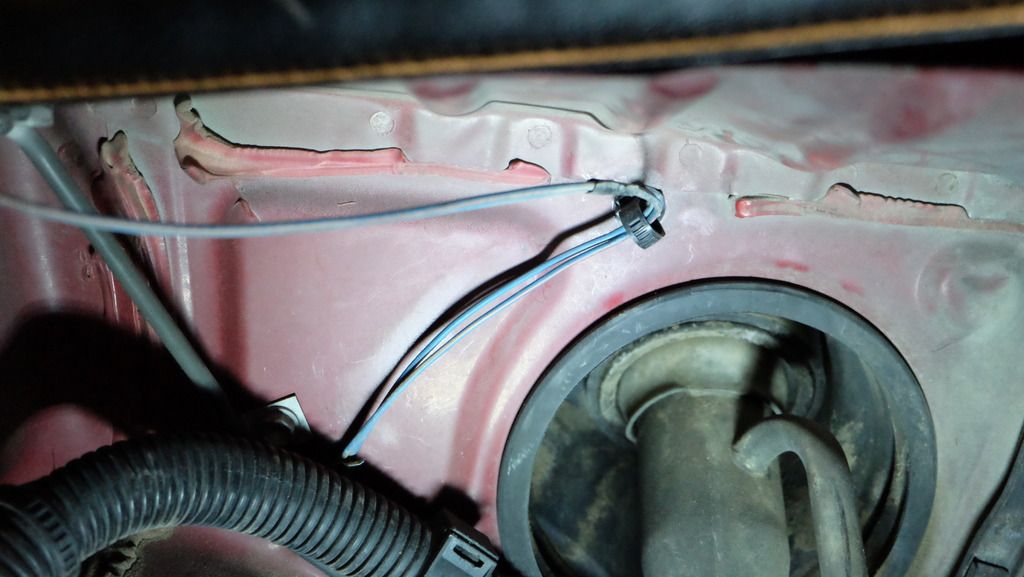
This little guy caused me a bit of trouble. I had to remove the air box and the large induction box to get access to it. I didn't want to break this one and trying to remove it from the car is almost impossible without doing that. So I had to pull the old loom tube out of the cable tie but this isn't easy as I'll show later on. Once I had the tube out I could insert a small flat head screw driver into the locking tab and then pull the clip open.
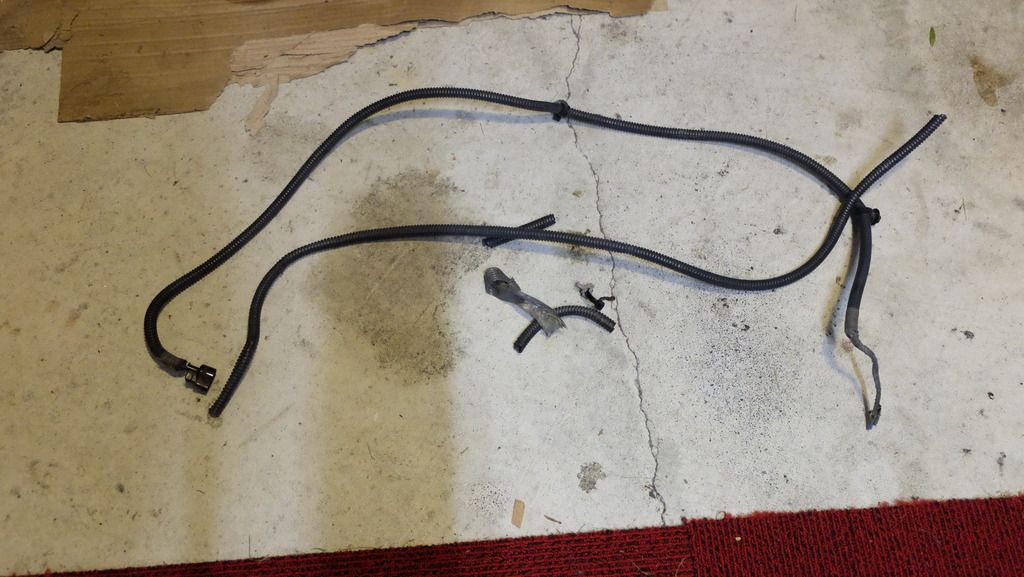
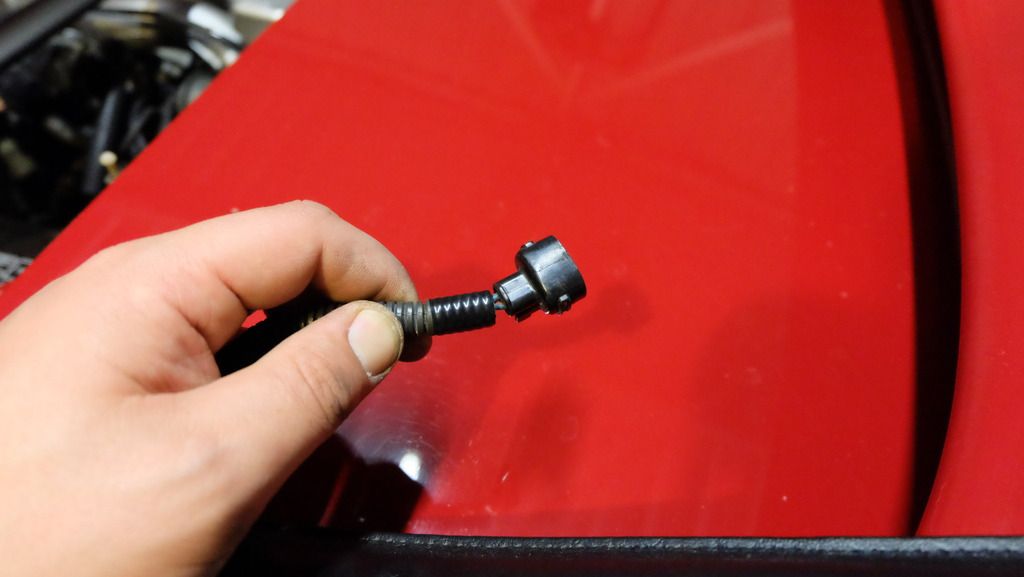
Old loom tube in many pieces with new one. The new one came with the wires and the plug. It will come in use later on I suspect.
Installing the new loom tube over the wires. As per factory, wrap the wire and loom tube in one piece of tape. First wrap the wires then put the loom tube over the top then wrap the tape over that to stop it from moving.
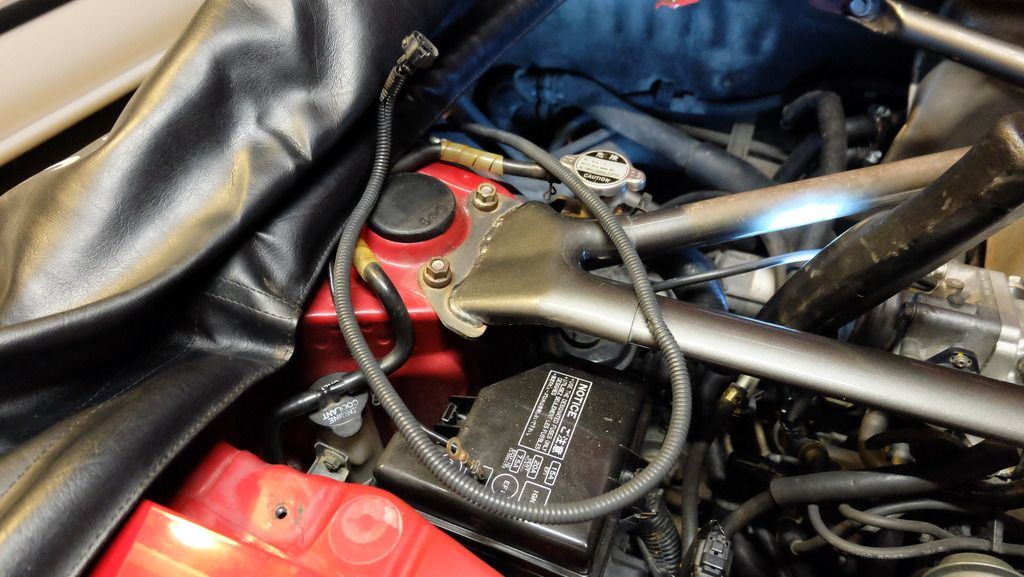
New loom tube installed. Looks much nicer.
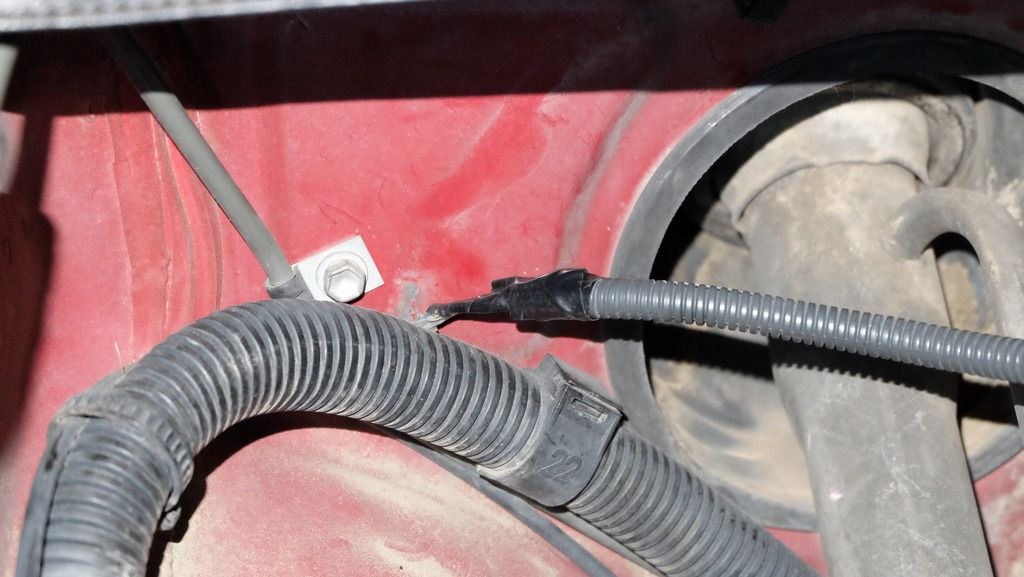
Taping the other end where the wires head into the main body loom.
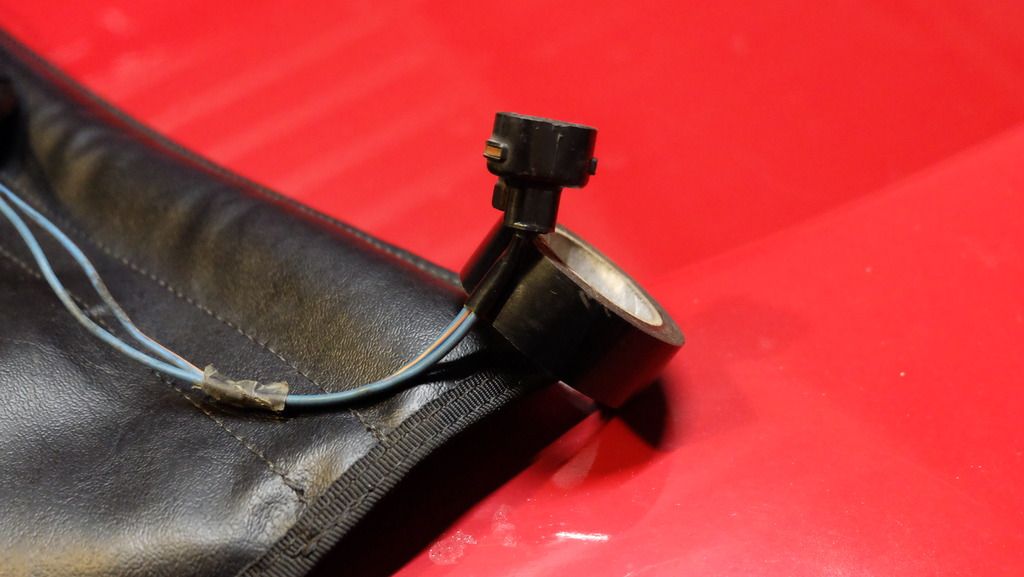
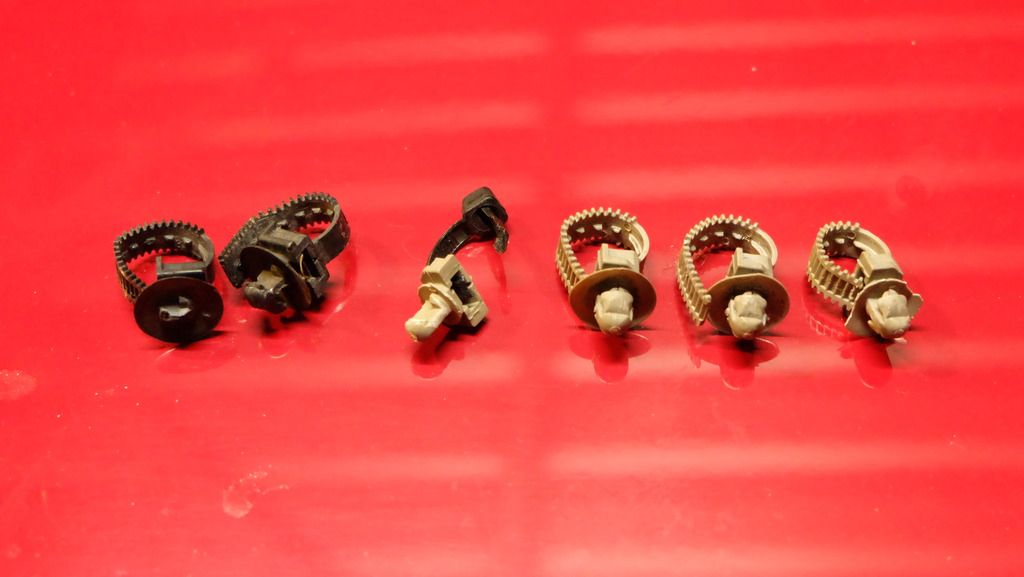
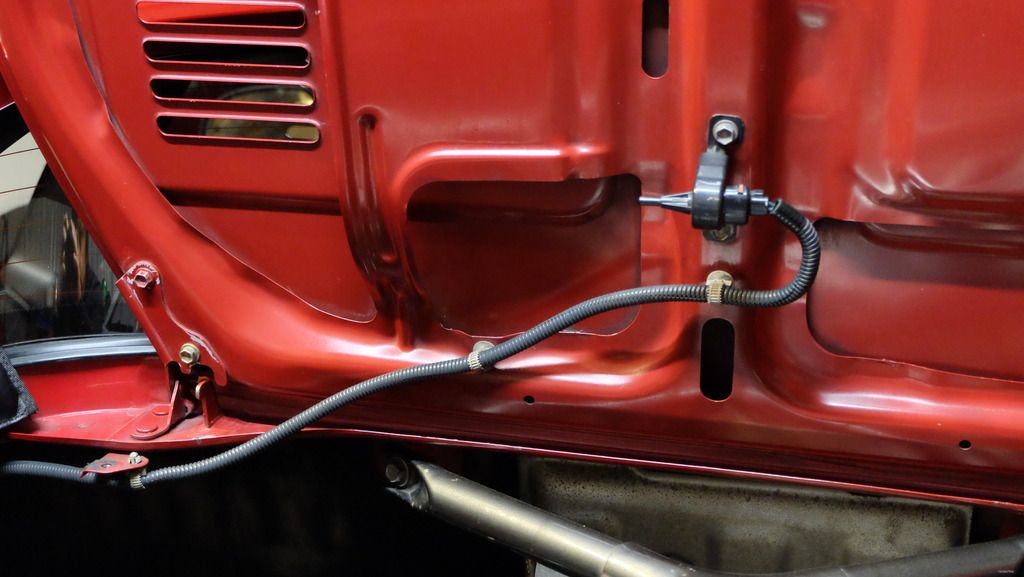
Here are the 'new' and old cable ties. You can see in the middle of the tie there are teeth. This stops the loom tube from sliding inside the cable tie. This is why I had trouble getting the old tube off. I knew about this from when I grabbed the ones from the other MR2 but it's in a difficult place to get at. Easiest way is to squeeze the tube to make it smaller than the cable tie teeth and slide it out bit by bit. I wanted to buy new ones but I haven't been able to find the part number for them and Toyota also weren't able to find what they are. The parts diagrams doesn't show them on the car or even show this type of cable tie in the images of clips and brackets.
And final install. Very happy with this.

Re: GDII's 1990 G-Limited
Posted: Sat Nov 05, 2016 9:49 pm
by GDII
Re: GDII's 1990 G-Limited
Posted: Sun Nov 06, 2016 3:39 am
by DravidDavid
Nice photos! I'm definitely doing the Japanese rising sun thing on my gas flap now!
Re: GDII's 1990 G-Limited
Posted: Sun Nov 06, 2016 12:10 pm
by Swampy
Great photos!
Re: GDII's 1990 G-Limited
Posted: Sun Nov 06, 2016 12:43 pm
by chief1eye
Great looking car. Real nice in red!
Re: GDII's 1990 G-Limited
Posted: Mon Nov 07, 2016 10:18 am
by Spykerwolf
LOL'd @ weedle.
Nice photos btw man, what camera/lense is that?


