TNR's AW11 (Finally!)

Want a thread dedicated to your car?
Got a seriously pimped-out ride? Building an extreme performance MR2? Post here!

Moderator: Moderators

Forum rules
This section of the forum is a great resource if you're looking for ideas, and it's a cool way of obtaining technical information that may otherwise not have been posted. (Members can use the Search functionality at top right of the forum to speed up finding things) Please respect others' contributions and don't diss anyone - keep comments helpful, factual, positive and polite. One thread per vehicle or owner please - don't start lots of threads about just one car. And if you need assistance with your car and want to host a spanner day, please use the appropriate section of the forum: http://mr2.org.nz/phpbb3/viewforum.php?f=35 Thank you.
TNR
Club Member - MR2OCNZ
Posts: 161
Joined: Sun Sep 13, 2015 6:03 pm
Stomping Ground: Auckland
Prime Mover: AW11
First name: TNR

Re: TNR's AW11 (Finally!)

Post by TNR »

Statek wrote:I've done my AW plenty of times, and a few SWs too, but always feel nervous about it. The best way (for me) to be sure, is after the first good bleed, take it for a blat up and down the road constantly watching the temp gauge so it doesn't start going above half way. Then let the car sit overnight (or until it cools), top up, rinse and repeat until no more water needs to be added. Even then, I'm still paranoid and watch the gauge like a hawk.
Because of my silvertop swap, I actually have two senders (and two gauges), one just before the thermostat and one just after. This way I can see when the thermostat opens (if at all) as the second gauge sits dead until flow starts going through - I find it quite handy, especially at the track 8) Definitely want to retain this after my next engine swap too.
Good advice, I'll remember it bleeding the system for the first time when its time.

BTW are you swapping to a blacktop top soon? I'm not sure if I'll fix the engine in mine or go blacktop.

User avatar
Statek
Club Member - MR2OCNZ
Posts: 590
Joined: Sat Oct 20, 2012 12:56 pm
Stomping Ground: Auckland
Prime Mover: Looking for an MR2
First name: Kris

Re: TNR's AW11 (Finally!)

Post by Statek »

TNR wrote:BTW are you swapping to a blacktop top soon? I'm not sure if I'll fix the engine in mine or go blacktop.
Hmmm... I'm still deciding, but I'm probably going to hunt for something a little newer, with a bit more power, but staying N/A and below 2 litres :wink:
1986 Toyota MR2 AW11 20v ST - SOLD
Image

TNR
Club Member - MR2OCNZ
Posts: 161
Joined: Sun Sep 13, 2015 6:03 pm
Stomping Ground: Auckland
Prime Mover: AW11
First name: TNR

Re: TNR's AW11 (Finally!)

Post by TNR »

Statek wrote:Hmmm... I'm still deciding, but I'm probably going to hunt for something a little newer, with a bit more power, but staying N/A and below 2 litres :wink:
Lol I think this means 2ZZ, that would be crazy.

TNR
Club Member - MR2OCNZ
Posts: 161
Joined: Sun Sep 13, 2015 6:03 pm
Stomping Ground: Auckland
Prime Mover: AW11
First name: TNR

Re: TNR's AW11 (Finally!)

Post by TNR »

Alright, I've been thinking about how to go about this.

I would prefer to rebuild the stock engine, however I've never done this before and don't wanted to spend money on the engine if its only good for scrap.
Does anyone know a good honest engine shop who can tell me how badly the head is warped, if its cracked or leaking, if the block needs honing or anything etc.

If its too far gone I might just go for a blacktop swap.

Thanks.

User avatar
Ash Kelly Barr
Club Member - MR2OCNZ
Posts: 838
Joined: Sun Dec 29, 2013 10:12 am
Stomping Ground: Auckland
Prime Mover: AW11
First name: Ash

Re: TNR's AW11 (Finally!)

Post by Ash Kelly Barr »

I'm using the guys at marsh motor sport for mine
Toyota motors:
Current - 89 AW11 factory manual SC
Sold - 74 Toyota Crown wagon (MS63), Holden 308, TH400 trans

TNR
Club Member - MR2OCNZ
Posts: 161
Joined: Sun Sep 13, 2015 6:03 pm
Stomping Ground: Auckland
Prime Mover: AW11
First name: TNR

Re: TNR's AW11 (Finally!)

Post by TNR »

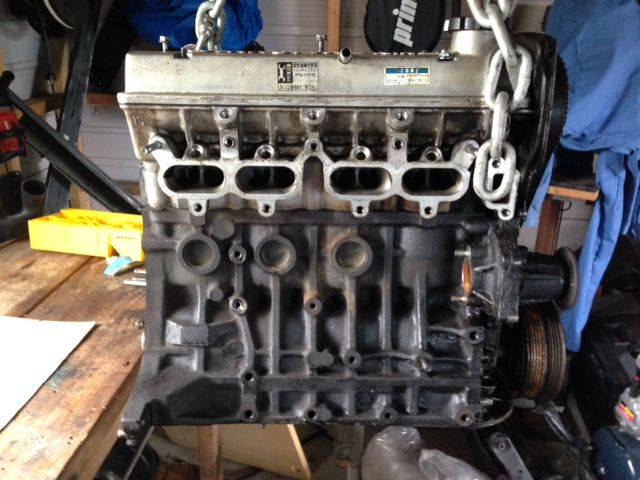
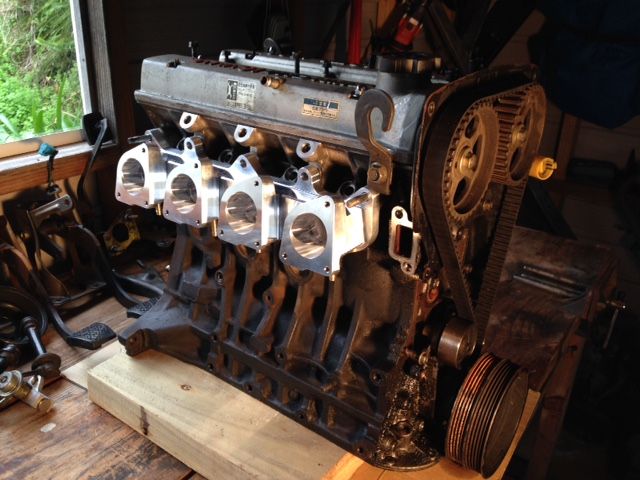
Just to share whats been happening, I will be staying with a 4AGE 16V but it will most likely be a replacement engine. I'll keep my engine for a rebuild in the future. By future I mean long term plans, nothing anytime soon.
Reason being that I thought the car was fun enough with the stock engine and autobox, so with a manual it will be more than enough fun. Also I want to keep the car mostly original with a few light modifications.

I'm pretty busy with uni this year but I have been working on the car little by little, just doing small jobs that need to be done for the manual swap + engine replacement.

The engine and box still aren't out, but its almost ready to happen.

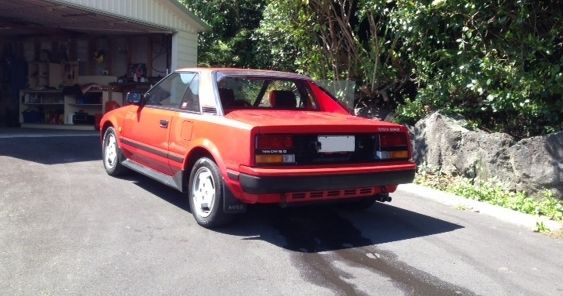
Removed the rear spoiler to make it easier to work on (this was the last time the car was outside the garage):
Image

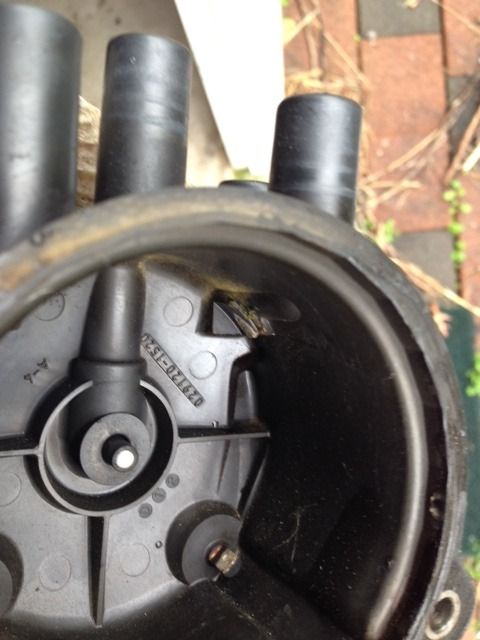
Removing parts/lines/wires:
Image

Image

Image

Image

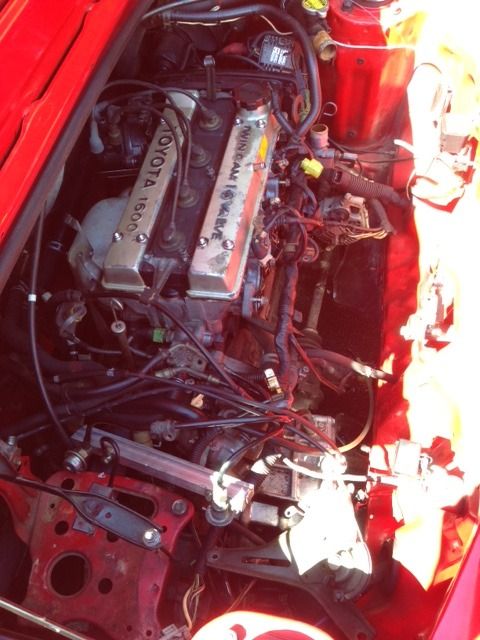
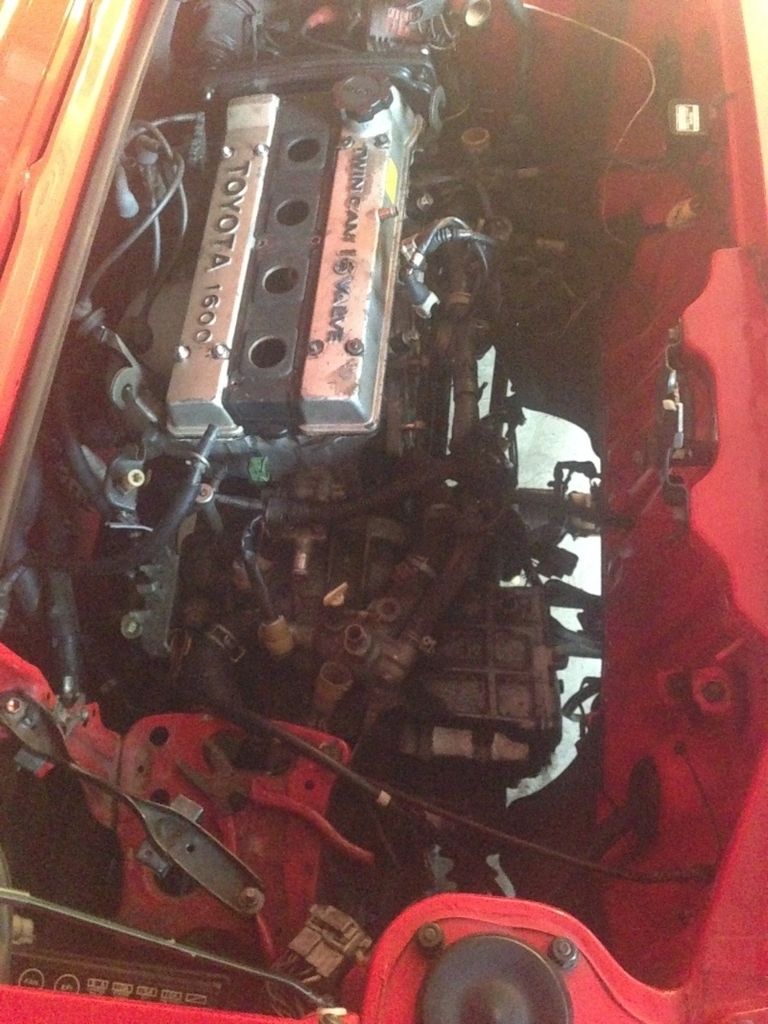
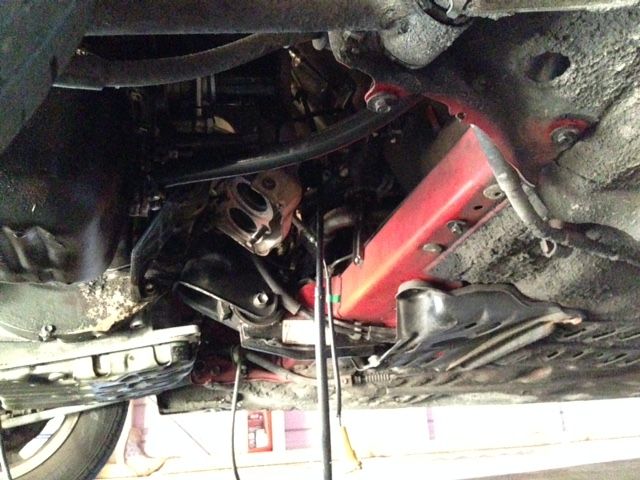
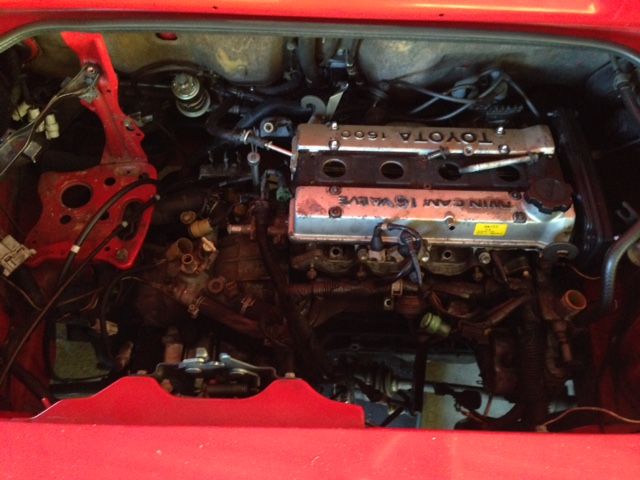
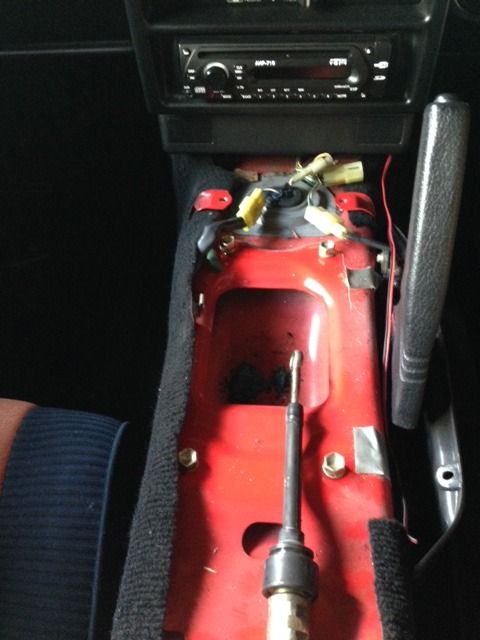
This is currently how the engine bay is. I need to remove the axles from the wheels (apparently the wheels should not be loaded after removing the axles according to manual? or maybe I just read it incorrectly since I was scanning). Also need to remove start cable connectors which seems a little difficult, after this I can probably drop the engine and box.

Like I said I'm pretty busy and because I couldn't find time to drop the engine, I did some other jobs instead.


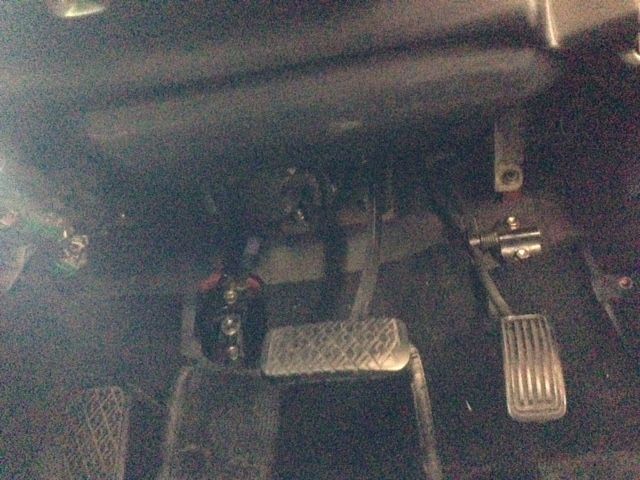
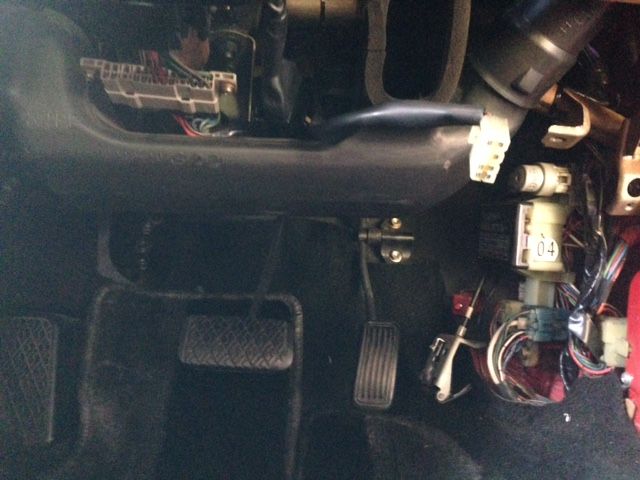
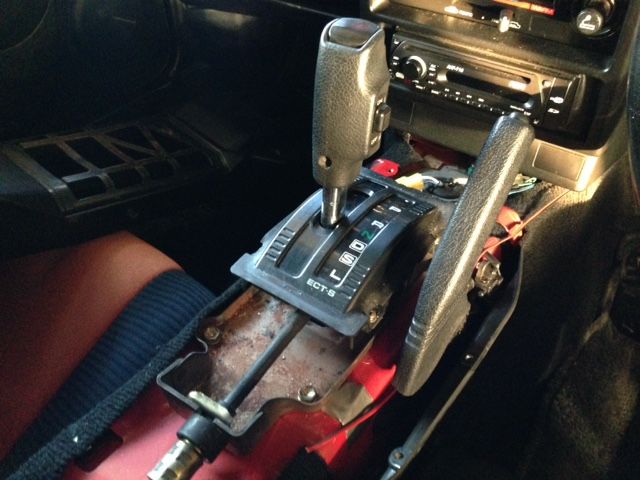
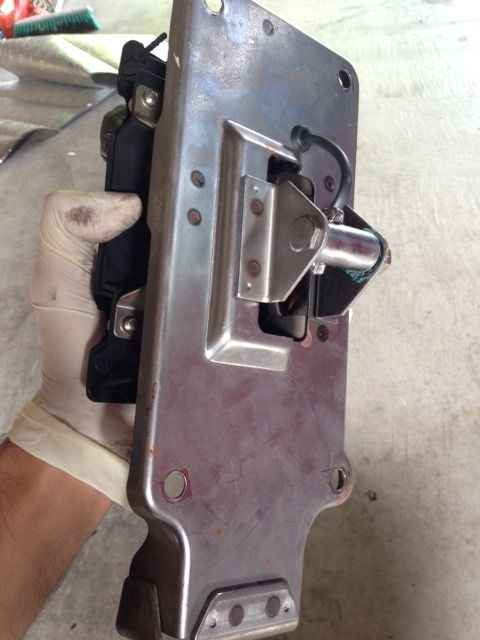
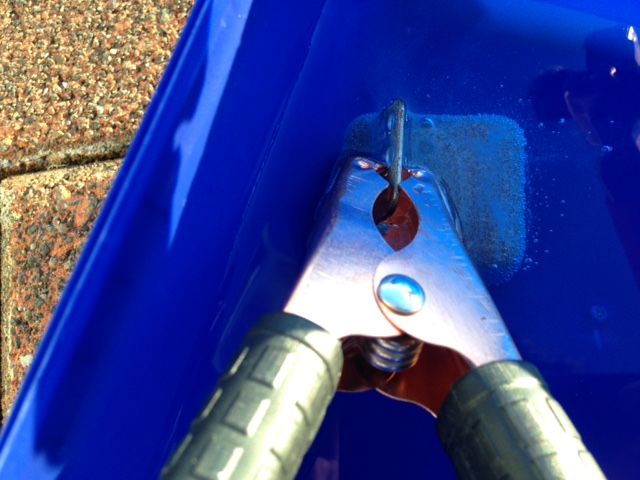
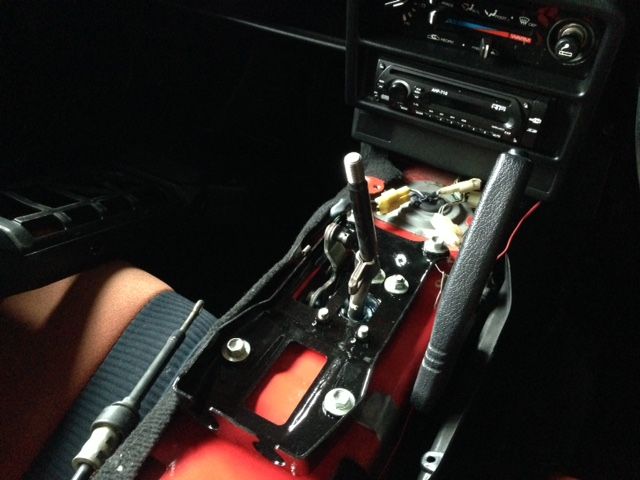
Like removing auto shifter:

Image

Image

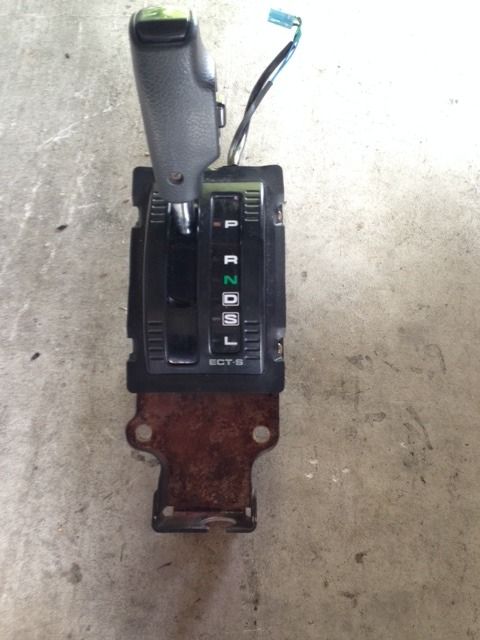
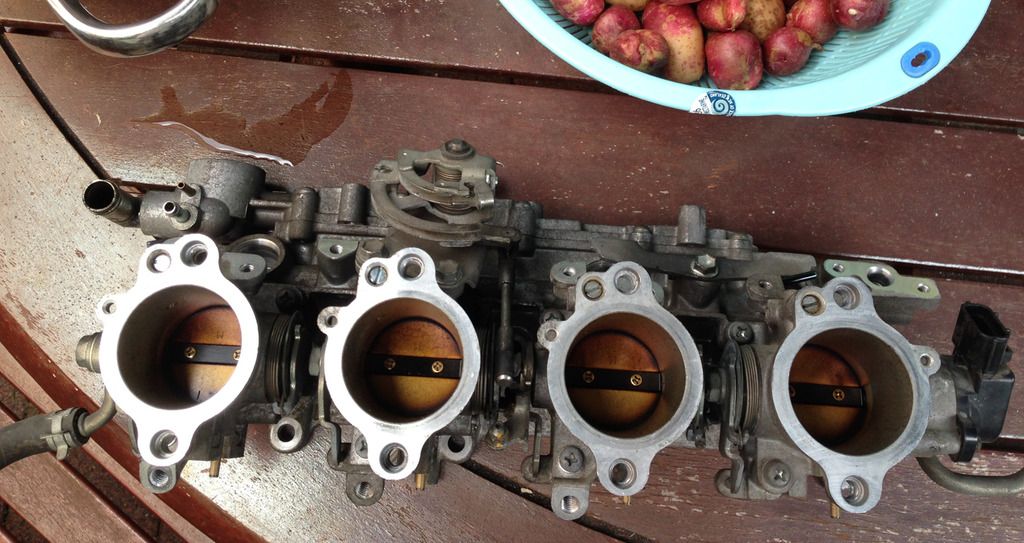
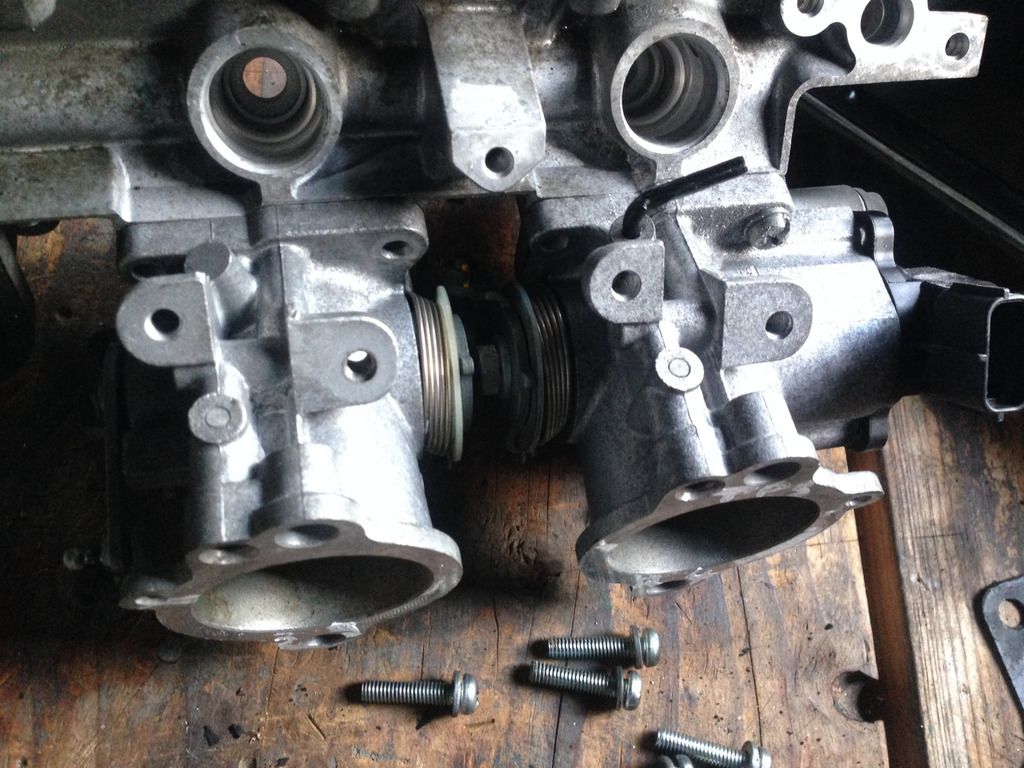
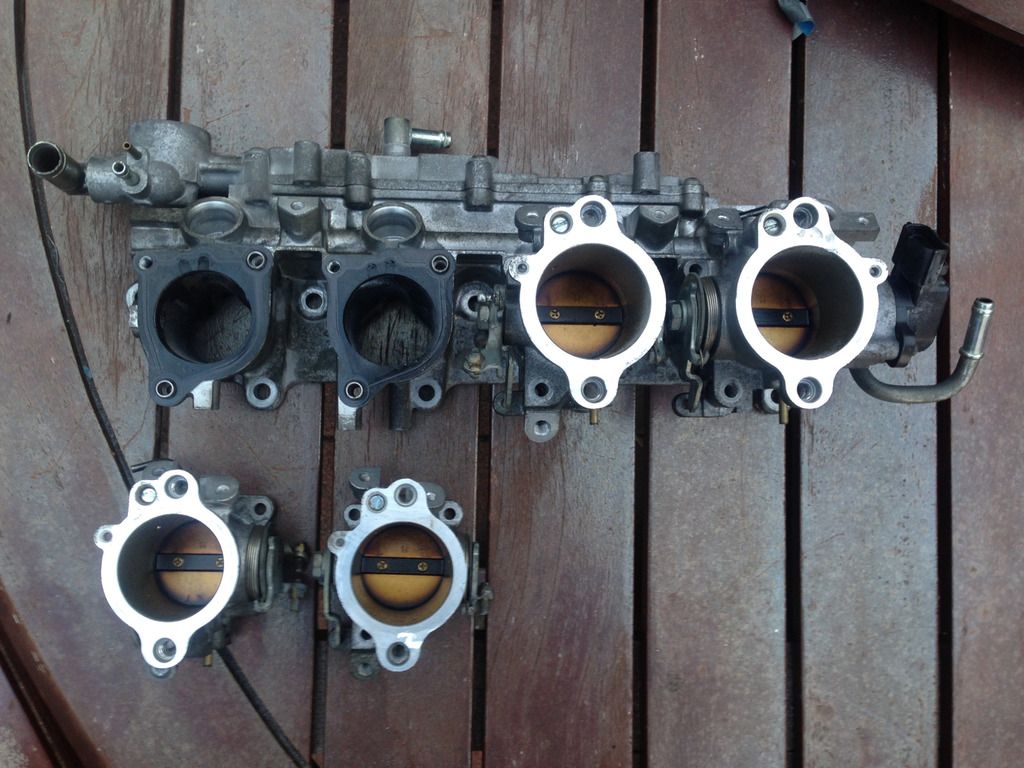
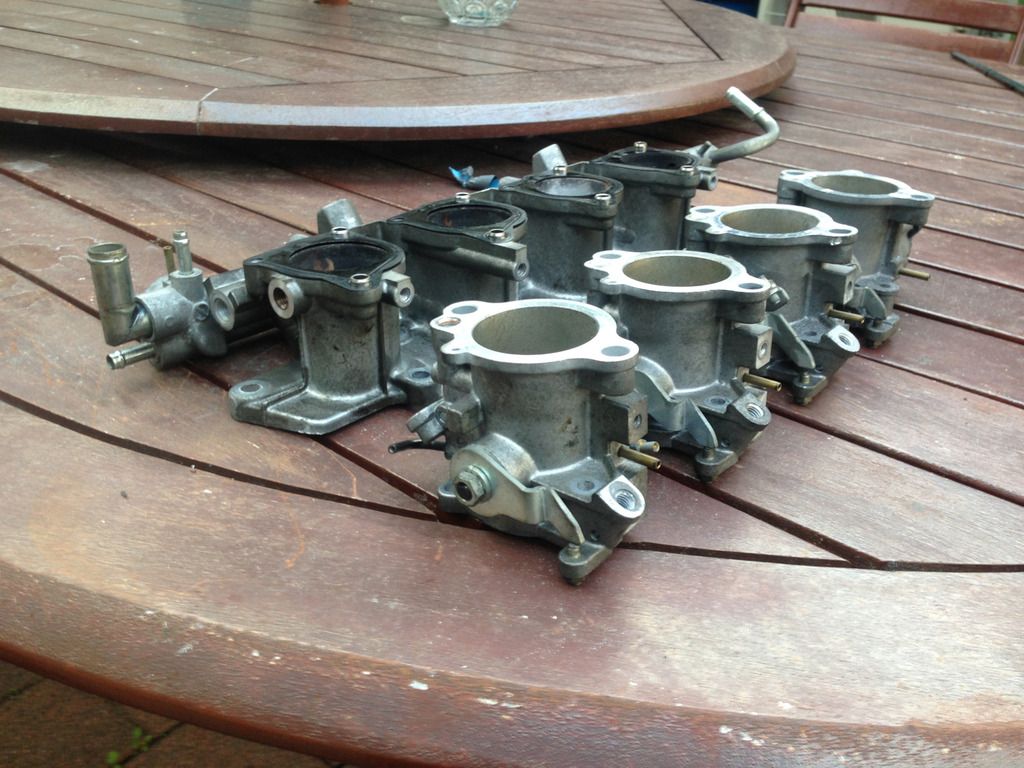
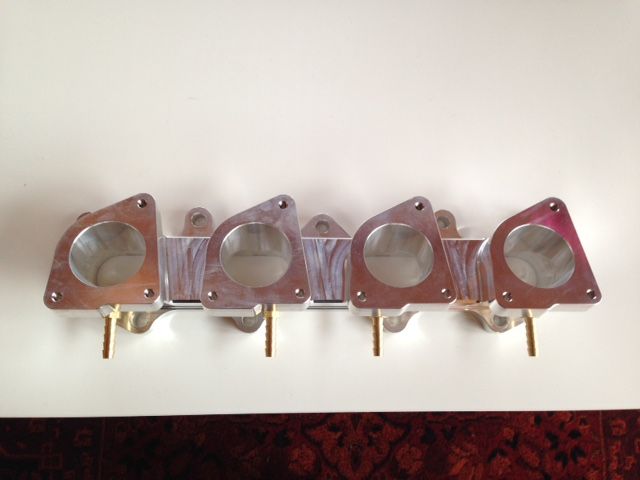
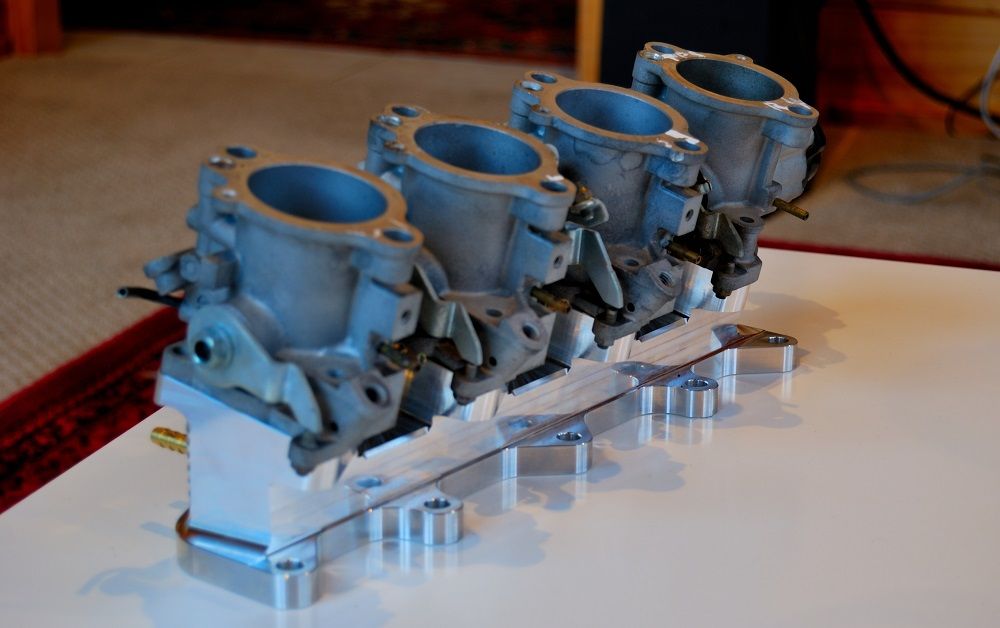
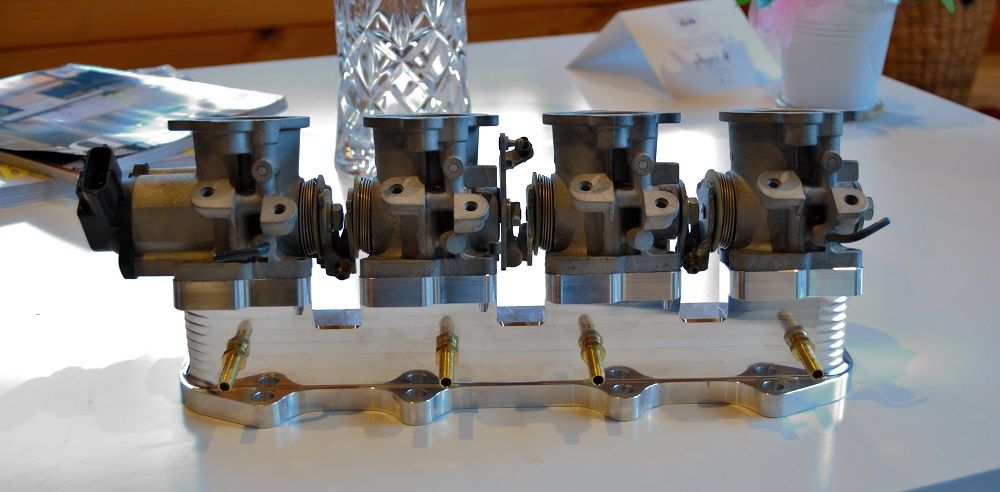
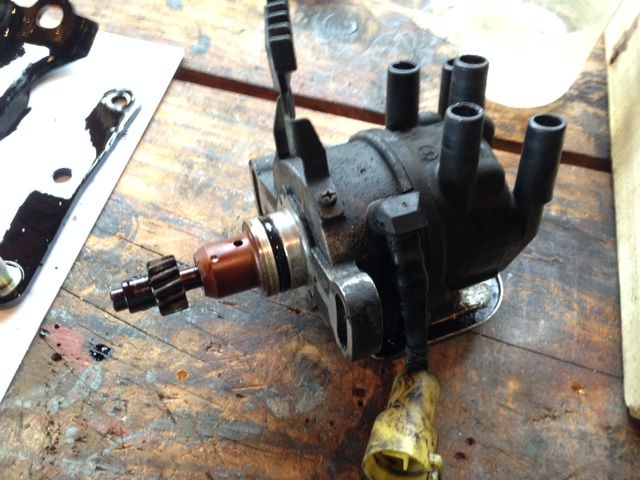
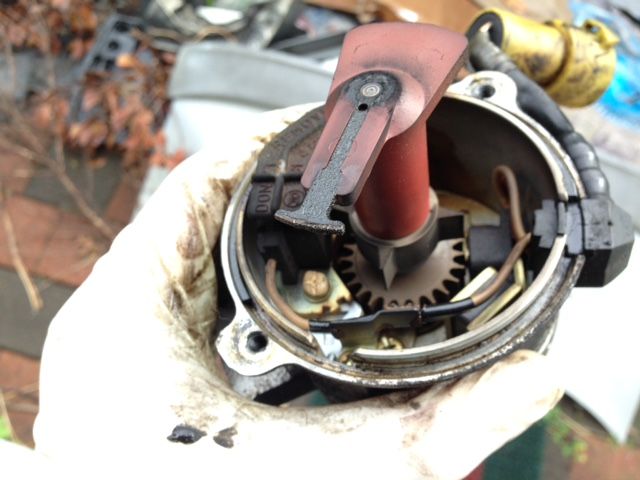
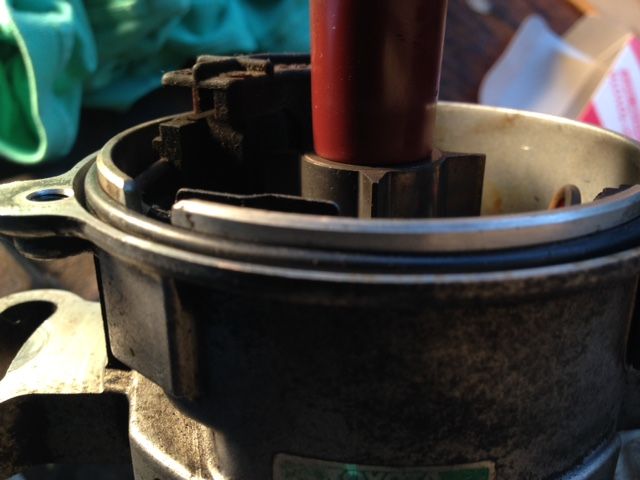
Cool to see stuff like this made of metal, now a days everything seems to be plastic:
Image

Image


A while ago I stumbled across a facelift AW at Zebra parts. I shared the find in the parts section, see here: http://mr2.org.nz/phpbb3/viewtopic.php?f=5&t=13544. I got a few bits and pieces from that car...
It was actually kind of unnecessary since after that I just bought a complete manual swap from user "vcut214", his parts were in nicer condition than the zebra parts car too. Thank you vcut214 by the way, appreciate it. So now I have two of certain parts... oh well.

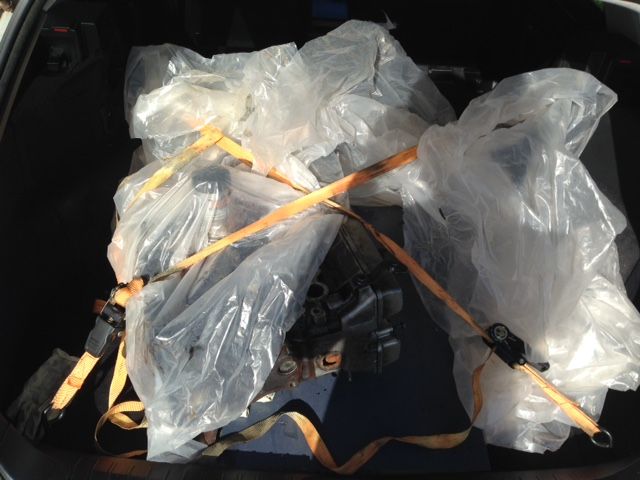
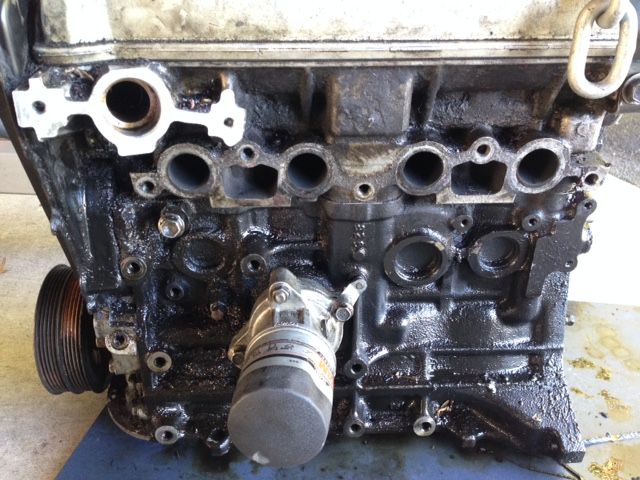
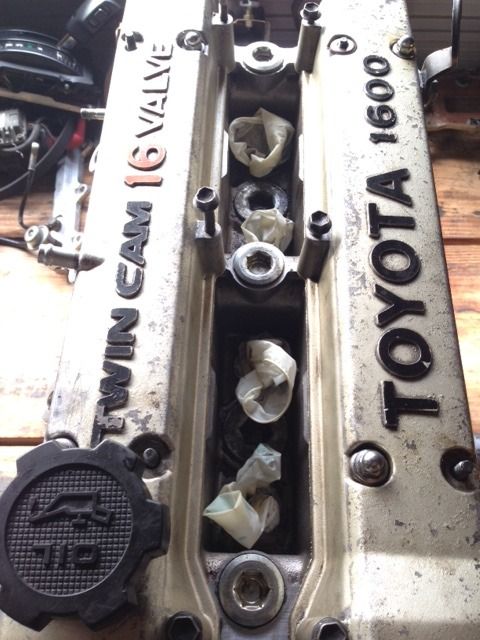
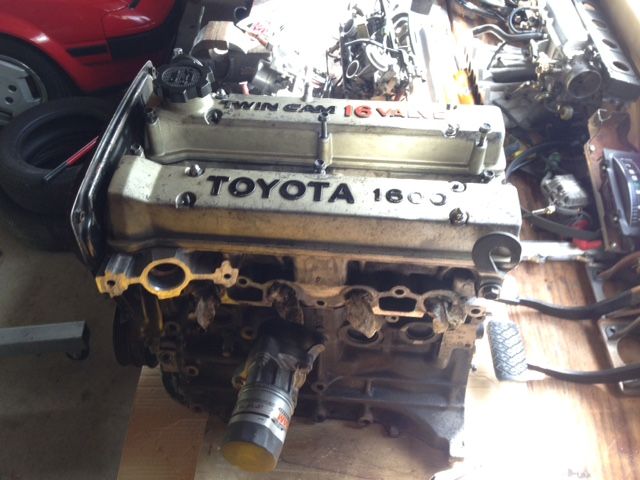
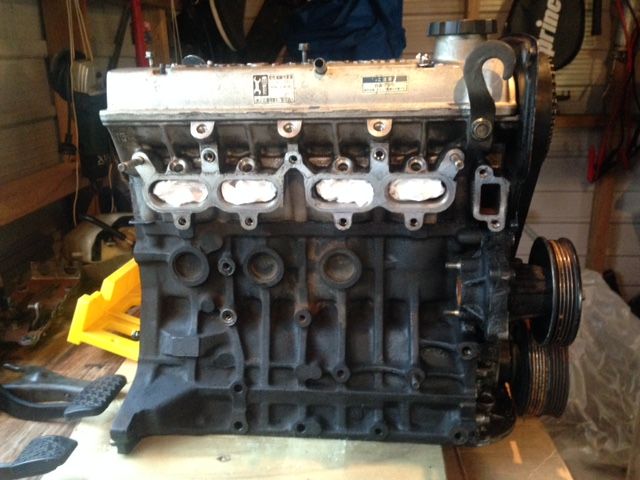
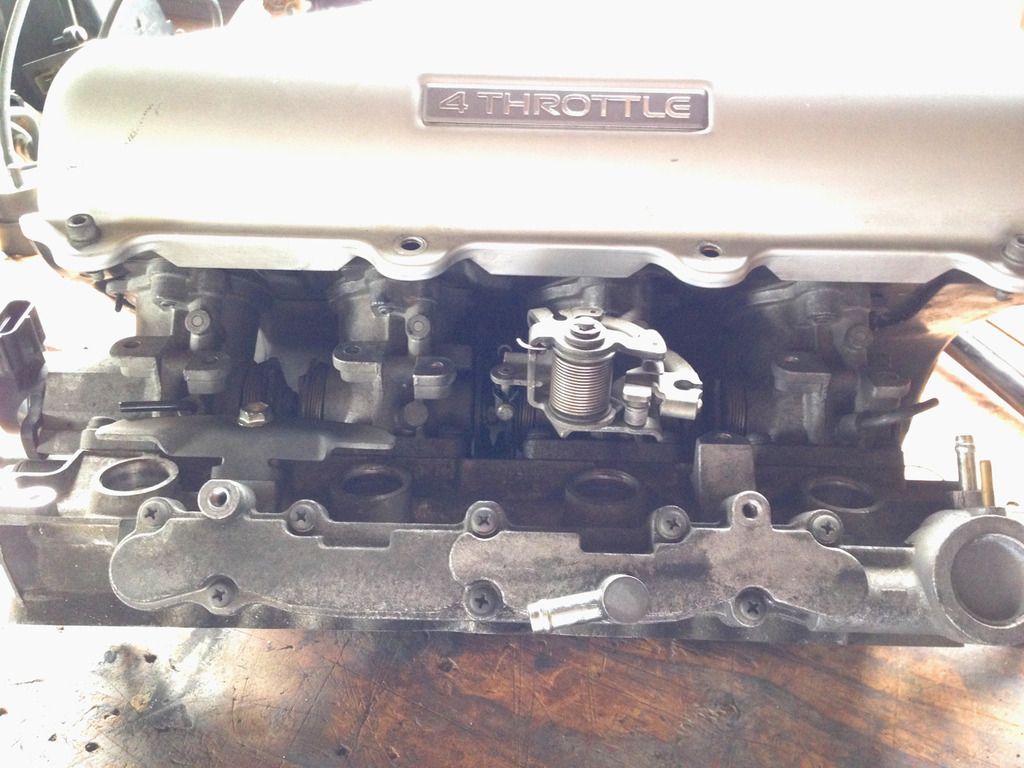
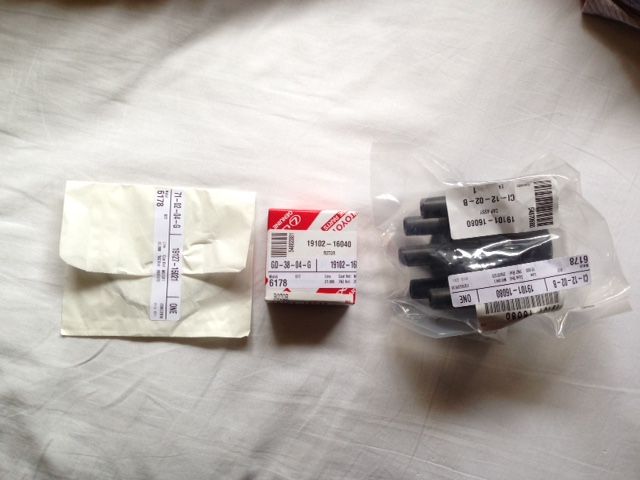
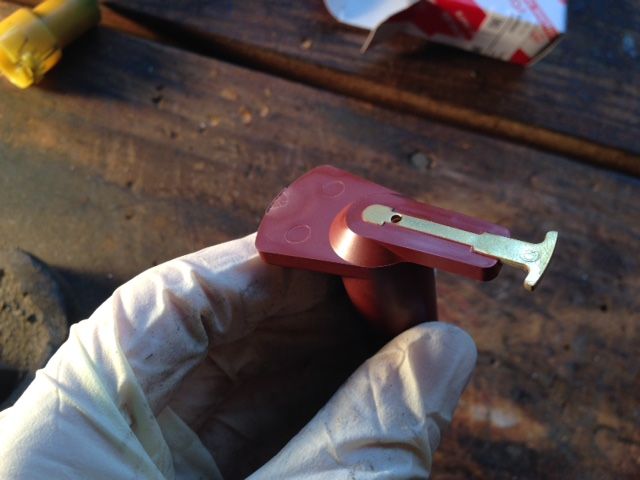
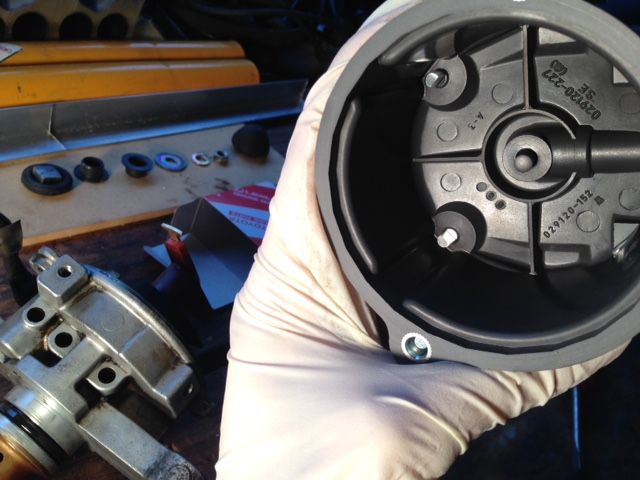
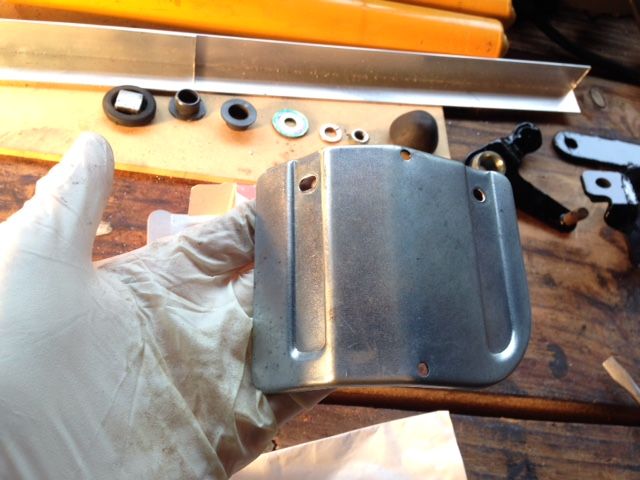
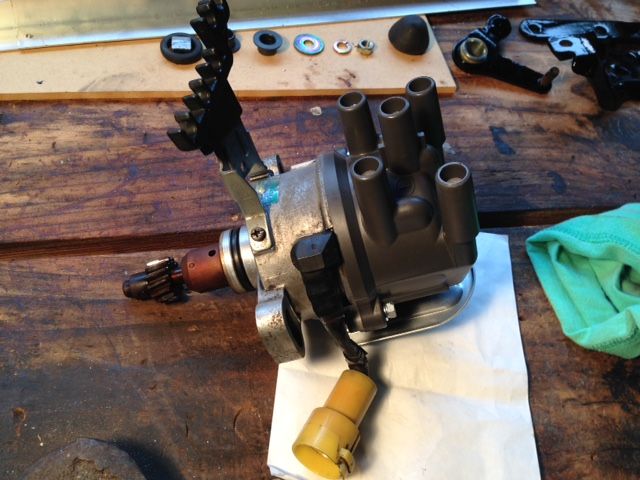
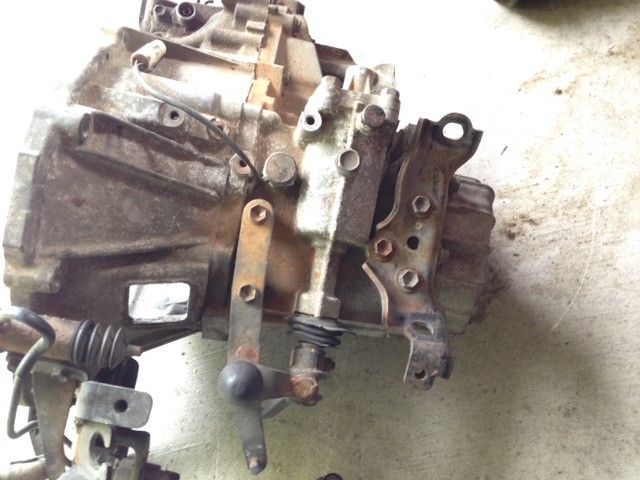
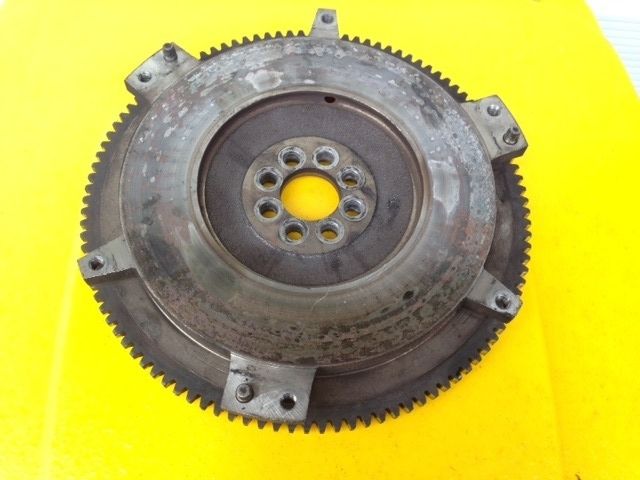
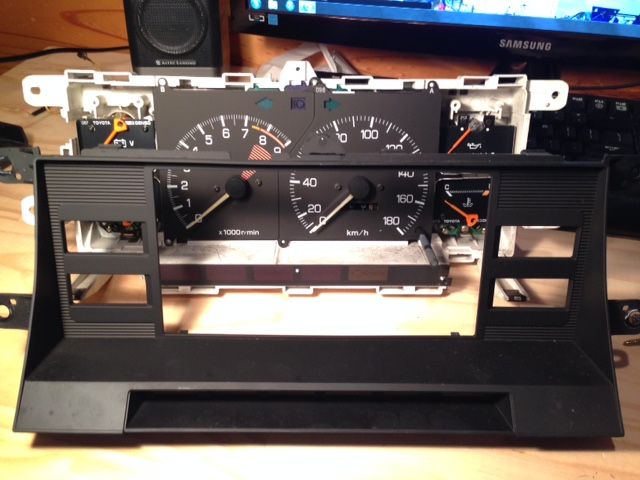
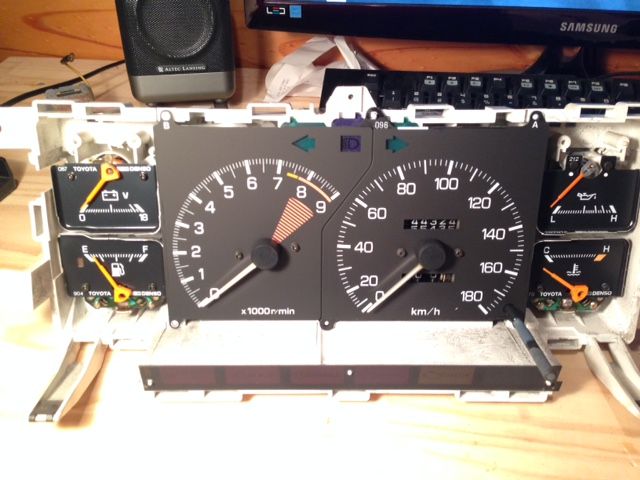
Here are the manual swap parts:
Image

Image

Image

Image

Image

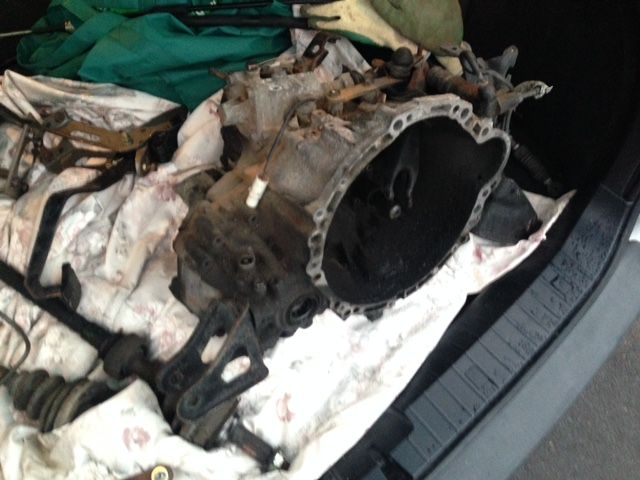
Actually everything above apart from the gearbox was from the zebra parts car, I didn't take pics of the parts I got from user "vcut214" which are the parts I will be using.
NOTE: I know these aren't all the parts required, I just don't have pics of everything.

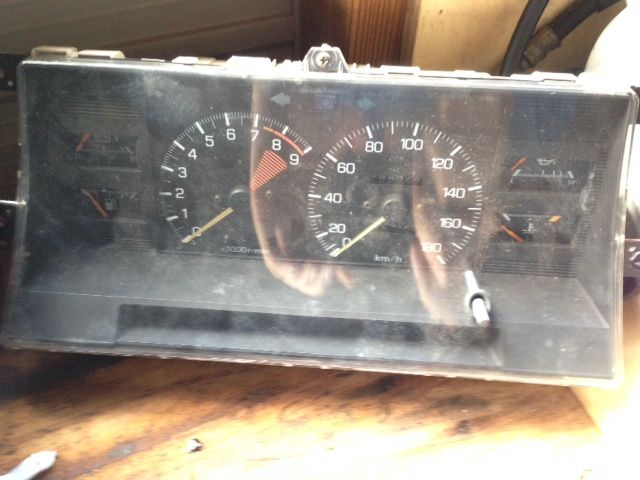
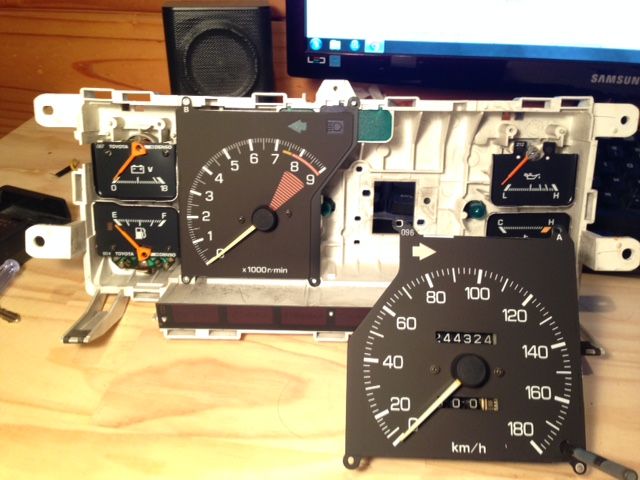
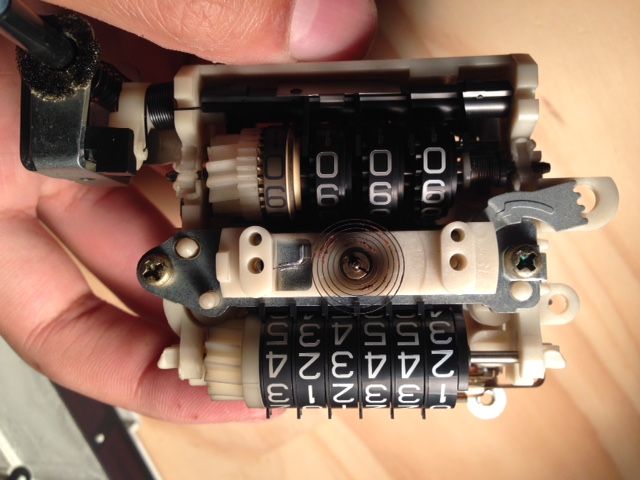
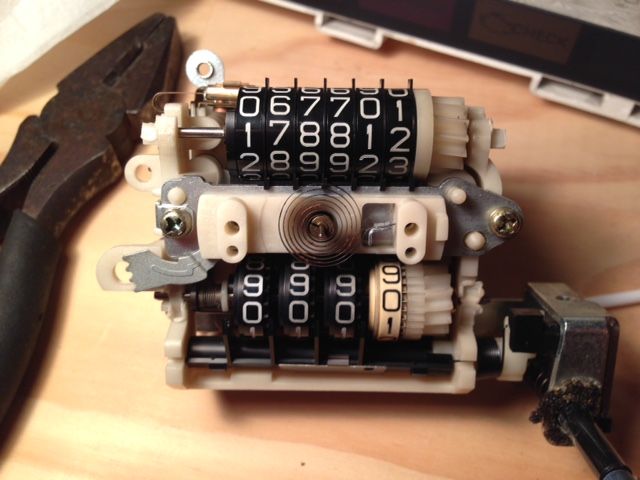
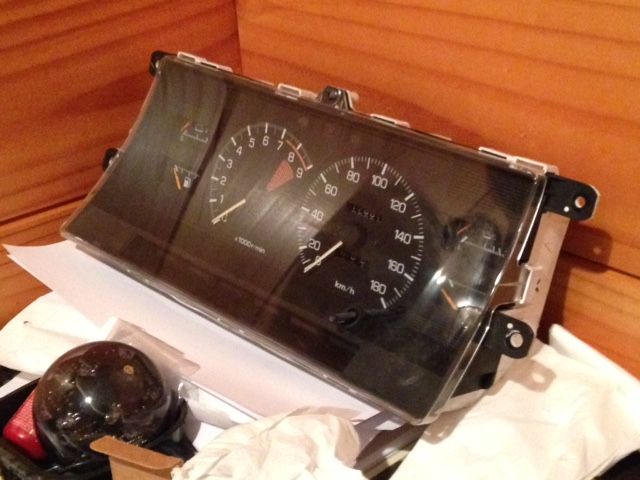
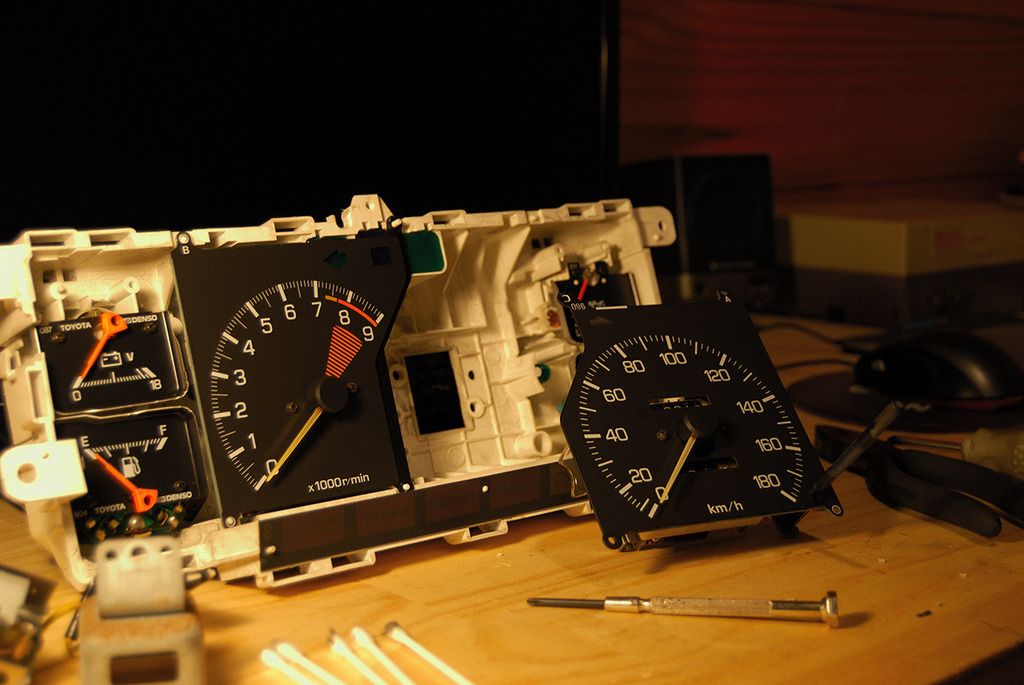
I wanted the replacement odometer to match the kilometers exactly of my car. So that's what I did. By the way, I want to change to a manual odometer so I can have a volt meter and the cool red stripes on the tacho. That is reason enough for me.

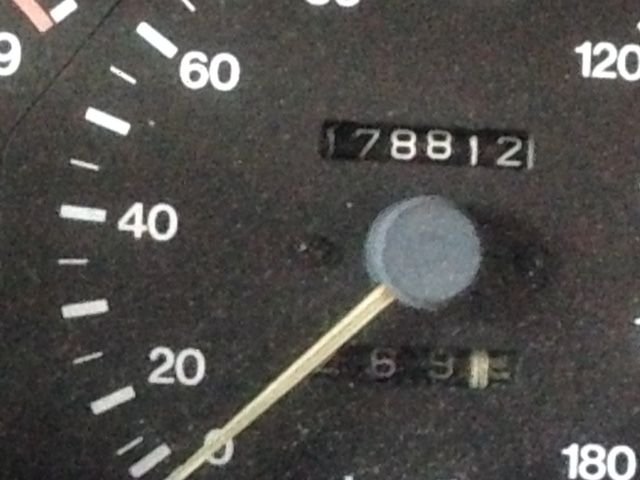
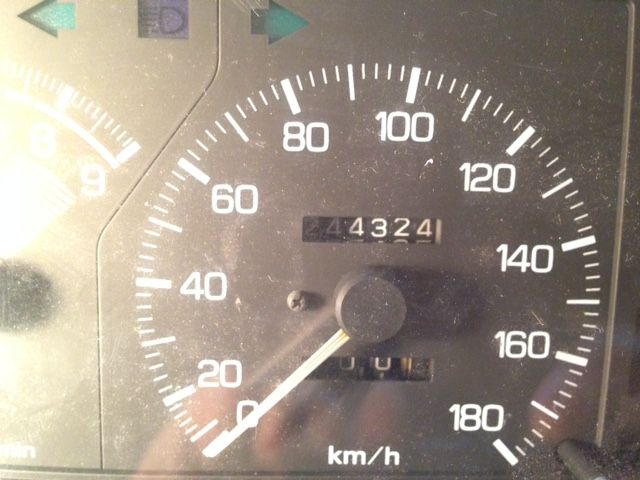
My cars odo reading:
Image

Replacement meters reading:
Image

Image

Image

Image

Image

Image

Image

Image

Image

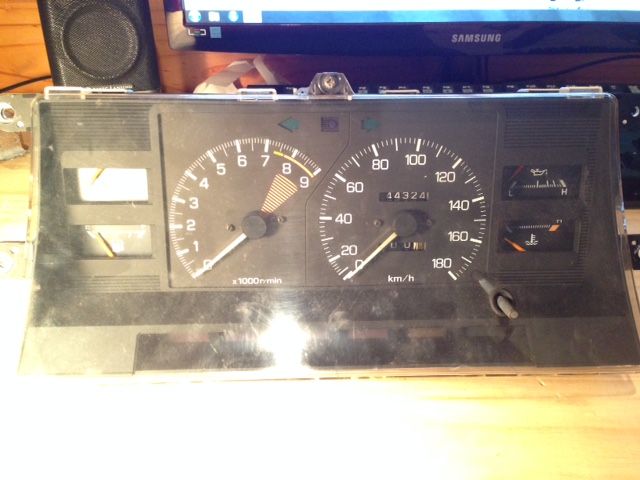
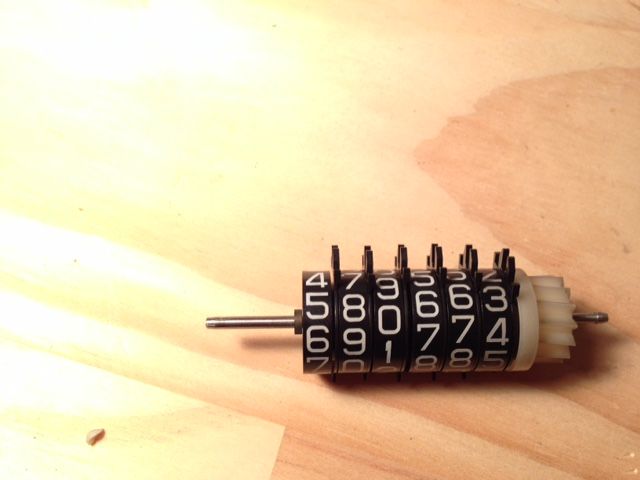
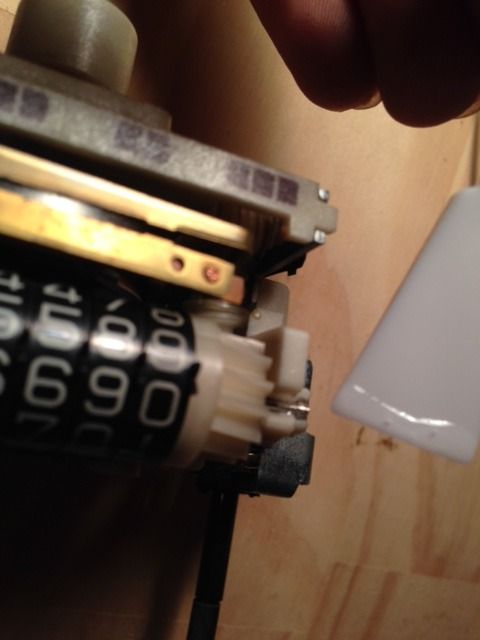
New reading which matches exactly with my cars reading:
Image

Image


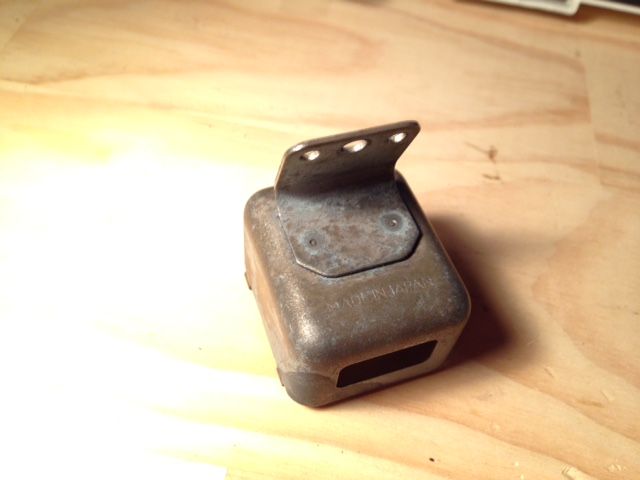
On the back of the instrument cluster there is a speed warning chime often found on old Japanese cars. The cover had quite a bit of surface rust so I decided to clean it up a little:

Image

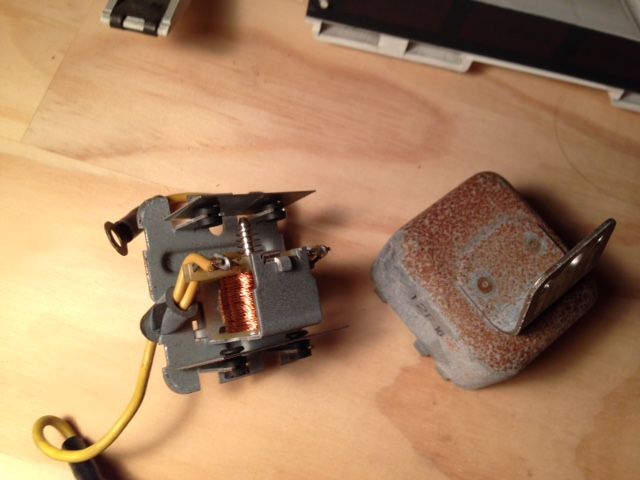
The method I used was electrolysis because I was too lazy to sand it:
Image

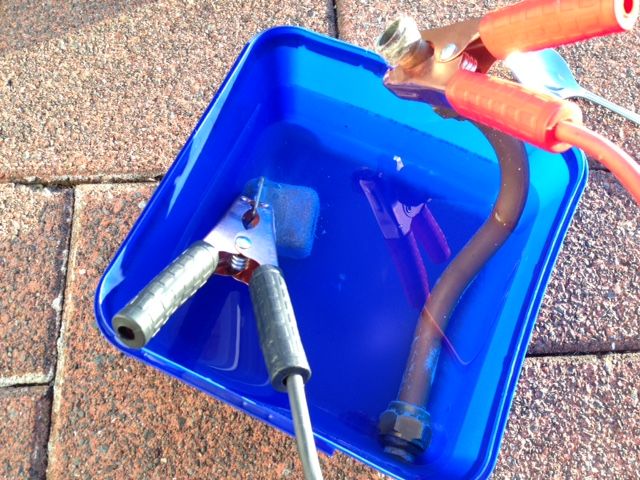
bubbles are hydrogen and oxygen gas:
Image

Finished result, not bad I'd say. It was actually very smooth:
Image


Just on the side, here is a video I took of the chime in action. Again I think its pretty cool to see things like this, never see them on newer cars:


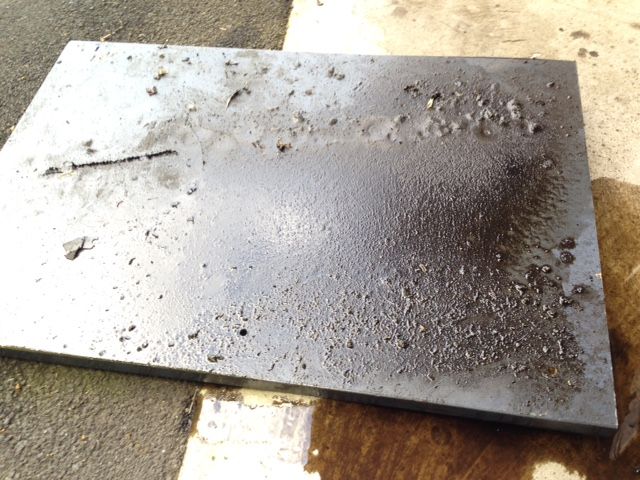
Here is just a random pic I took which I thought looked kind of cool:
Image


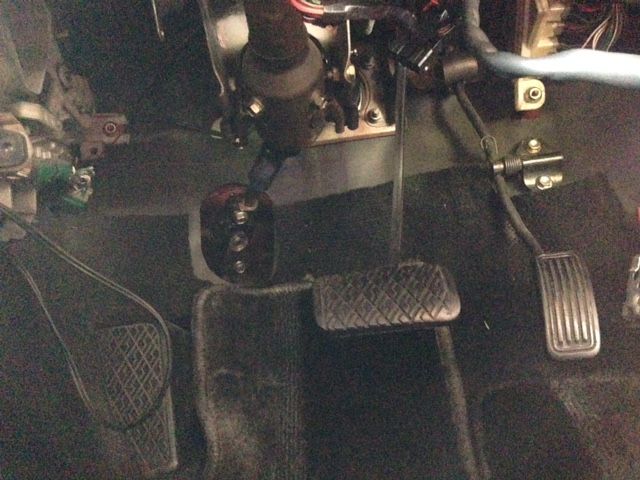
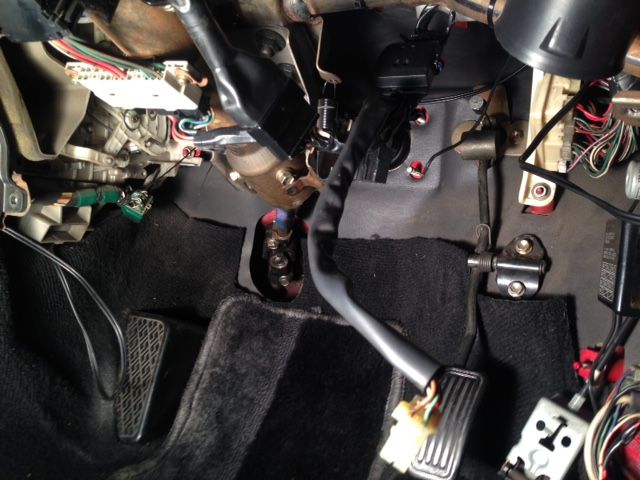
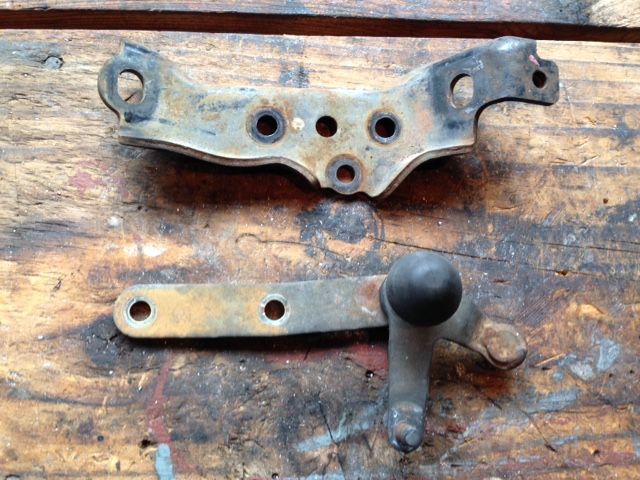
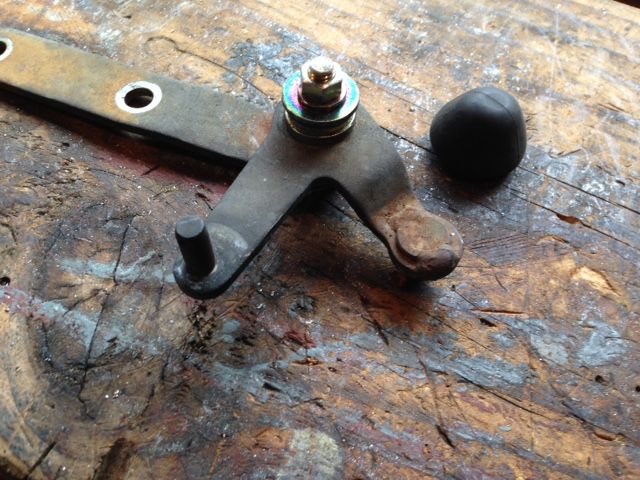
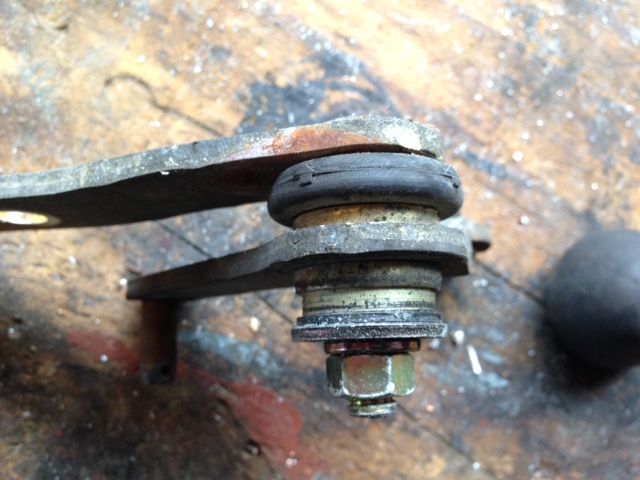
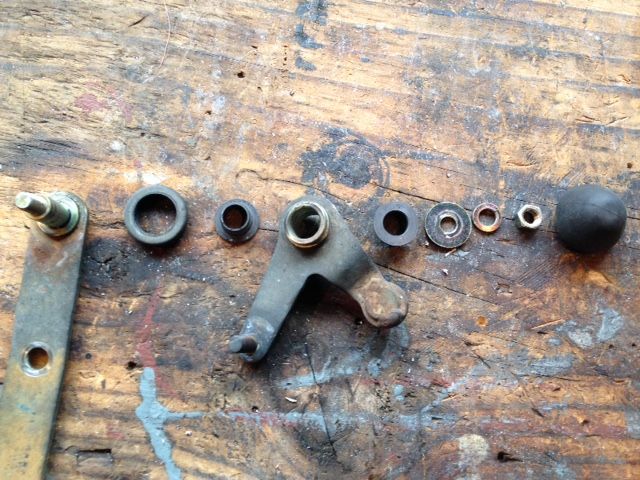
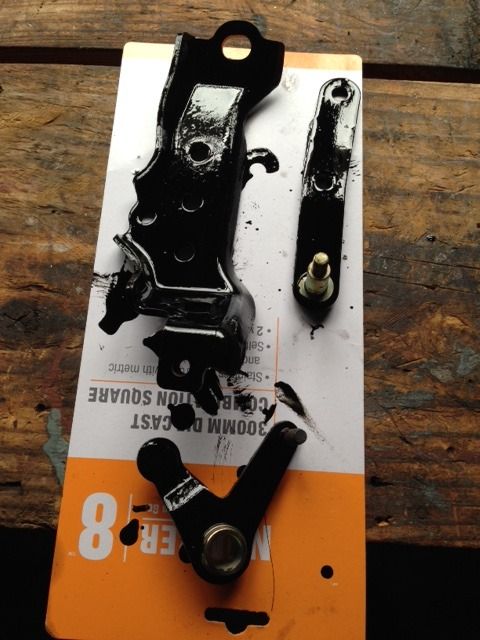
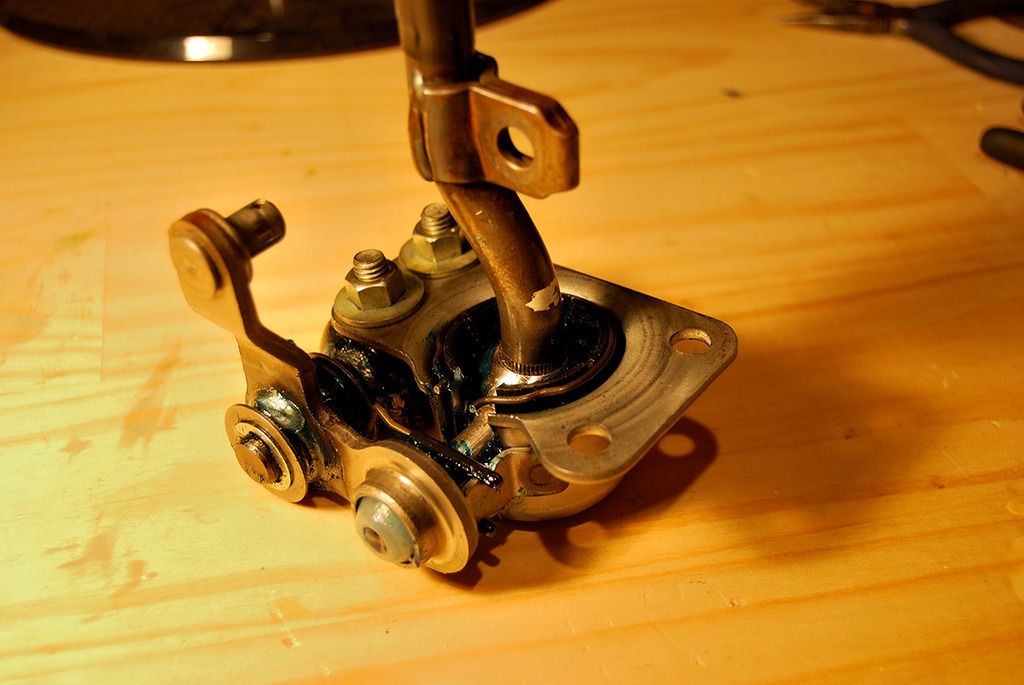
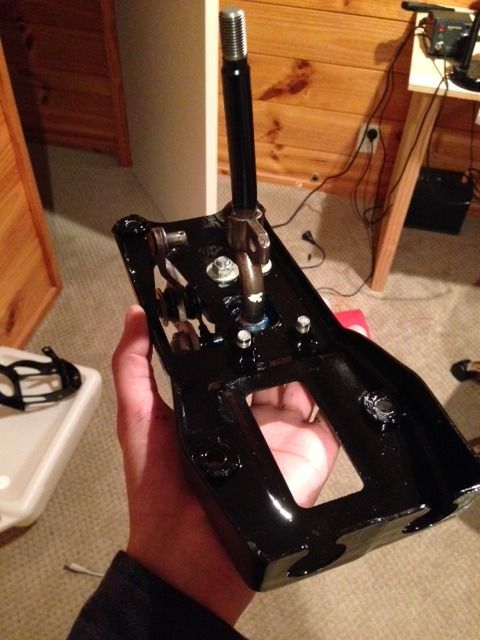
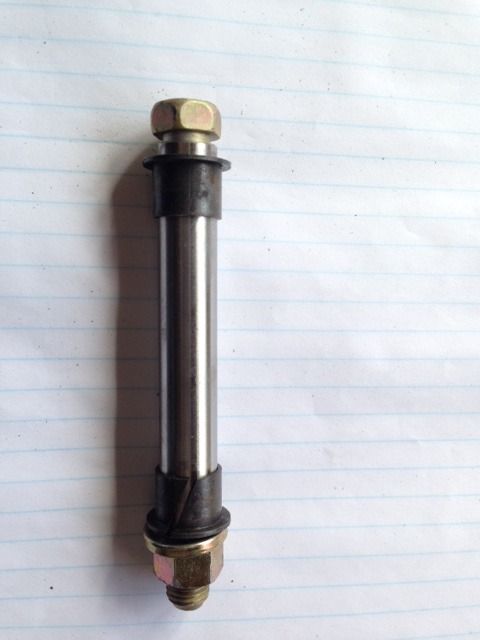
Alright so more recently I cleaned up and refreshed the shifter mechanism:

Image

Image

Image

Image


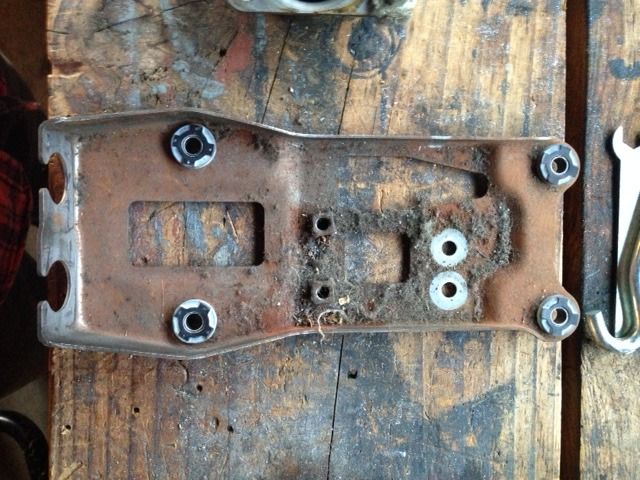
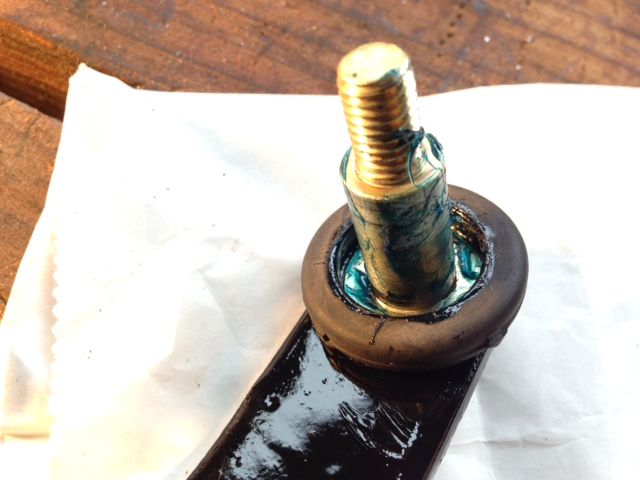
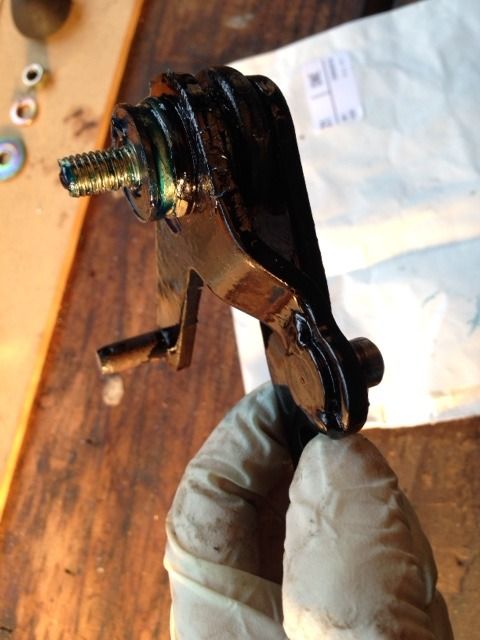
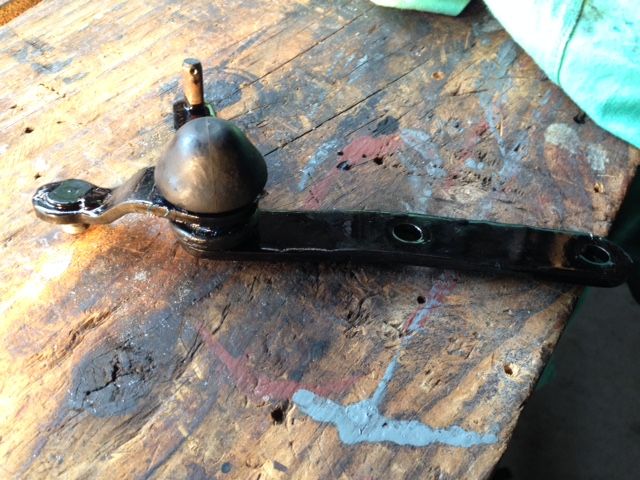
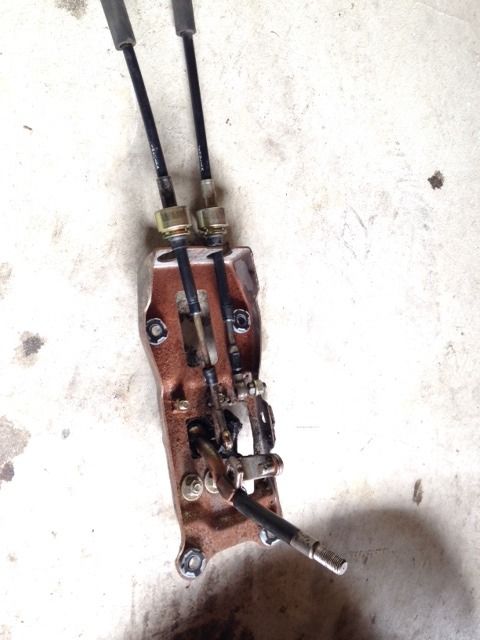
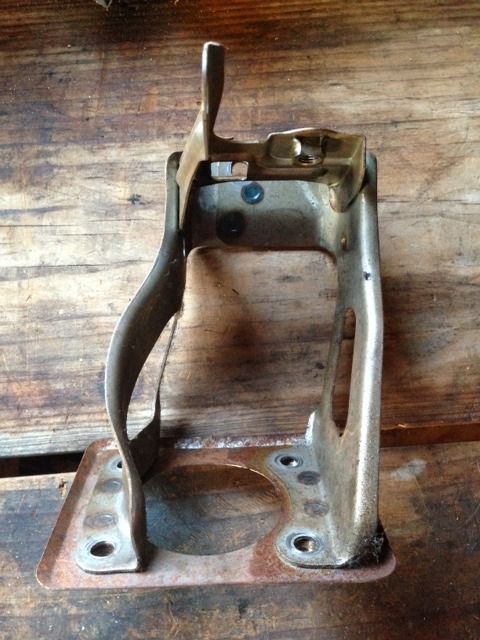
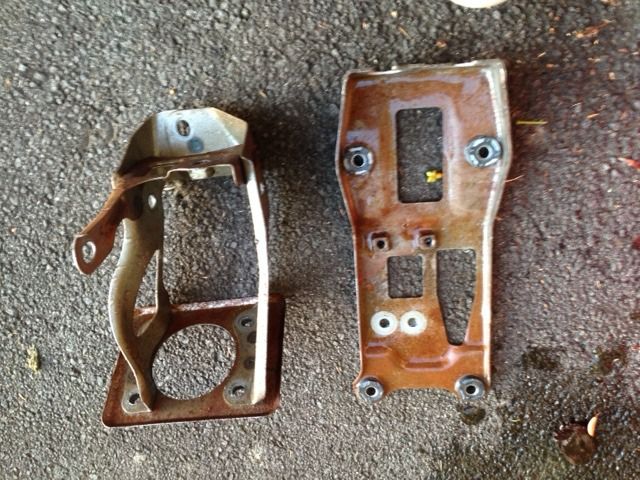
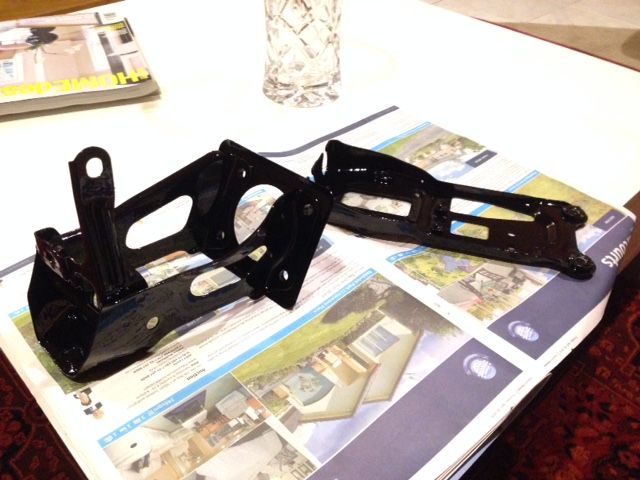
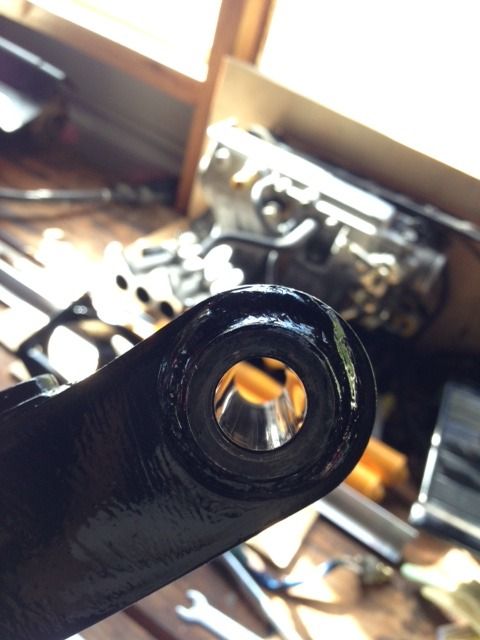
I then looked at the mounting bracket for the shifter and pedals and thought they could also use a little cleaning up. I again used electrolysis to remove the rust and then coated the parts in a rust preventative coating:

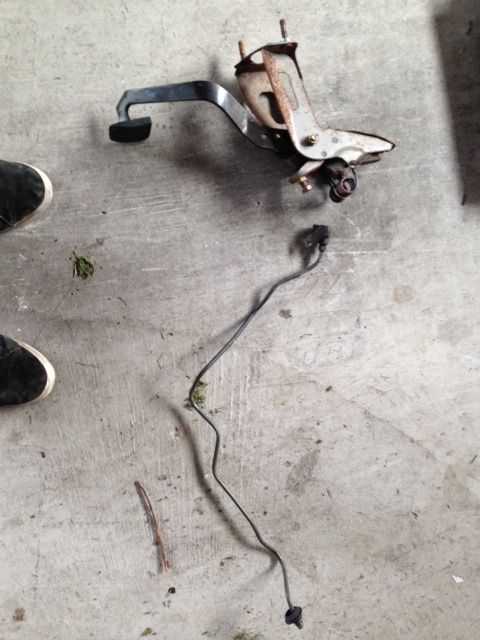
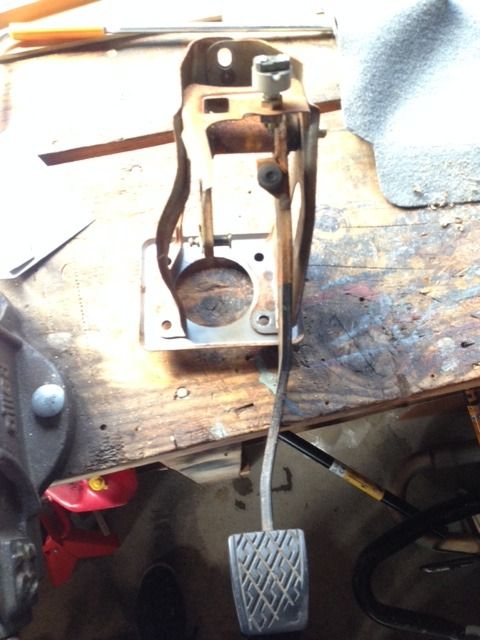
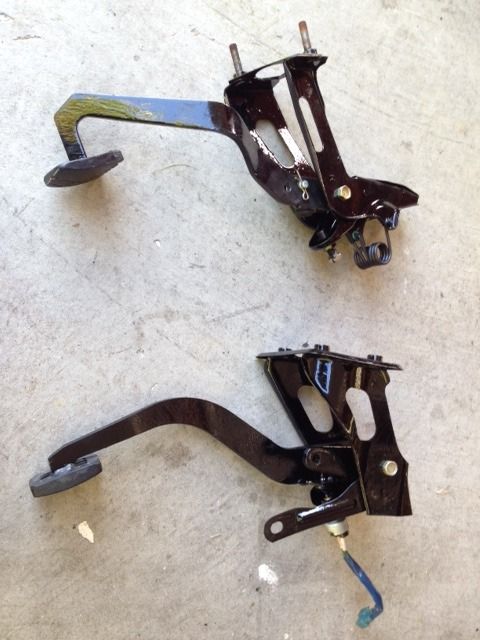
Disassembled brake pedal assembly:
Image

Image

Parts cleaned of all dirt and oil before electrolysis:
Image

Unfortunately no pics of electrolysis that I can find but here are the parts after rust coating:
Image

Image

I cleaned the pedal bushings and re-greased, unfortunately no pics of re-greased parts because my hands were too dirty:
Image

Image

Image

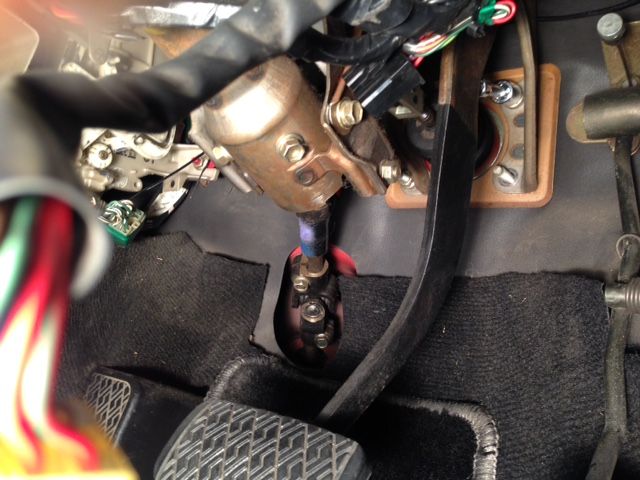
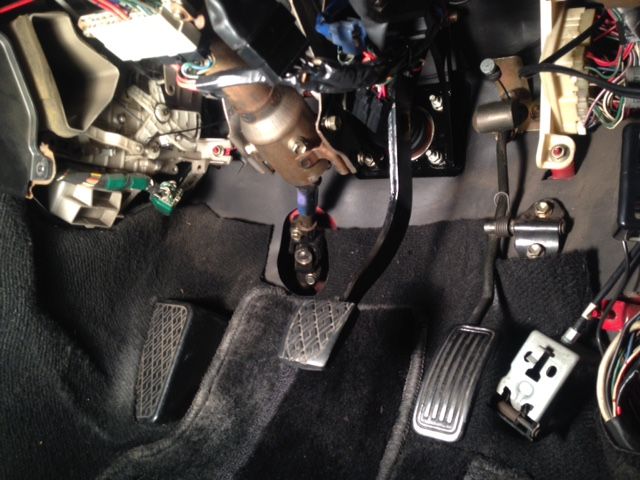
Shifter installed into car:
Image


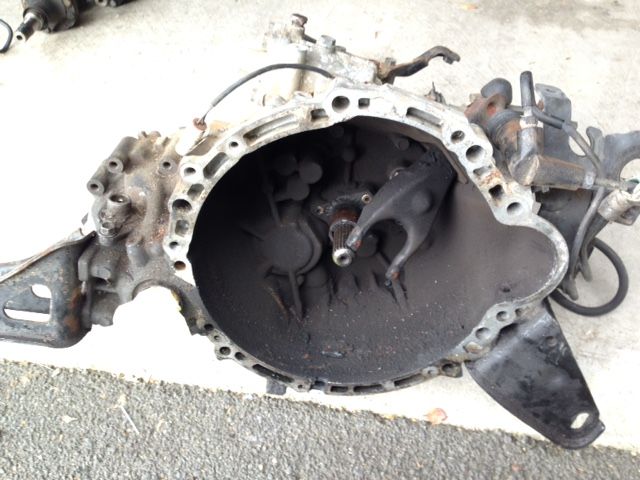
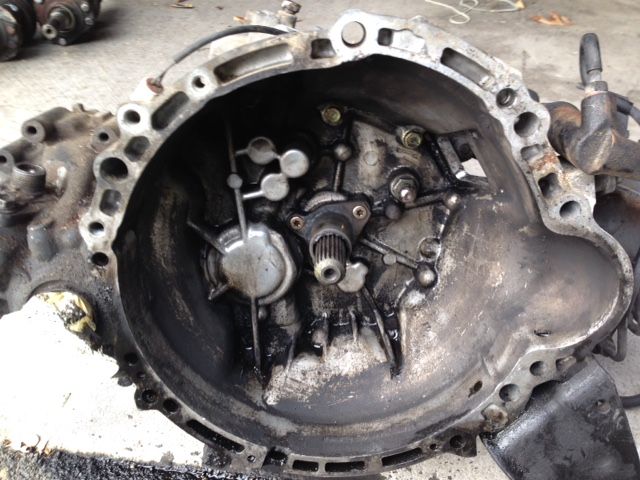
Finally where I am up to currently. The transmission is pretty dirty so I'll be cleaning it up. I made a start but ran out of degreaser and didn't have an appropriate brush.
Image

Image


Okay, that's about it for now. Sorry for all the mismatched photo sizes, hard to keep it consistent with vertical/horizontal shots and different cameras.
Last edited by TNR on Sun May 15, 2016 8:33 pm, edited 1 time in total.

User avatar
GDII
Forum Moderator - MR2OCNZ
Posts: 5739
Joined: Sun Jul 10, 2011 5:13 pm
Stomping Ground: Wellington
Prime Mover: SW20
First name: Phill

Re: TNR's AW11 (Finally!)

Post by GDII »

Thanks for the detailed write up on progress. It's interesting to see the electrolysis method for tidying up the surface rust on those metal parts. The black finish looks great.

I hope you enjoy the car more once it becomes a manual.
1990 SW20 MR2 G-Limited (GEN4 3SGTE Installed)
2000 AE111R Corolla Wagon NZ New Daily
1996 AE101R Corolla Sprint NZ New Selling Soon
1990 EP81 Starlet XL (Sold)
1990 EE90 Corolla XL (Sold)
Instagram https://www.instagram.com/sw20glimited/

TNR
Club Member - MR2OCNZ
Posts: 161
Joined: Sun Sep 13, 2015 6:03 pm
Stomping Ground: Auckland
Prime Mover: AW11
First name: TNR

Re: TNR's AW11 (Finally!)

Post by TNR »

Thanks! And no worries.

Yeah I was too lazy, so I let electricity do my cleaning for me lol.

User avatar
Aza
Club Member - MR2OCNZ
Posts: 37
Joined: Tue Mar 22, 2016 9:10 pm
Stomping Ground: Nelson
Prime Mover: AW11
First name: Aaron

Re: TNR's AW11 (Finally!)

Post by Aza »

Wow, she's looking very good for her age. Good find!

TNR
Club Member - MR2OCNZ
Posts: 161
Joined: Sun Sep 13, 2015 6:03 pm
Stomping Ground: Auckland
Prime Mover: AW11
First name: TNR

Re: TNR's AW11 (Finally!)

Post by TNR »

Aza wrote:Wow, she's looking very good for her age. Good find!
Thanks!

Another small update:

Got the manual brake pedal installed. Couldn't do the clutch as I don't have a master cylinder yet.
The starting point, all covers still fixed:
Image

Cover removed but air vent ducting still in place:
Image

Duct also removed:
Image

Here you can see I've taken most of the bolts which secure the pedal to the vehicle off:
Image

Pedal removed (was the hardest part for me):
Image

A normal sized brake pedal!
Image

A more significant update:

I recently got a replacement engine thanks to user "Vrtigo". I'll still be keeping my original engine for a possible future rebuild, but at the moment I don't feel comfortable attempting this with without knowing more about 4AGE rebuilds. Also I don't really have the time/money to learn or get it done at the moment.

Transporting it home:
Image

Was pretty dirty so cleaned it up a little:
Image

Dirt that came off:
Image

A little cleaner:
Image

Image

I had to keep it somewhere while I remove my original engine and do some work to get this one ready (sorry for terrible pic, back light was too strong):
Image

Image


I didn't want the engine to rest on the crankshaft so I decided to let it rest on two pieces of timber. The bottom of the block has two bolts/dowels for the oil sump positioning which won't allow it to sit flat, so it required two quick holes to be drilled into the timber:
Image

This is one of the bolts, block can now sit flat as the bolt is not pressing against timber:
Image

Image

I blocked all the ports, spark plug holes and distributor hole with paper towels or rubber gloves to stop dust getting into the engine while it waits:
Image


As it sits:
Image

Image


I will be cleaning it up more thoroughly later on, I just wanted to get the majority of the dirt off it so it wouldn't make a mess of the bench and my hands when working on it.
Will most likely put on a new water pump and timing belt/tensioner at least.

TNR
Club Member - MR2OCNZ
Posts: 161
Joined: Sun Sep 13, 2015 6:03 pm
Stomping Ground: Auckland
Prime Mover: AW11
First name: TNR

Re: TNR's AW11 (Finally!)

Post by TNR »

Alright so a while ago I mentioned wanting to run ITB's. Well I'm no where near that stage yet, however, a package arrived in the mail today which reminded me I had a set of these sitting in storage. Might as well share what I've been up to.

Image

Image

Image

Image

Image


Cleaned up:
Image

Still a little cleaning to do on the insides:
Image


So what was the package that reminded me of these?

Image

Image

Hmm.. what could this be:
Image

T3 ITB adapter of course:
Image

Very nice:
Image

I'm no where near installing the ITB's but I couldn't help it; had to see:
Image

Image

Image

I thought the throttles looked pretty clean but now with them next to the adapter they look dirty again.

Had to check what it looked like on the engine too:
Image

..Engine is still so dirty too..


I also had to order a new distributor rotor, cap and seal because the originals were no good (as you will see below):
Image

Original distributor off my car, which I will be using:
Image

Doesn't look good:
Image

Seems the rotor had somehow rubbed or burnt the plastic cap??
Image

Honestly I'd seemed to run well but couldn't just ignore this, which is why I bought the OEM Toyota replacement parts.

Image

New rotor:
Image

New cap:
Image

New seal:
Image

Image

Cleaned up dizzy heat shield:
Image

Refurbished unit:
Image


Alright onto another completely different area. The transmission and its various brackets/ linkages were looking pretty bad so I decided to clean them up and coat them with the same rust preventative coating as I did the brake/clutch/shifter parts.

Here's what it initially looked like:
Image

Image

Image

Note the direction of the arrow on rubber seal (not really sure if this was important, but best to reassemble the same way):
Image

Image

Rust/protection coating:
Image

Image

Image

Image

Image


Feels a lot smoother now.

Oh I also picked up a blacktop flywheel since it is about ~1.2Kg lighter than the 16V one, stock feel should be retained while being slightly quicker revving. Of course it needs resurfacing.
Image

User avatar
GDII
Forum Moderator - MR2OCNZ
Posts: 5739
Joined: Sun Jul 10, 2011 5:13 pm
Stomping Ground: Wellington
Prime Mover: SW20
First name: Phill

Re: TNR's AW11 (Finally!)

Post by GDII »

That's a lot of work going into this engine. Looks like a lot of fun though. Love the T3 adapter.
1990 SW20 MR2 G-Limited (GEN4 3SGTE Installed)
2000 AE111R Corolla Wagon NZ New Daily
1996 AE101R Corolla Sprint NZ New Selling Soon
1990 EP81 Starlet XL (Sold)
1990 EE90 Corolla XL (Sold)
Instagram https://www.instagram.com/sw20glimited/

TNR
Club Member - MR2OCNZ
Posts: 161
Joined: Sun Sep 13, 2015 6:03 pm
Stomping Ground: Auckland
Prime Mover: AW11
First name: TNR

Re: TNR's AW11 (Finally!)

Post by TNR »

GDII wrote:That's a lot of work going into this engine. Looks like a lot of fun though. Love the T3 adapter.
Thanks! I just hope it'll run well.

Anyone know what this electrical connector on the manual transmission is for?
Image

User avatar
GDII
Forum Moderator - MR2OCNZ
Posts: 5739
Joined: Sun Jul 10, 2011 5:13 pm
Stomping Ground: Wellington
Prime Mover: SW20
First name: Phill

Re: TNR's AW11 (Finally!)

Post by GDII »

TNR wrote:
GDII wrote:That's a lot of work going into this engine. Looks like a lot of fun though. Love the T3 adapter.
Thanks! I just hope it'll run well.

Anyone know what this electrical connector on the manual transmission is for?
Image
Reverse light switch. Tells the reverse light circuit to come on when you put it in reverse if the name isn't clear. :wink:
1990 SW20 MR2 G-Limited (GEN4 3SGTE Installed)
2000 AE111R Corolla Wagon NZ New Daily
1996 AE101R Corolla Sprint NZ New Selling Soon
1990 EP81 Starlet XL (Sold)
1990 EE90 Corolla XL (Sold)
Instagram https://www.instagram.com/sw20glimited/

User avatar
flying_wedge
Club Member - MR2OCNZ
Posts: 1696
Joined: Sat Aug 06, 2005 5:07 pm
Stomping Ground: Christchurch
Prime Mover: AW11
First name: Mark

Re: TNR's AW11 (Finally!)

Post by flying_wedge »

GDII wrote:Reverse light switch. Tells the reverse light circuit to come on when you put it in reverse if the name isn't clear. :wink:
It's never been plugged in with any AW11 I've had, but reverse lights have always worked ok. Odd?
Image

Post Reply