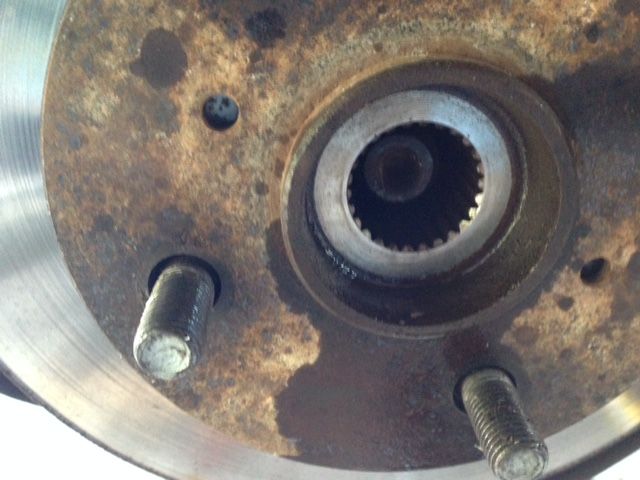
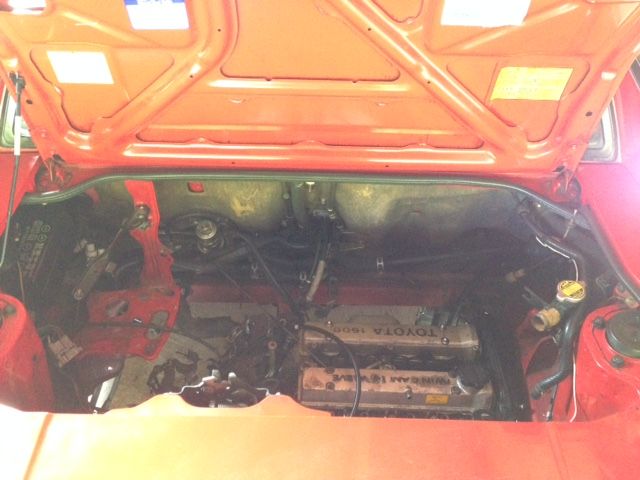
Maybe it's not then. I know very little about AW11s but it just seemed logical that it's what it is in the position it's in. My Corolla and Starlet both have wires coming from there for that purpose.flying_wedge wrote:It's never been plugged in with any AW11 I've had, but reverse lights have always worked ok. Odd?GDII wrote:Reverse light switch. Tells the reverse light circuit to come on when you put it in reverse if the name isn't clear.
TNR's AW11 (Finally!)
Moderator: Moderators
Forum rules
This section of the forum is a great resource if you're looking for ideas, and it's a cool way of obtaining technical information that may otherwise not have been posted. (Members can use the Search functionality at top right of the forum to speed up finding things) Please respect others' contributions and don't diss anyone - keep comments helpful, factual, positive and polite. One thread per vehicle or owner please - don't start lots of threads about just one car. And if you need assistance with your car and want to host a spanner day, please use the appropriate section of the forum: http://mr2.org.nz/phpbb3/viewforum.php?f=35 Thank you.
This section of the forum is a great resource if you're looking for ideas, and it's a cool way of obtaining technical information that may otherwise not have been posted. (Members can use the Search functionality at top right of the forum to speed up finding things) Please respect others' contributions and don't diss anyone - keep comments helpful, factual, positive and polite. One thread per vehicle or owner please - don't start lots of threads about just one car. And if you need assistance with your car and want to host a spanner day, please use the appropriate section of the forum: http://mr2.org.nz/phpbb3/viewforum.php?f=35 Thank you.
-
GDII

- Forum Moderator - MR2OCNZ
- Posts: 5739
- Joined: Sun Jul 10, 2011 5:13 pm
- Stomping Ground: Wellington
- Prime Mover: SW20
- First name: Phill
Re: TNR's AW11 (Finally!)
1990 SW20 MR2 G-Limited (GEN4 3SGTE Installed)
2000 AE111R Corolla Wagon NZ New Daily
1996 AE101R Corolla Sprint NZ New Selling Soon
1990 EP81 Starlet XL (Sold)
1990 EE90 Corolla XL (Sold)
Instagram https://www.instagram.com/sw20glimited/
2000 AE111R Corolla Wagon NZ New Daily
1996 AE101R Corolla Sprint NZ New Selling Soon
1990 EP81 Starlet XL (Sold)
1990 EE90 Corolla XL (Sold)
Instagram https://www.instagram.com/sw20glimited/
-
TNR
- Club Member - MR2OCNZ
- Posts: 161
- Joined: Sun Sep 13, 2015 6:03 pm
- Stomping Ground: Auckland
- Prime Mover: AW11
- First name: TNR
Re: TNR's AW11 (Finally!)
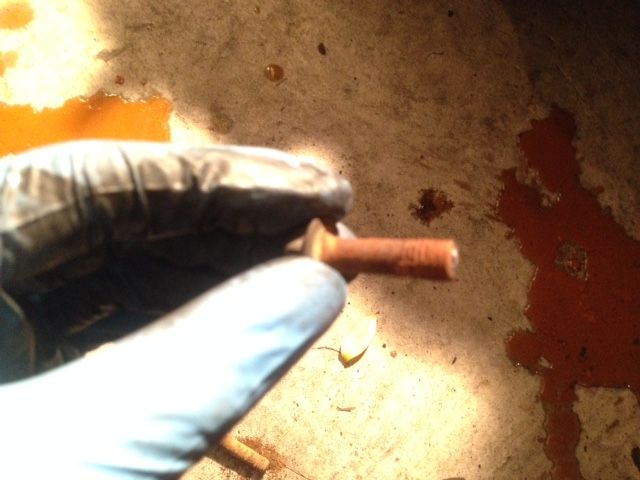
Hmm.. I did a bit of researching and it seems it is the back up switch. I tried searching before using part diagrams but was looking in the wrong section.
Its Toyota part number is: 84210-60021

Its Toyota part number is: 84210-60021
-
GDII
- Forum Moderator - MR2OCNZ
- Posts: 5739
- Joined: Sun Jul 10, 2011 5:13 pm
- Stomping Ground: Wellington
- Prime Mover: SW20
- First name: Phill
Re: TNR's AW11 (Finally!)
Yeah it's under 8401 Switch Relay Computer as it's an electronic switch.TNR wrote:Hmm.. I did a bit of researching and it seems it is the back up switch. I tried searching before using part diagrams but was looking in the wrong section.
Its Toyota part number is: 84210-60021
Curious to know how flying_wedge got his reverse lights working without this plugged in.
1990 SW20 MR2 G-Limited (GEN4 3SGTE Installed)
2000 AE111R Corolla Wagon NZ New Daily
1996 AE101R Corolla Sprint NZ New Selling Soon
1990 EP81 Starlet XL (Sold)
1990 EE90 Corolla XL (Sold)
Instagram https://www.instagram.com/sw20glimited/
2000 AE111R Corolla Wagon NZ New Daily
1996 AE101R Corolla Sprint NZ New Selling Soon
1990 EP81 Starlet XL (Sold)
1990 EE90 Corolla XL (Sold)
Instagram https://www.instagram.com/sw20glimited/
-
TNR
- Club Member - MR2OCNZ
- Posts: 161
- Joined: Sun Sep 13, 2015 6:03 pm
- Stomping Ground: Auckland
- Prime Mover: AW11
- First name: TNR
Re: TNR's AW11 (Finally!)
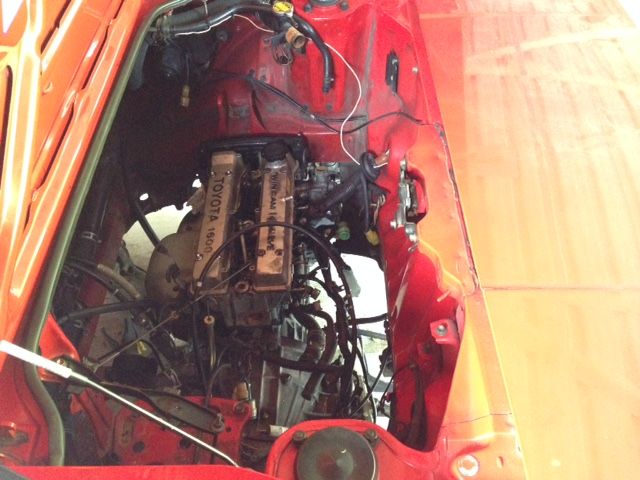
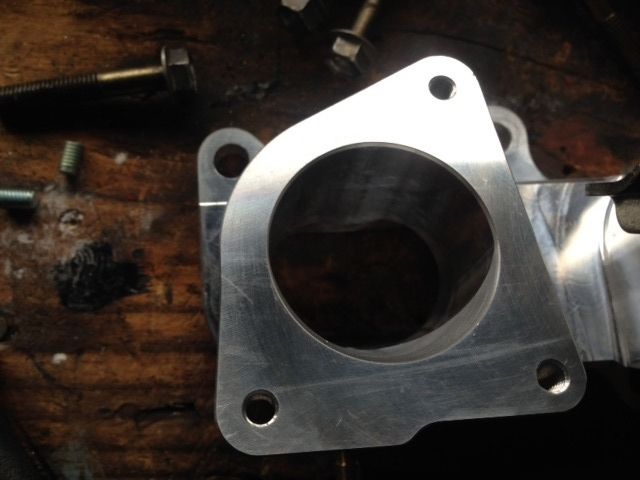
I thought I better check the ITB adapter to make sure it actually fit. It seemed to not fit initially but then I realized it was just the vacuum barb touching the coolant pipe, this can simply be solved by removing the barb, fitting the adapter and then re-fitting the barb through the gap between the coolant pipe and engine block.
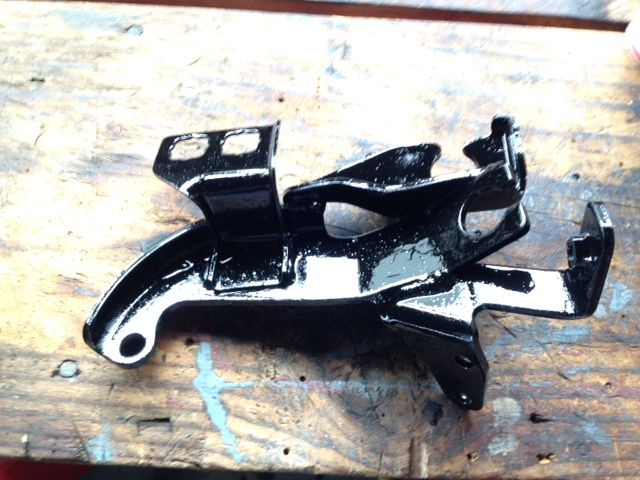
Anyway back to work, this time I did the clutch salve cylinder bracket. No pictures of the entire disassembly or cleaning etc, getting a little bored of this painting business:
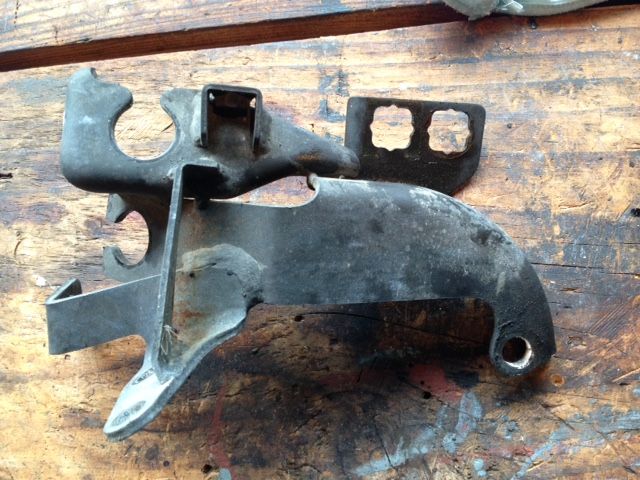
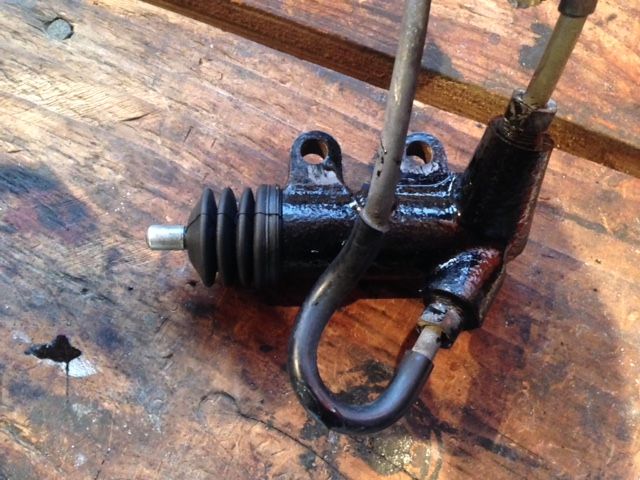
The slave cylinder is located in a kind of unpleasant area, so I decided to rebuild it in hopes of not having to do it later on when access is restricted:

A little compressed air easily pushes the piston out:
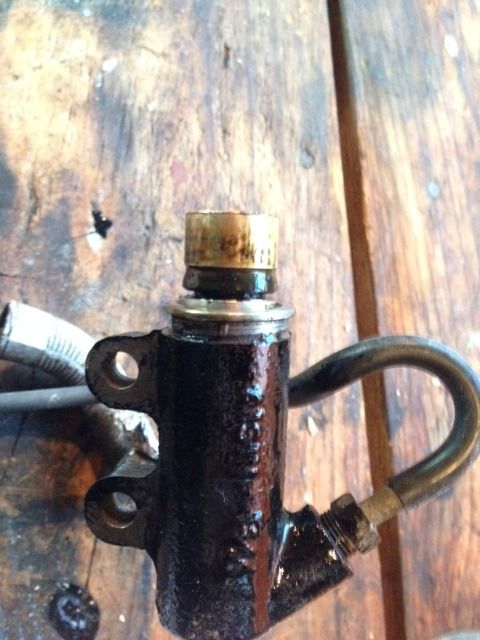
Used Vs. new... glad I decided to do this:
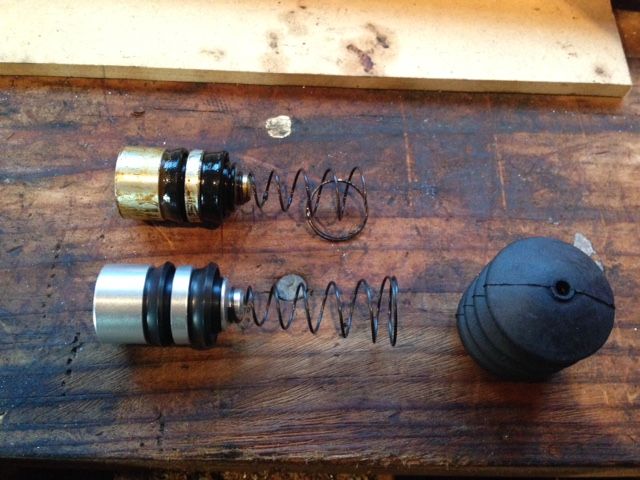
New piston in:
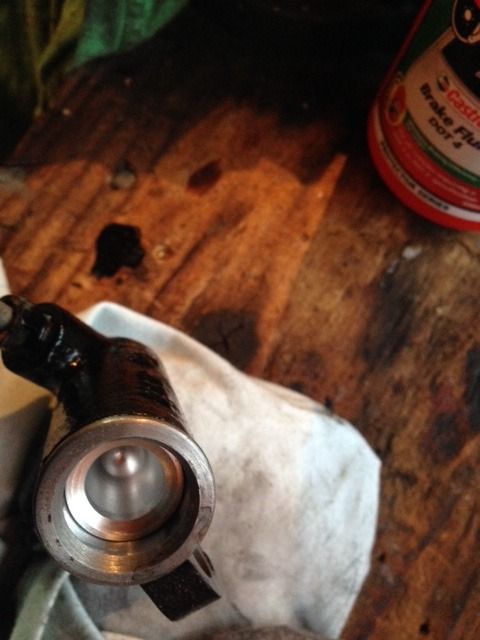
Finished cylinder:
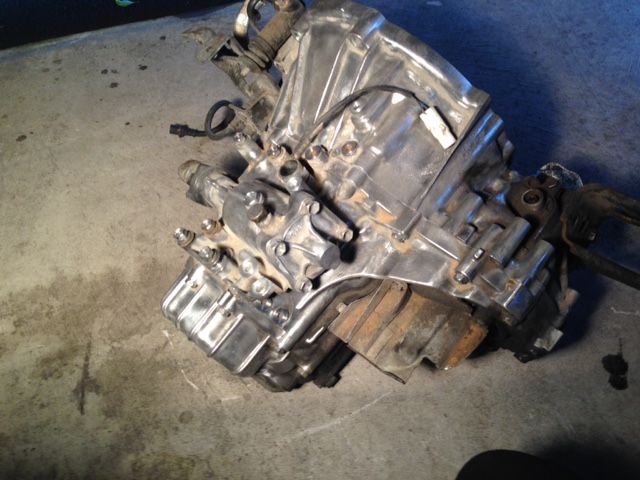
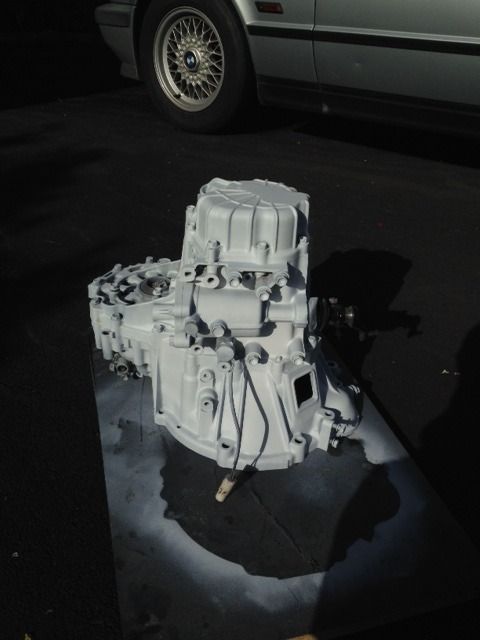
Alright so at this point I was tired of seeing the transmission looking so dirty so thought I would deal with it next. This is how it looked when I got it:
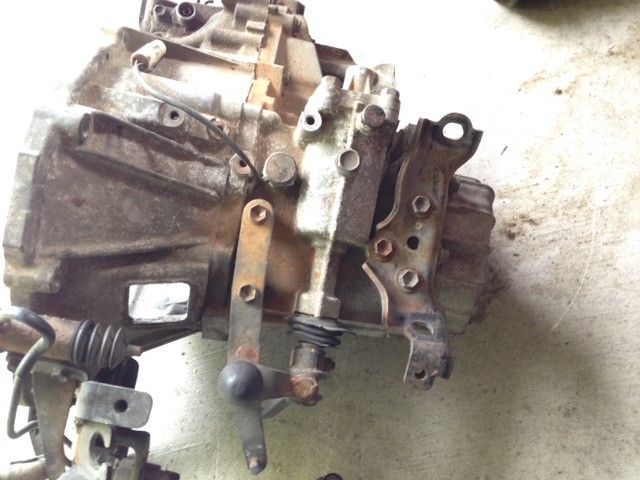
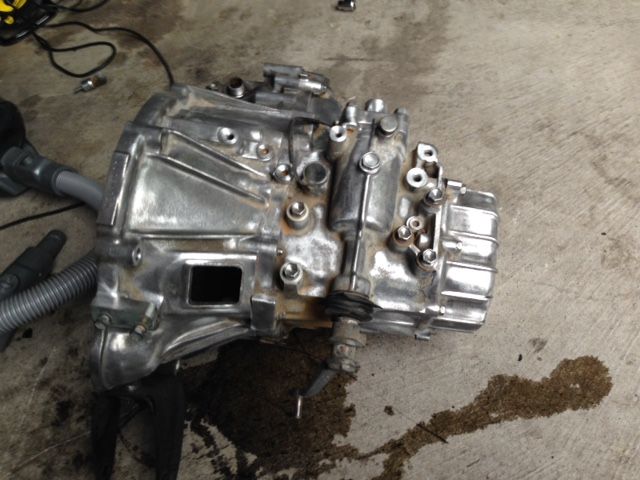
In the progress of being cleaned up:
That's not water by the way, its a bit of trans fluid which came out while tilting the box.
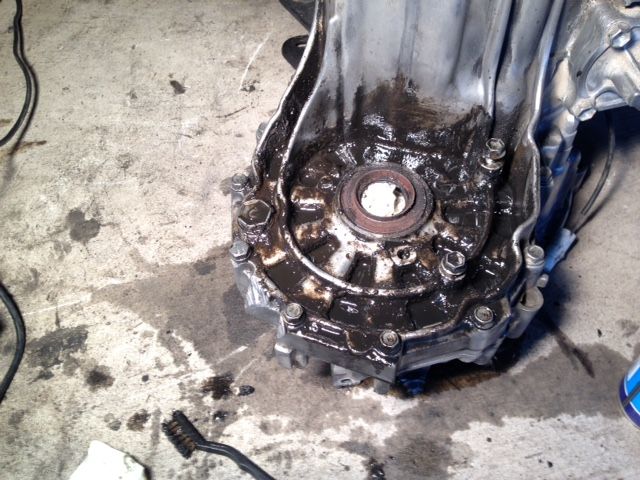
This part really was no fun:
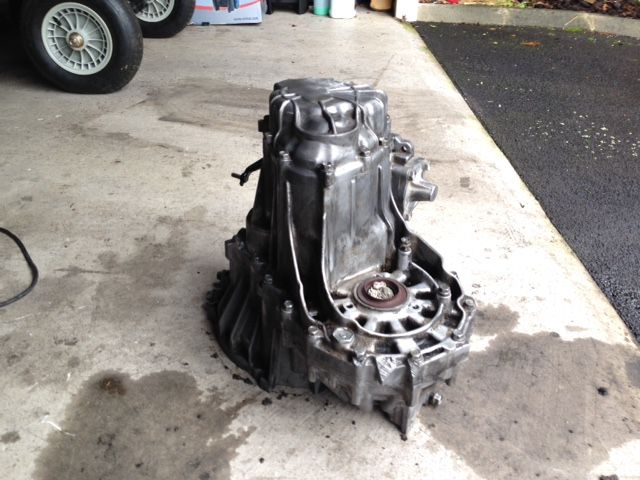
Looking a little cleaner:
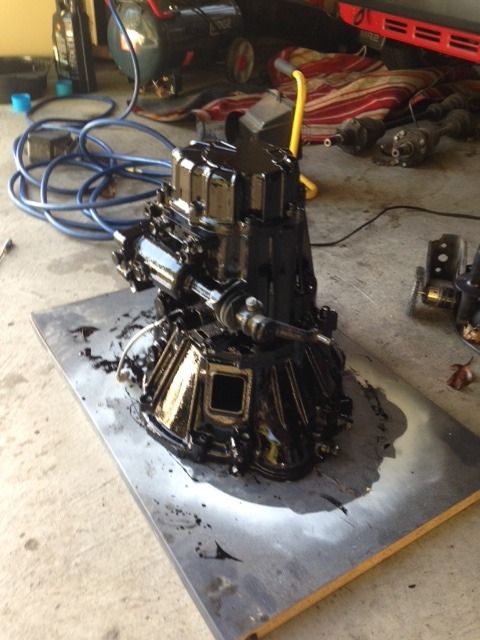
Again I kind of forgot to take pictures after getting busy with this, however, once it was all clean I used some etch primer on it:
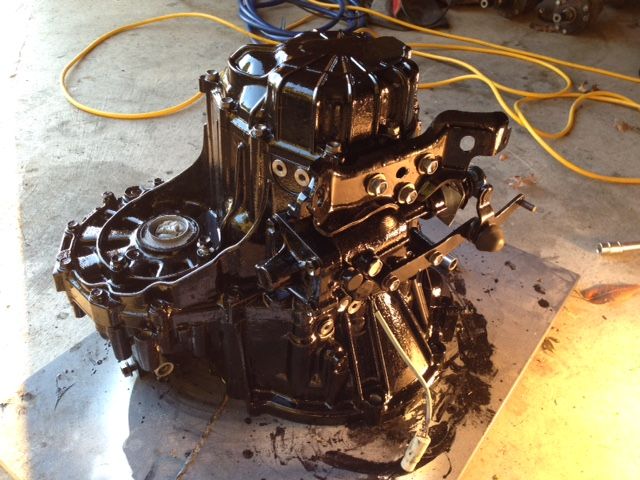
Painted black:
Ok next it was time to remove the axles which I had been putting off for a long time. I had never removed axles before and thought they would be a nightmare for some reason, they were actually pretty easy.

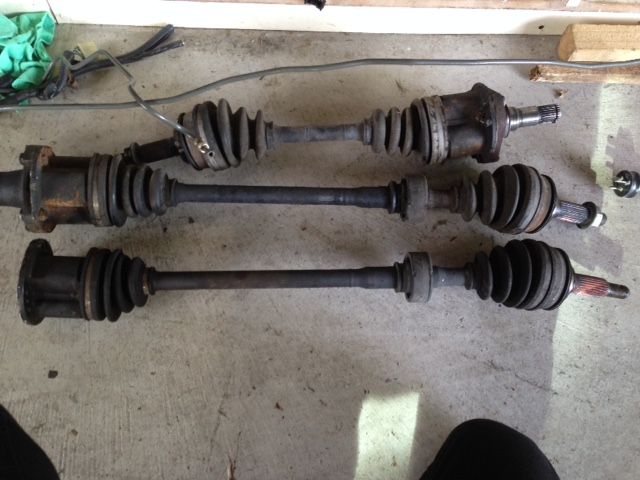
As suspected the auto and manual axles seem to be identical (bottom one is my original one, middle one is the one I got with manual swap):
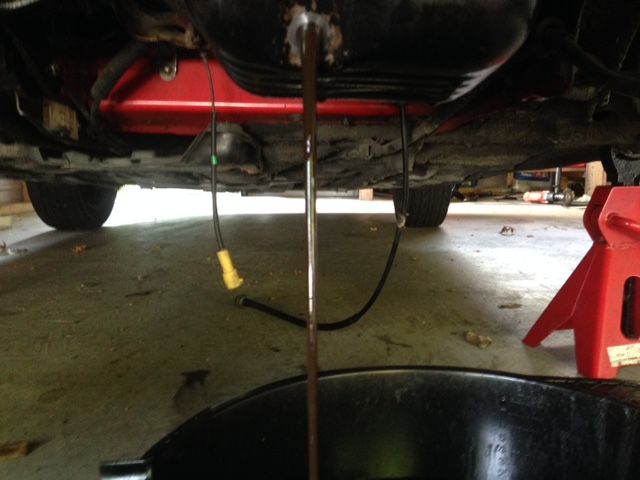
Also time to drain the oil and disconnect all the engine and trans oil coolers:
Head gasket for sure:
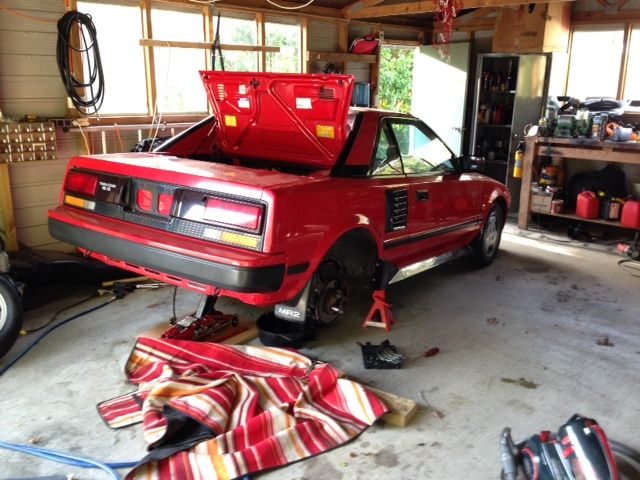
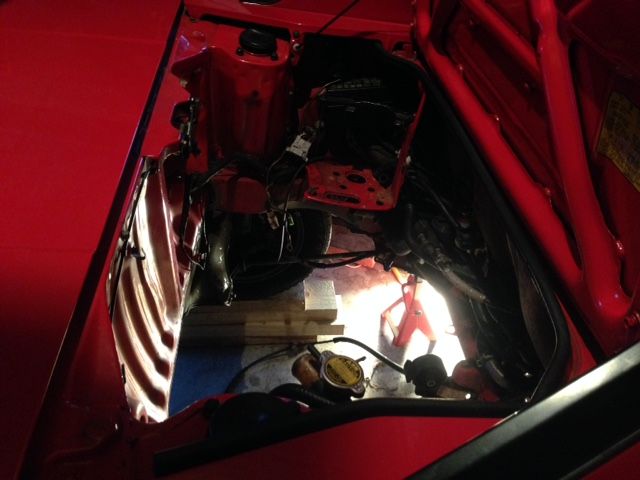
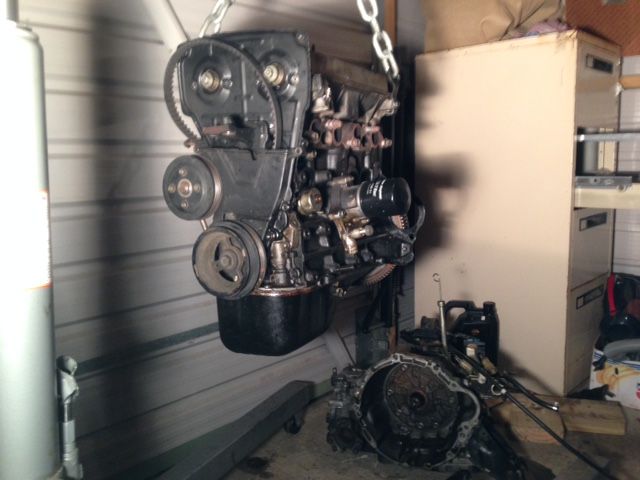
So as you can probably guess this is all leading towards removing the engine. I went down to the garage today expecting to do one or two small jobs.. ended up dropping the engine, I suppose it was going to happen one day soon. I had gradually been removing all the accessories/wiring etc. so there wasn't one single big load of work.
Soon to be out:
I know its a shitty situation having the crane up near a wall like this, had I known it could only work in this position I would have tried to move the car earlier. The reason it doesnt work from behind is because the transmission touches the cranes leg.
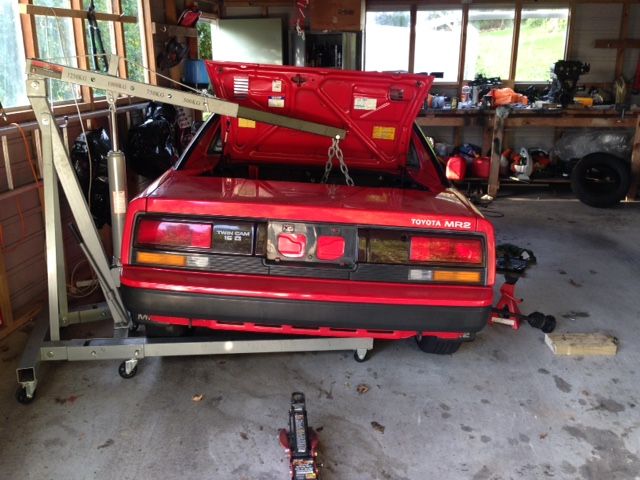
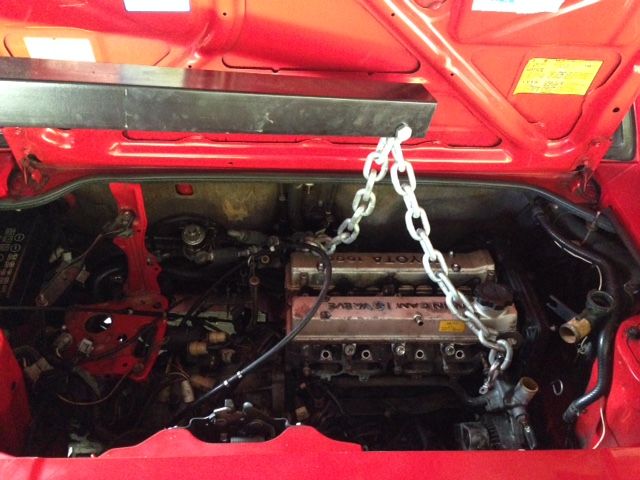
Because of the location of the diff and the engine lift points it kind of went down a bit crooked:
And well that is all I have. At the moment the engine is resting on the ground still partially in the engine bay, I'll get better pics tomorrow but chances are I won't be able to actually get the engine out from under the car until sometime later.
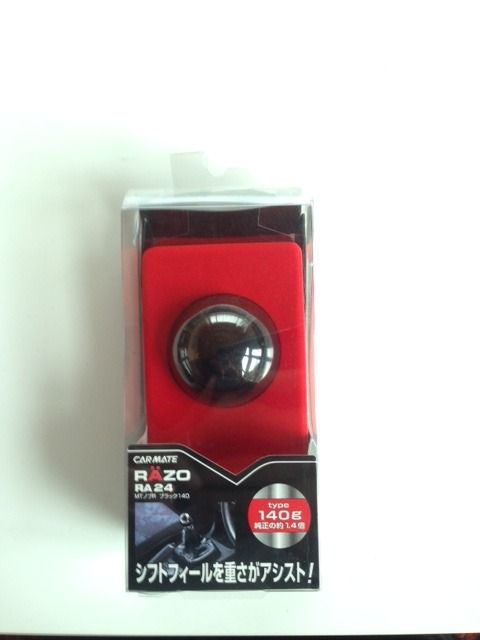
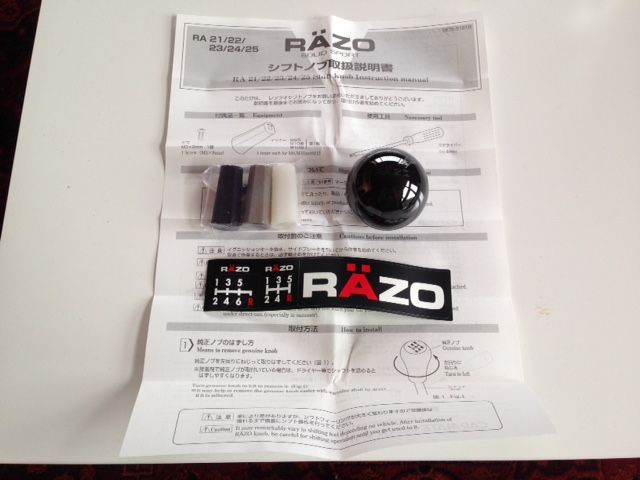
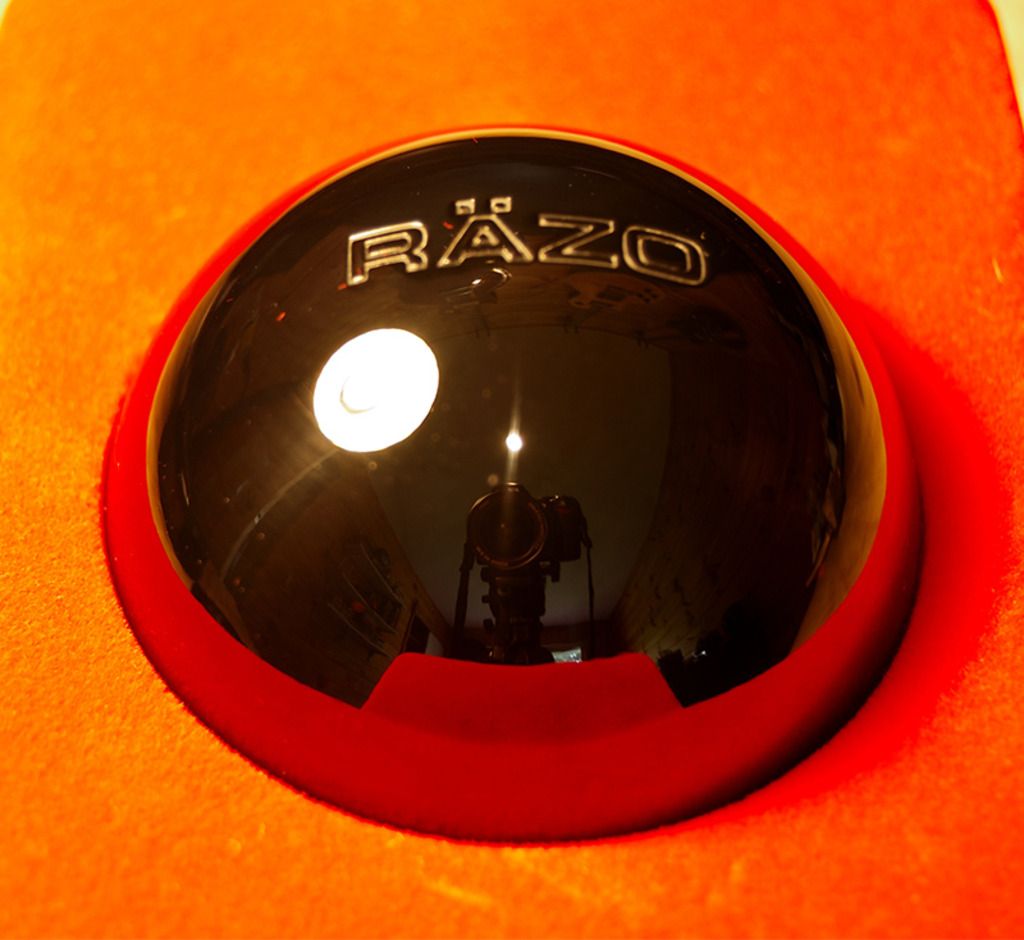
Oh, I got something nice in the mail:
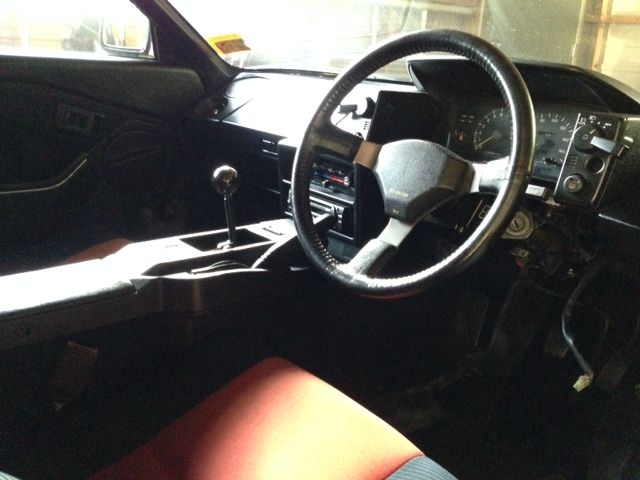
Again it was too hard to wait so I installed the shift cables even though it would have been 10x easier with the engine out of the way:
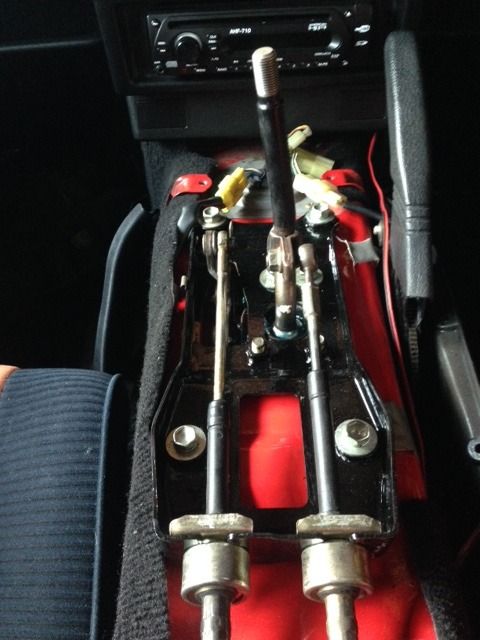
It feels so right having a manual shifter in there rather then the auto:
Anyway back to work, this time I did the clutch salve cylinder bracket. No pictures of the entire disassembly or cleaning etc, getting a little bored of this painting business:
The slave cylinder is located in a kind of unpleasant area, so I decided to rebuild it in hopes of not having to do it later on when access is restricted:
A little compressed air easily pushes the piston out:
Used Vs. new... glad I decided to do this:
New piston in:
Finished cylinder:
Alright so at this point I was tired of seeing the transmission looking so dirty so thought I would deal with it next. This is how it looked when I got it:
In the progress of being cleaned up:
That's not water by the way, its a bit of trans fluid which came out while tilting the box.
This part really was no fun:
Looking a little cleaner:
Again I kind of forgot to take pictures after getting busy with this, however, once it was all clean I used some etch primer on it:
Painted black:
Ok next it was time to remove the axles which I had been putting off for a long time. I had never removed axles before and thought they would be a nightmare for some reason, they were actually pretty easy.
As suspected the auto and manual axles seem to be identical (bottom one is my original one, middle one is the one I got with manual swap):
Also time to drain the oil and disconnect all the engine and trans oil coolers:
Head gasket for sure:
So as you can probably guess this is all leading towards removing the engine. I went down to the garage today expecting to do one or two small jobs.. ended up dropping the engine, I suppose it was going to happen one day soon. I had gradually been removing all the accessories/wiring etc. so there wasn't one single big load of work.
Soon to be out:
I know its a shitty situation having the crane up near a wall like this, had I known it could only work in this position I would have tried to move the car earlier. The reason it doesnt work from behind is because the transmission touches the cranes leg.
Because of the location of the diff and the engine lift points it kind of went down a bit crooked:
And well that is all I have. At the moment the engine is resting on the ground still partially in the engine bay, I'll get better pics tomorrow but chances are I won't be able to actually get the engine out from under the car until sometime later.
Oh, I got something nice in the mail:
Again it was too hard to wait so I installed the shift cables even though it would have been 10x easier with the engine out of the way:
It feels so right having a manual shifter in there rather then the auto:
-
GDII
- Forum Moderator - MR2OCNZ
- Posts: 5739
- Joined: Sun Jul 10, 2011 5:13 pm
- Stomping Ground: Wellington
- Prime Mover: SW20
- First name: Phill
Re: TNR's AW11 (Finally!)
BLAAAAACK!!
Looking good. The paint should protect everything from oxidation.
Love the shift knob. Very clean. Glad you think manual is the way to go. I couldn't stand driving an auto in a car like this, I need the control and direct feel. I hope you get some enjoyment out of the car once you get the new engine in and finish up the manual swap. I would hate to see all this hard work done and no fun at the end if you can't drive it. Although I do like working on cars just as much as I do driving them.
1990 SW20 MR2 G-Limited (GEN4 3SGTE Installed)
2000 AE111R Corolla Wagon NZ New Daily
1996 AE101R Corolla Sprint NZ New Selling Soon
1990 EP81 Starlet XL (Sold)
1990 EE90 Corolla XL (Sold)
Instagram https://www.instagram.com/sw20glimited/
2000 AE111R Corolla Wagon NZ New Daily
1996 AE101R Corolla Sprint NZ New Selling Soon
1990 EP81 Starlet XL (Sold)
1990 EE90 Corolla XL (Sold)
Instagram https://www.instagram.com/sw20glimited/
-
Swampy

- Club Member - MR2OCNZ
- Posts: 703
- Joined: Wed May 13, 2015 10:37 am
- Stomping Ground: Waikato
- Prime Mover: SW20
- First name: James
Re: TNR's AW11 (Finally!)
Awesome! Did you get the old engine out and new one in just by yourself?
And you have a good looking knob!!
And you have a good looking knob!!
In the shed: 91 MR2 G-Limited, 95 Subaru Impreza WRX
In the front of the shed: 95 Corolla
In the driveway: 00 Subaru Legacy Lancaster
In the rear view: 87 Honda Prelude, 94 Nissan Serena, 04 Swift
~ 4 Runs ~
In the front of the shed: 95 Corolla
In the driveway: 00 Subaru Legacy Lancaster
In the rear view: 87 Honda Prelude, 94 Nissan Serena, 04 Swift
~ 4 Runs ~
-
TNR
- Club Member - MR2OCNZ
- Posts: 161
- Joined: Sun Sep 13, 2015 6:03 pm
- Stomping Ground: Auckland
- Prime Mover: AW11
- First name: TNR
Re: TNR's AW11 (Finally!)
Ha the black was just an idea from some other builds I had seen recently. Hopefully it gives the look of a tidier engine bay since it should blend in with all the other black pipes and hoses, but we will see.GDII wrote:BLAAAAACK!!
Looking good. The paint should protect everything from oxidation.
Love the shift knob. Very clean. Glad you think manual is the way to go. I couldn't stand driving an auto in a car like this, I need the control and direct feel. I hope you get some enjoyment out of the car once you get the new engine in and finish up the manual swap. I would hate to see all this hard work done and no fun at the end if you can't drive it. Although I do like working on cars just as much as I do driving them.
I definitely want to get a lot of use out of it. I know what you mean though, a lot of projects don't get used after completion. This is kind of the reason why I wanted to keep it mostly stock without anything too crazy, I think drive-ability makes a big difference for a road car.
-
TNR
- Club Member - MR2OCNZ
- Posts: 161
- Joined: Sun Sep 13, 2015 6:03 pm
- Stomping Ground: Auckland
- Prime Mover: AW11
- First name: TNR
Re: TNR's AW11 (Finally!)
Thanks for the compliment :s, lol.Swampy wrote:Awesome! Did you get the old engine out and new one in just by yourself?
And you have a good looking knob!!
Actually I haven't gotten the new engine in yet so a lot of work to be done. At the moment the old one is still sitting on the ground waiting to be pulled out from under the car. I did it all my self apart from a little help from my dad. He came down to the garage to see what I was doing and ended up helping me guide the engine down since it was kind of snagging on a mount a little.
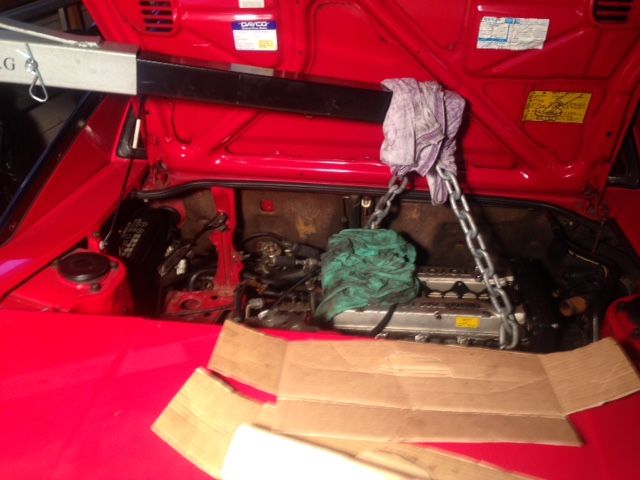
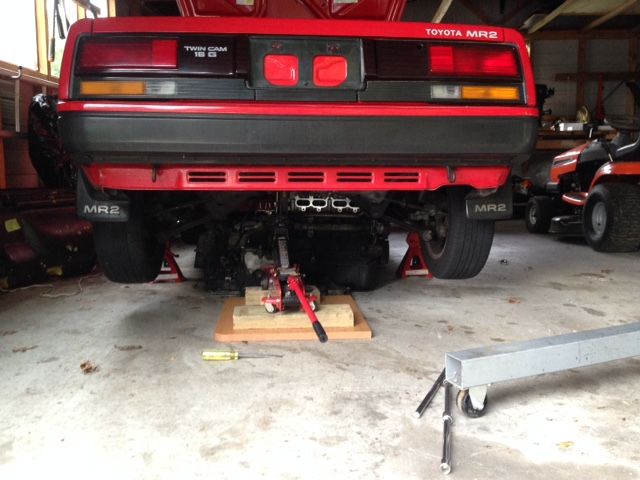
Here is how it sits at the moment:
-
TNR
- Club Member - MR2OCNZ
- Posts: 161
- Joined: Sun Sep 13, 2015 6:03 pm
- Stomping Ground: Auckland
- Prime Mover: AW11
- First name: TNR
Re: TNR's AW11 (Finally!)
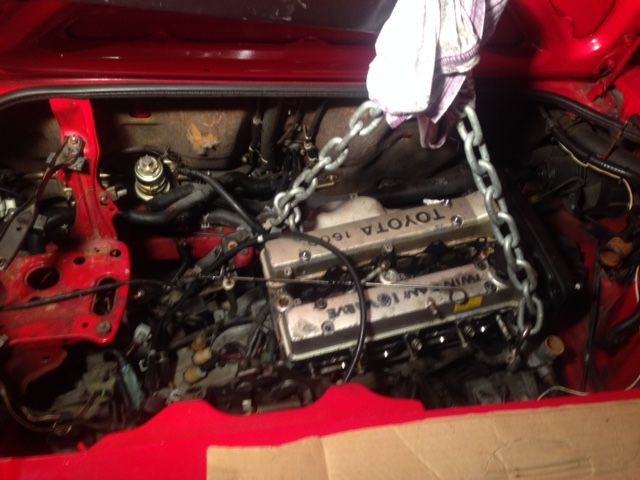
Okay found some more time today to work on removing the engine.
Excuse the pics, sometimes phone lens gets dirty.
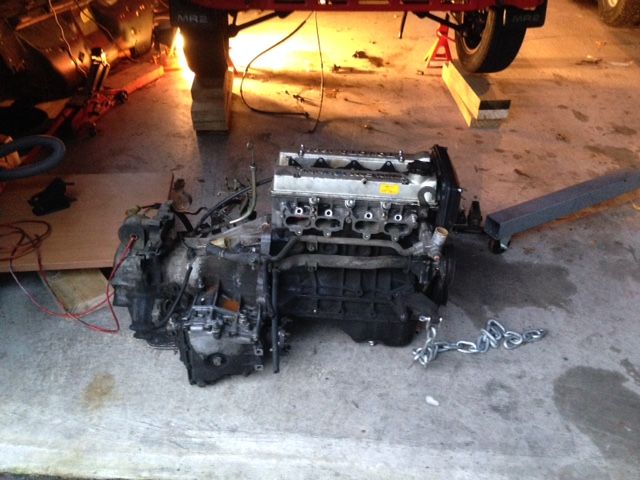
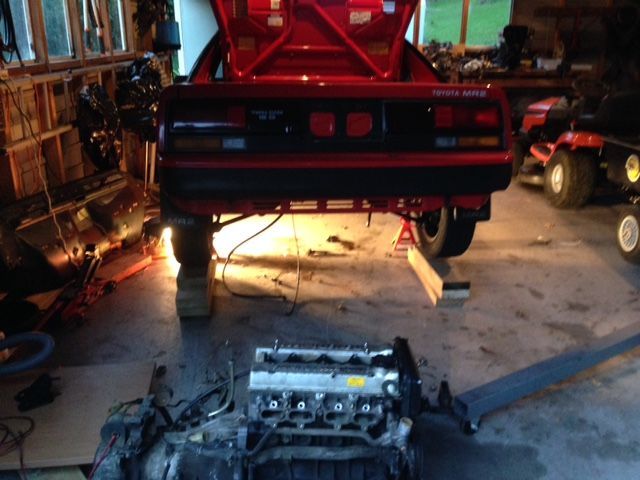
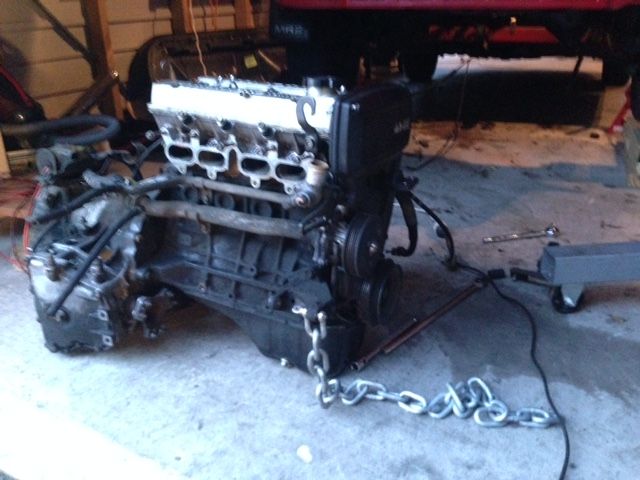
Was surprisingly easy to drag out.
Excuse the pics, sometimes phone lens gets dirty.
Was surprisingly easy to drag out.
-
TNR
- Club Member - MR2OCNZ
- Posts: 161
- Joined: Sun Sep 13, 2015 6:03 pm
- Stomping Ground: Auckland
- Prime Mover: AW11
- First name: TNR
Re: TNR's AW11 (Finally!)
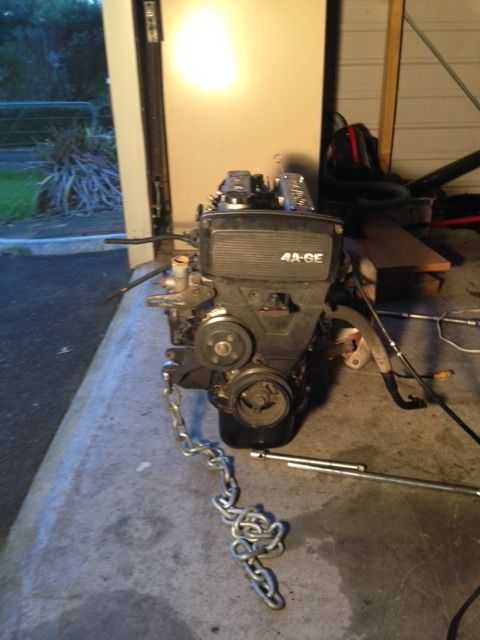
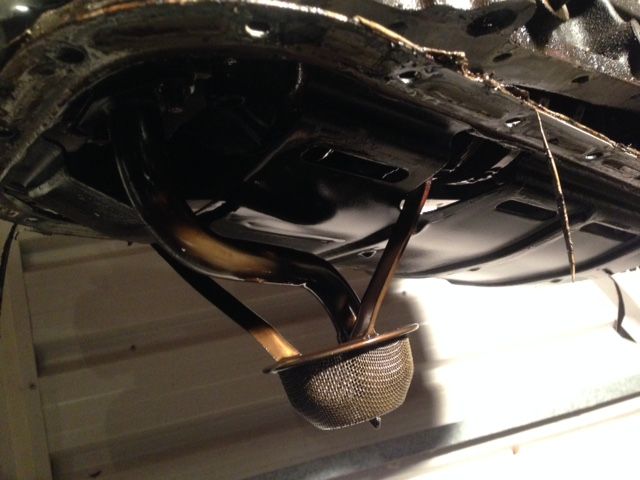
I've been disassembling the old engine and cleaning up parts which I will be reusing.
Coolant hoses removed:
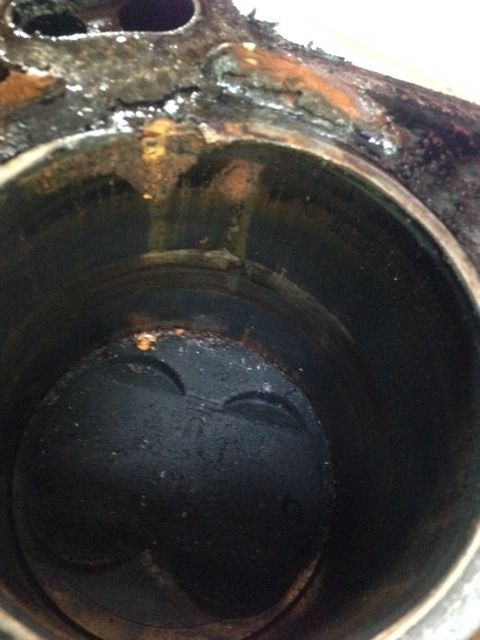
Coolant passages full of shit:
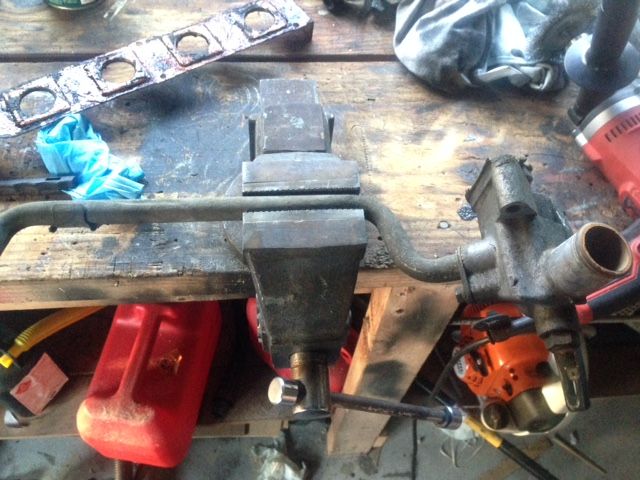
Bolts on the front water neck mount were pretty rusty and the top one sheared in half:
Autobox removed:

Sump removed (will be reused as new engine didn't come with one):
Some kind of plastic and RTV shit caught on the oil pickup strainer, wonder how much got past (previous owners mechanic didn't do a nice job of re sealing the oil pan, overused RTV):

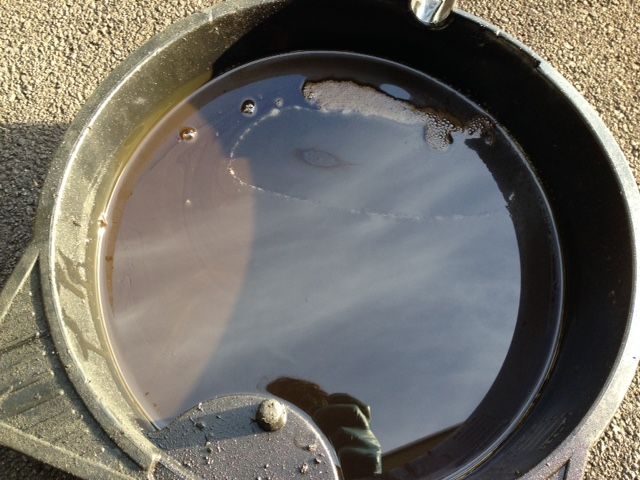
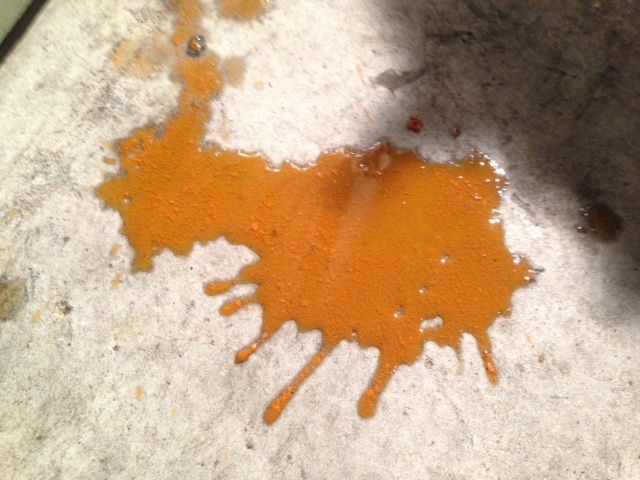
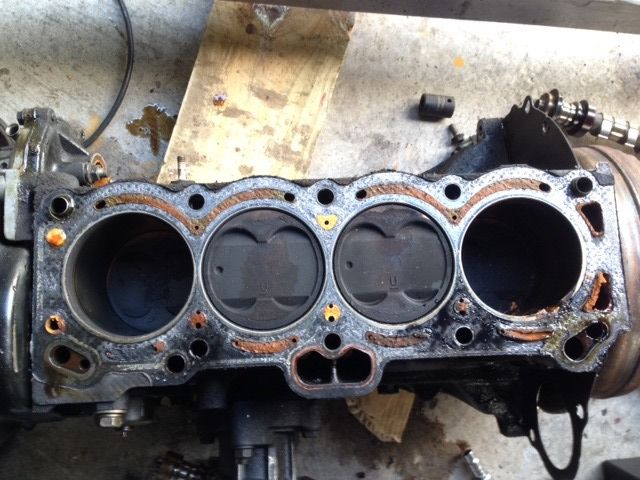
Obviously water in the oil from head gasket failure:
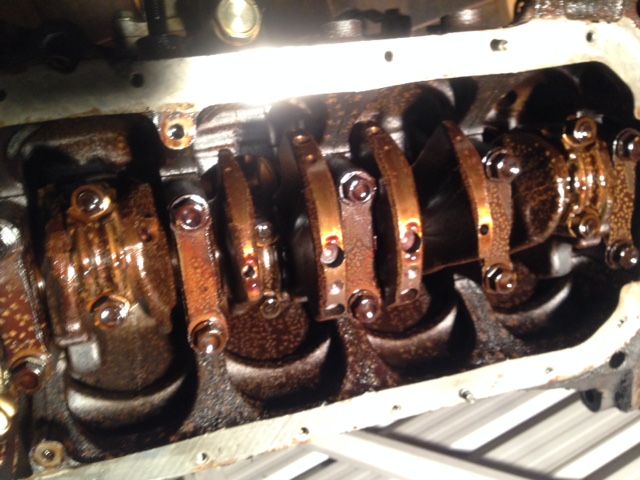
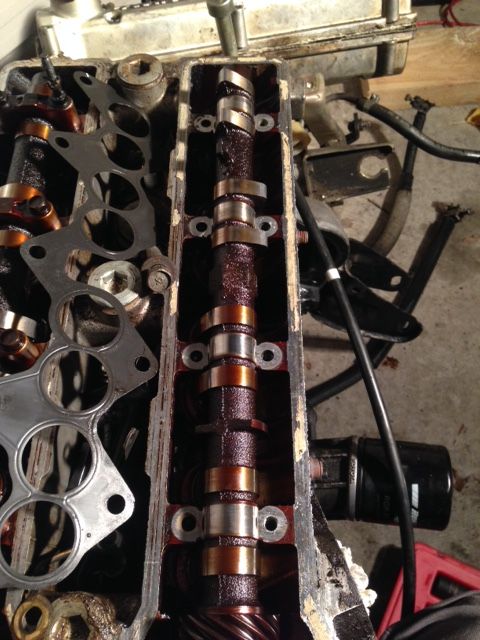
Removing cams:
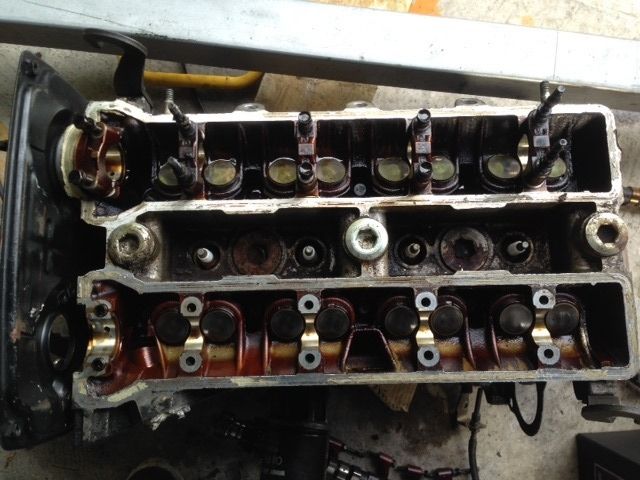
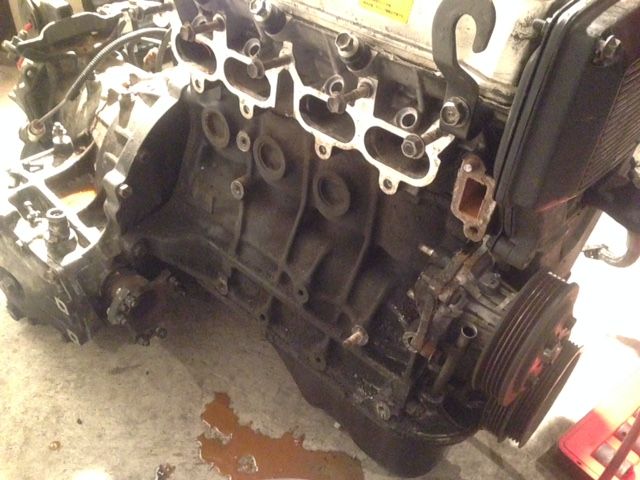
Head removed:
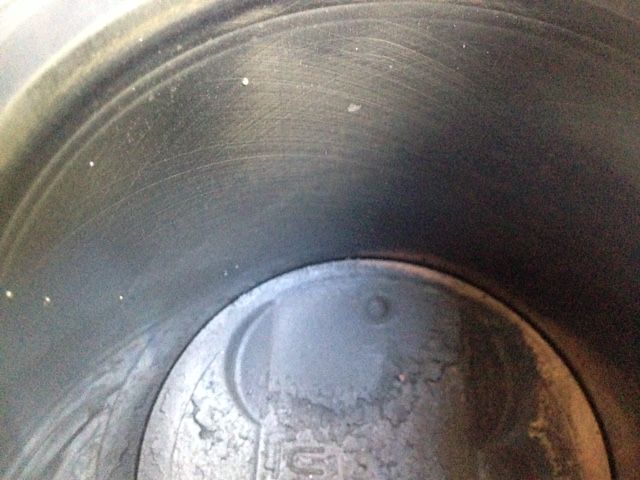
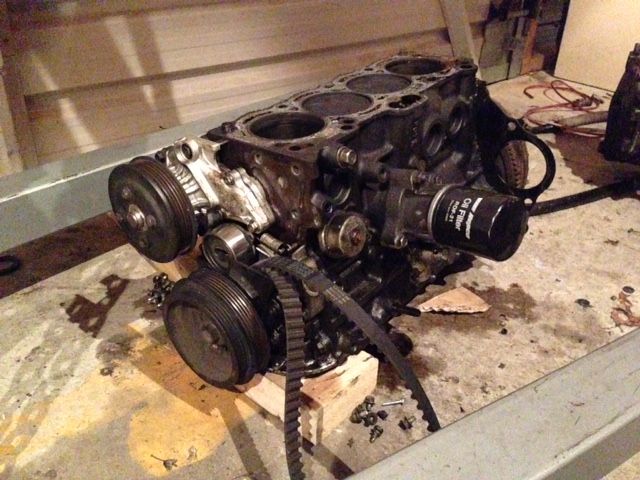
Block:
Hone marks still seem good:
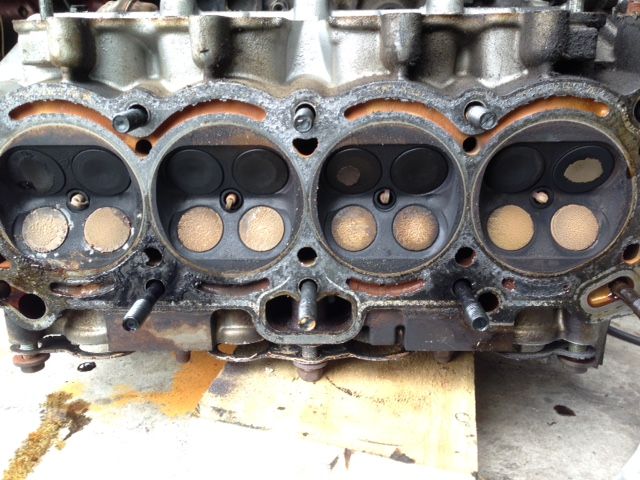
Head gasket failed on cyl 4:
Alright that's it for the old engine, for now. After this I started cleaning up parts that I will be reusing.

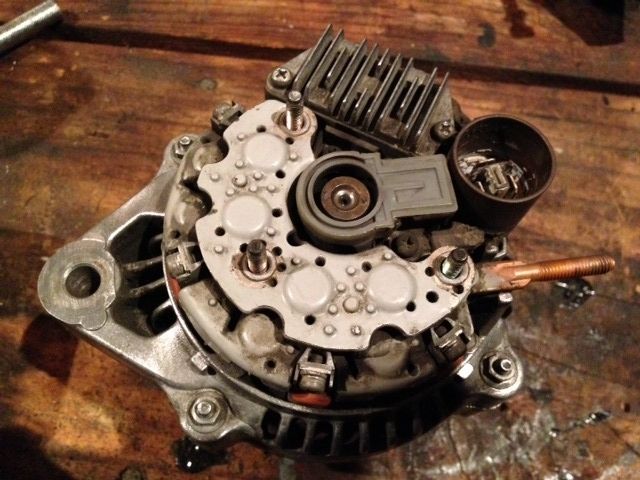
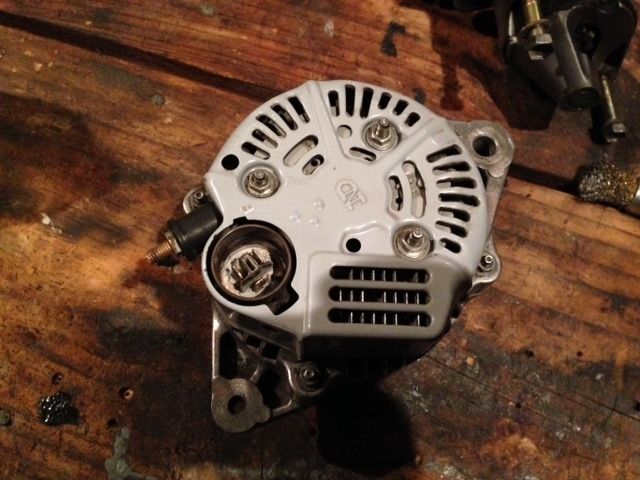
Alternator was pretty dirty, no money atm to rebuild it but it was working fine so will just get a clean for now:

Starter also, sorry for terrible pic:
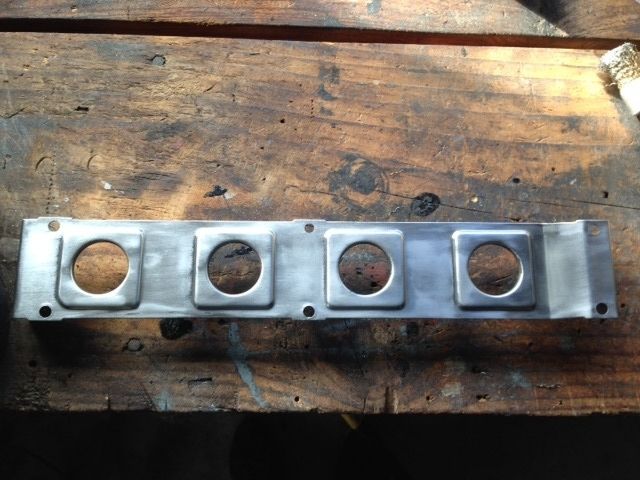
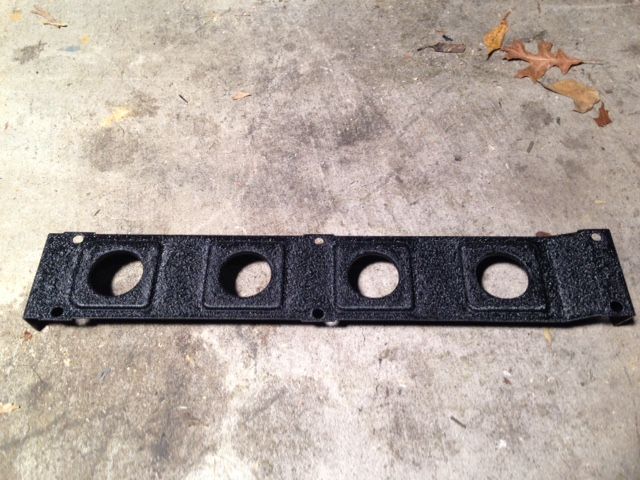
Re finishing spark cover:
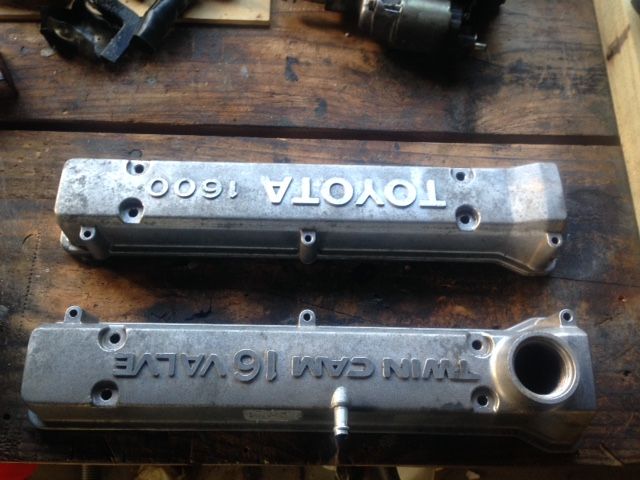
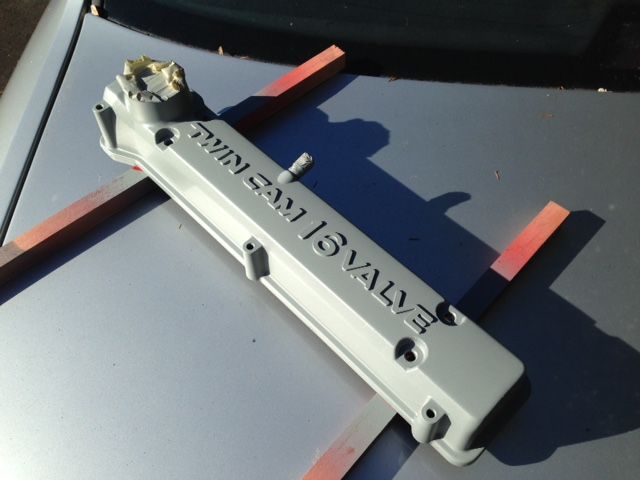
Refinishing valve covers:
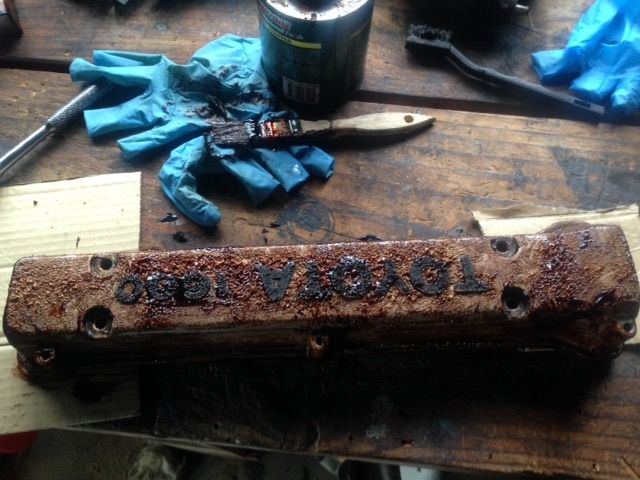
Casting lines don't look so nice, so I sanded them off:
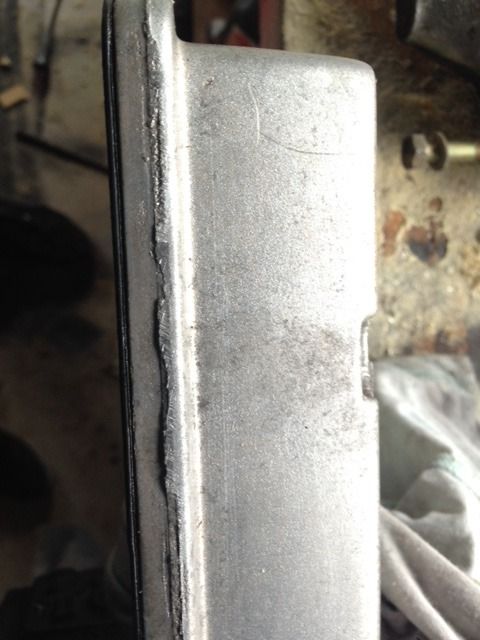
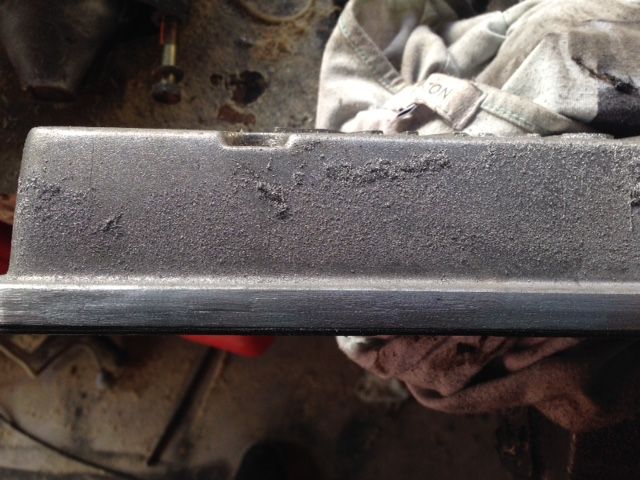
High heat primer:
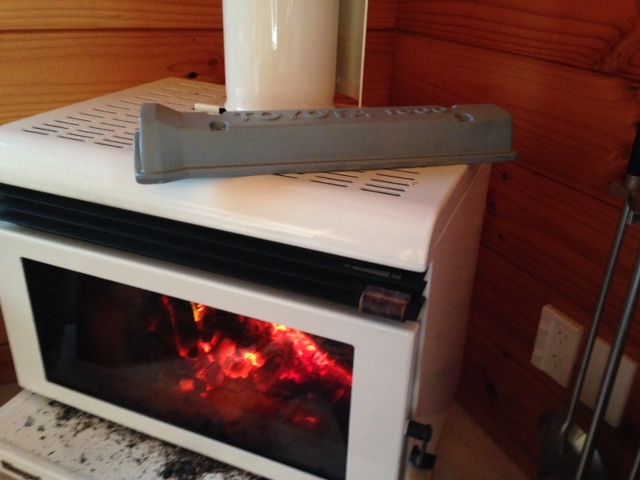
My method for curing paint overnight:
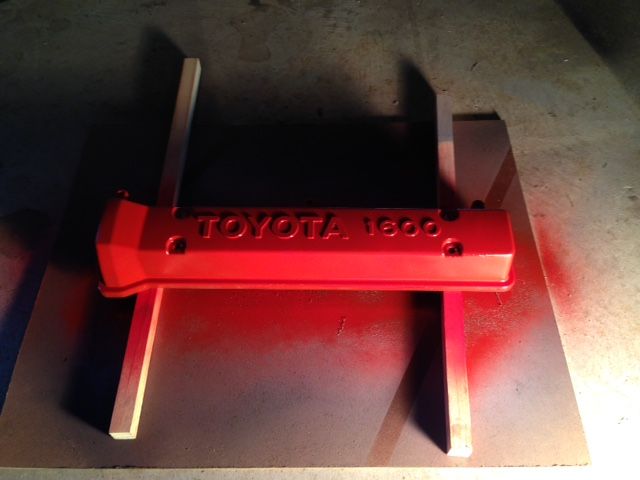
Spraying red:
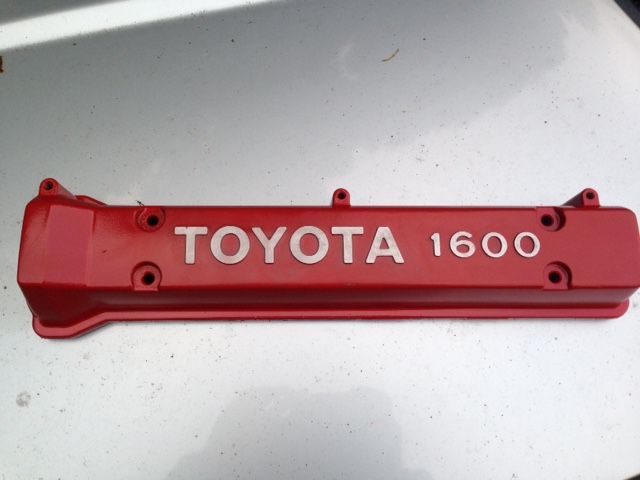
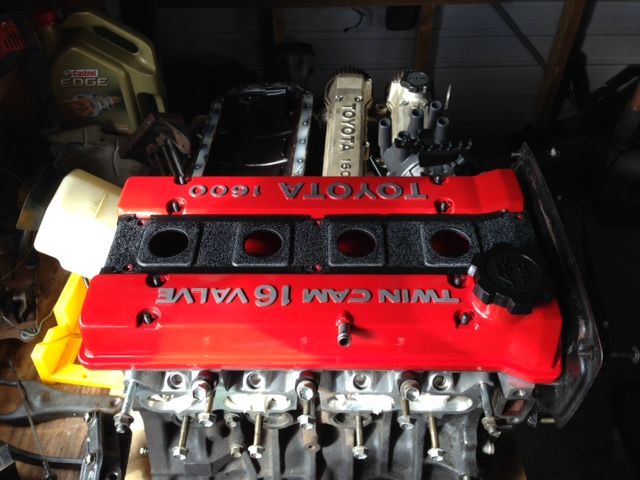
Okay valve covers done.
I broke the engine bay temp sensor removing the engine:
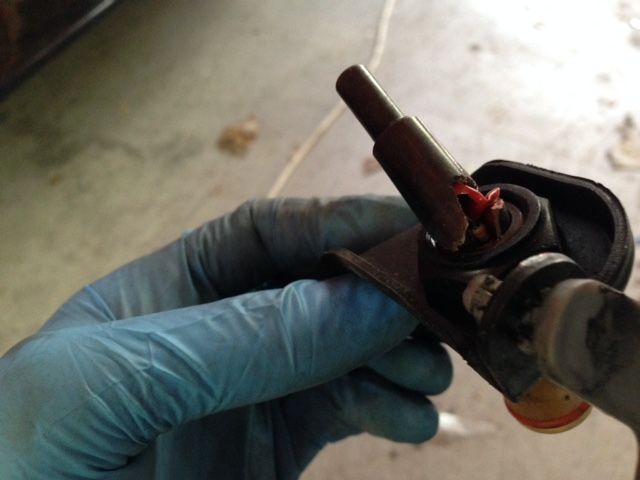
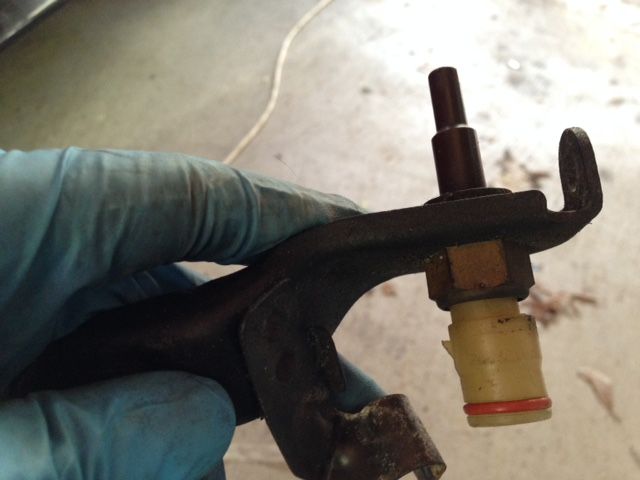
So I went to the junkyard to find a replacement:
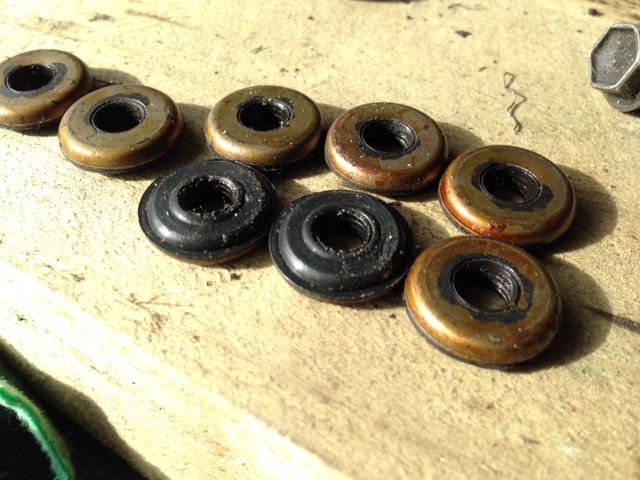
Also my valve cover washers/seals were really worn:
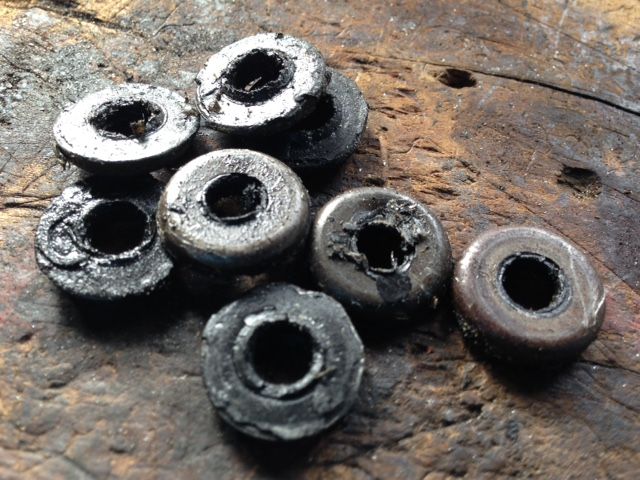
Replacements are used and not perfect but a lot better:
Also found a facelift strut bar:

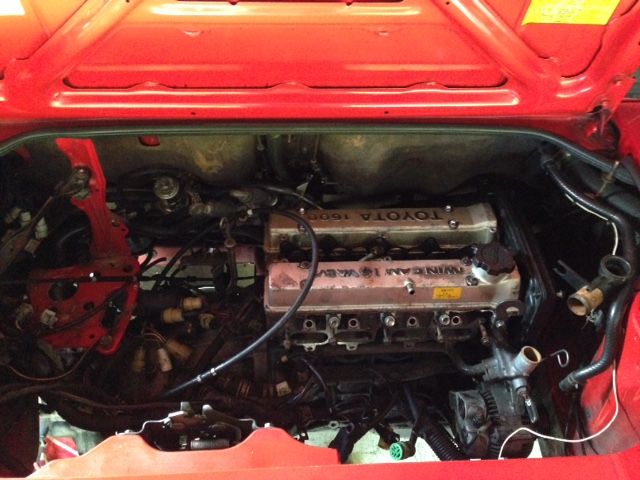
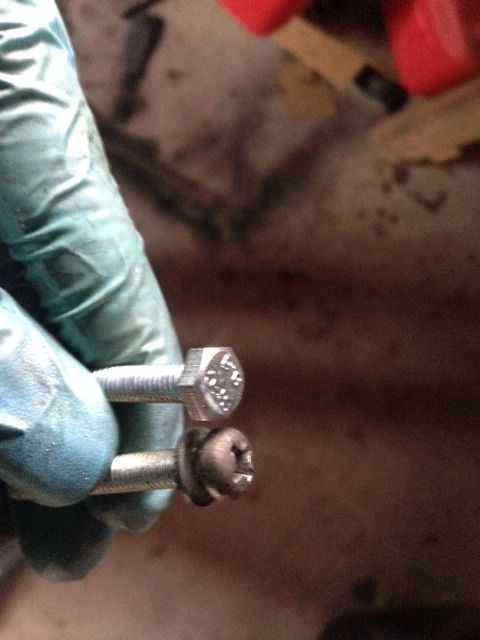
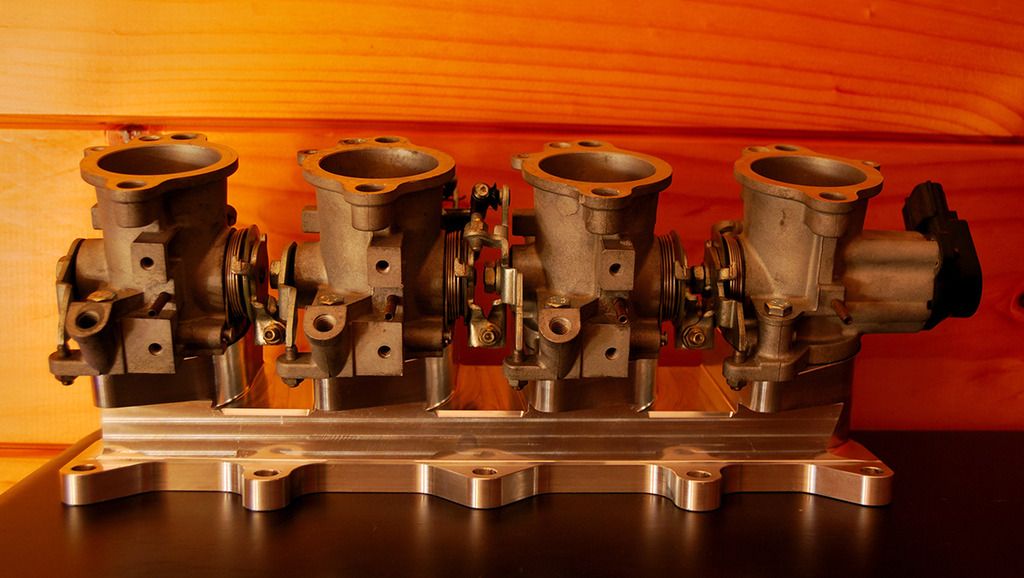
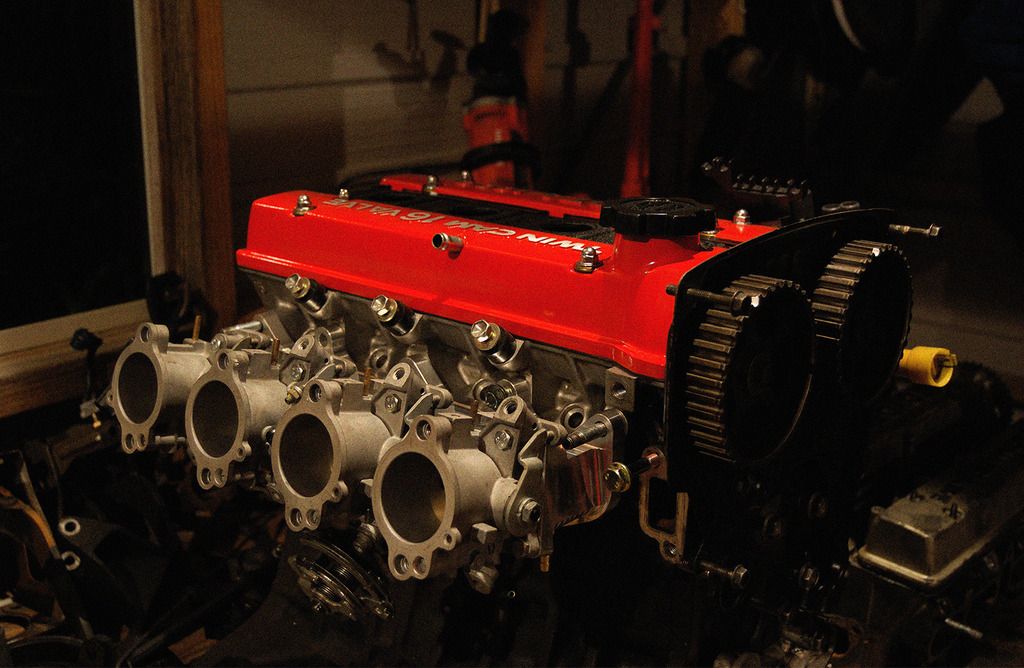
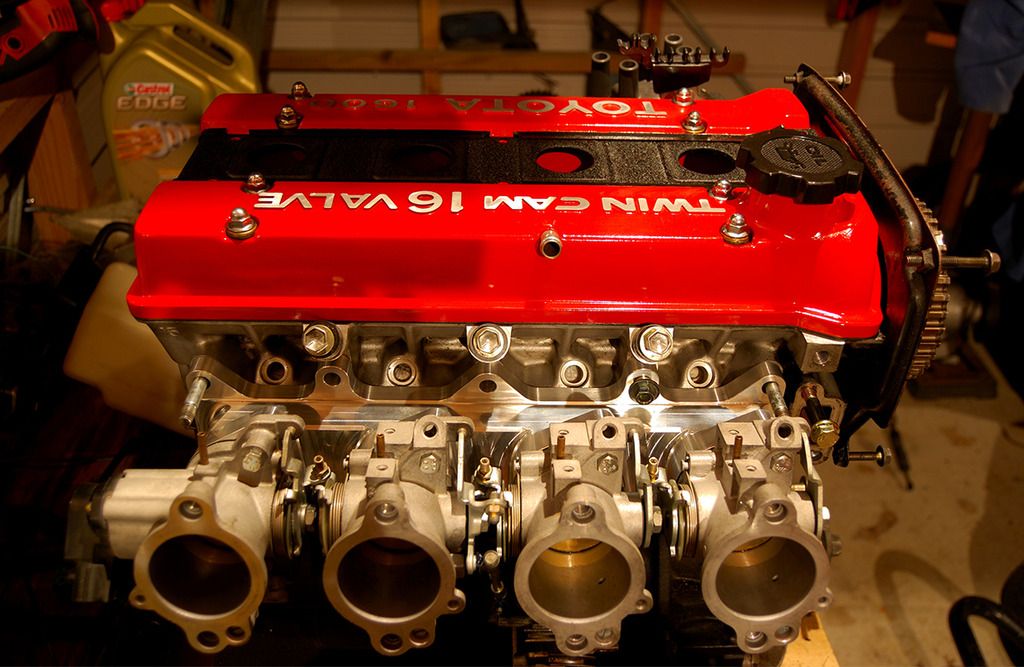
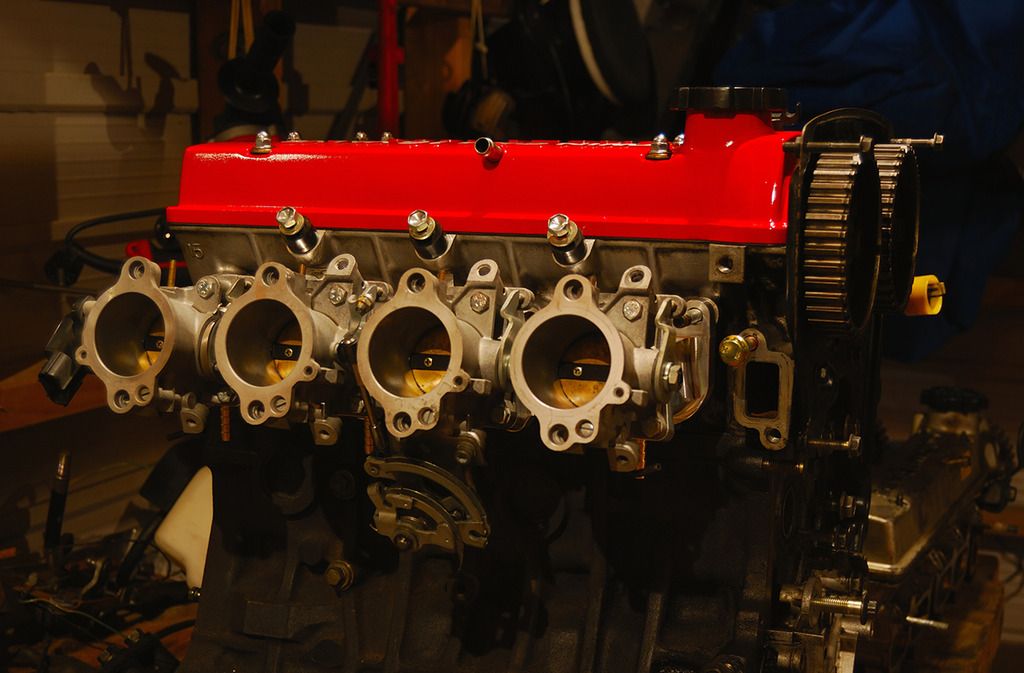
I felt like test fitting the valve covers and ITB's together, but first I got replacement screws for the ITB's. They originally use a phillips head which easily get ****ed upon removal, so I bought screws with hex heads:
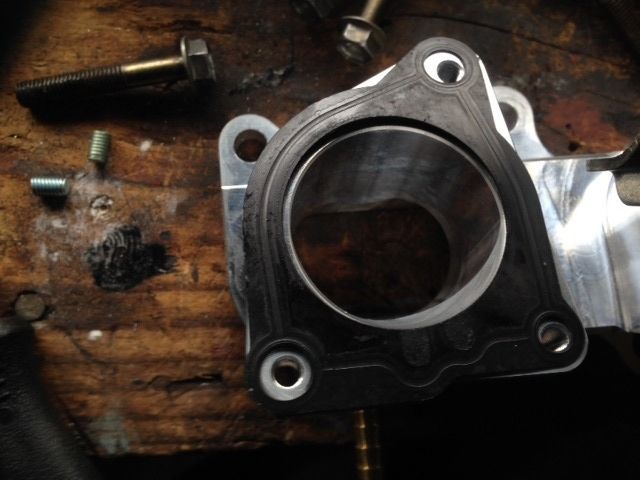
Fitted inc. throttle linkage:
Anyway that's it for now, progress is a little slow. A lot of weird shit happening to me recently, run of back luck etc..
Coolant hoses removed:
Coolant passages full of shit:
Bolts on the front water neck mount were pretty rusty and the top one sheared in half:
Autobox removed:
Sump removed (will be reused as new engine didn't come with one):
Some kind of plastic and RTV shit caught on the oil pickup strainer, wonder how much got past (previous owners mechanic didn't do a nice job of re sealing the oil pan, overused RTV):
Obviously water in the oil from head gasket failure:
Removing cams:
Head removed:
Block:
Hone marks still seem good:
Head gasket failed on cyl 4:
Alright that's it for the old engine, for now. After this I started cleaning up parts that I will be reusing.
Alternator was pretty dirty, no money atm to rebuild it but it was working fine so will just get a clean for now:
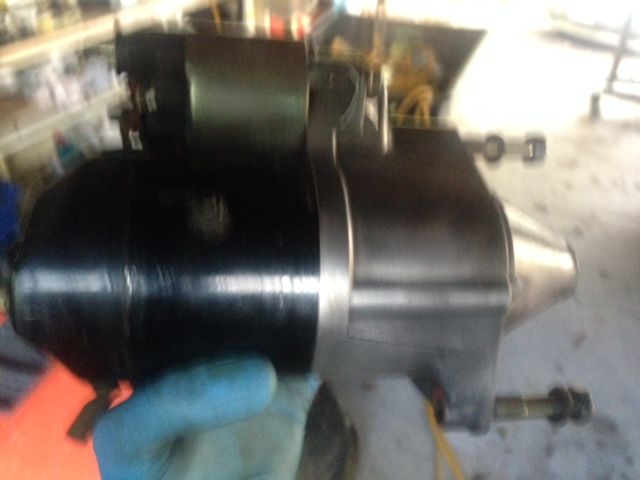
Starter also, sorry for terrible pic:
Re finishing spark cover:
Refinishing valve covers:
Casting lines don't look so nice, so I sanded them off:
High heat primer:
My method for curing paint overnight:
Spraying red:
Okay valve covers done.
I broke the engine bay temp sensor removing the engine:
So I went to the junkyard to find a replacement:
Also my valve cover washers/seals were really worn:
Replacements are used and not perfect but a lot better:
Also found a facelift strut bar:
I felt like test fitting the valve covers and ITB's together, but first I got replacement screws for the ITB's. They originally use a phillips head which easily get ****ed upon removal, so I bought screws with hex heads:
Fitted inc. throttle linkage:
Anyway that's it for now, progress is a little slow. A lot of weird shit happening to me recently, run of back luck etc..
-
GDII
- Forum Moderator - MR2OCNZ
- Posts: 5739
- Joined: Sun Jul 10, 2011 5:13 pm
- Stomping Ground: Wellington
- Prime Mover: SW20
- First name: Phill
Re: TNR's AW11 (Finally!)
Good work getting all the bits cleaned up. Love the last picture. The valve covers look great in red.
1990 SW20 MR2 G-Limited (GEN4 3SGTE Installed)
2000 AE111R Corolla Wagon NZ New Daily
1996 AE101R Corolla Sprint NZ New Selling Soon
1990 EP81 Starlet XL (Sold)
1990 EE90 Corolla XL (Sold)
Instagram https://www.instagram.com/sw20glimited/
2000 AE111R Corolla Wagon NZ New Daily
1996 AE101R Corolla Sprint NZ New Selling Soon
1990 EP81 Starlet XL (Sold)
1990 EE90 Corolla XL (Sold)
Instagram https://www.instagram.com/sw20glimited/
-
mickeyduck

- Life Member - MR2OCNZ
- Posts: 6144
- Joined: Mon Apr 25, 2005 11:30 am
- Stomping Ground: Auckland
- Prime Mover: More than one MR2
- First name: Charlie
Re: TNR's AW11 (Finally!)
Yeah that's coming along real nice alright. Can't wait to see it on a run. 
#8^) Charlie the certified Westie
Retired - President 2012 - 2018
Retired - Committee Member 2009 - 2018
Retired - Auckland Area Coordinator 2009 - 2018
Retired - Webmaster, Forum Host & Admin 2010 - 2018 - Now it's mknz
Financial Club Member since 2004 and thanks to *84vvt and co-conspirators, Life Member since April 2017
100+ MR2OCNZ runs and counting... When going hard, good rubber's your best protection against unwanted accidents. Buy good tyres!
When you're nearing the end of the drag-strip and you have no 'chute, you may as well keep your foot to the floor... Live life. There ain't no second pass.
-
Statek

- Club Member - MR2OCNZ
- Posts: 590
- Joined: Sat Oct 20, 2012 12:56 pm
- Stomping Ground: Auckland
- Prime Mover: Looking for an MR2
- First name: Kris
Re: TNR's AW11 (Finally!)
Nice work mate, 50 points for dedication 
That is looking really, really tidy!
That is looking really, really tidy!
1986 Toyota MR2 AW11 20v ST - SOLD

-
TNR
- Club Member - MR2OCNZ
- Posts: 161
- Joined: Sun Sep 13, 2015 6:03 pm
- Stomping Ground: Auckland
- Prime Mover: AW11
- First name: TNR
Re: TNR's AW11 (Finally!)
Thanks guys, appreciate it. It'll be nice to go on a run with it, I was planning to.. and then it overheated.
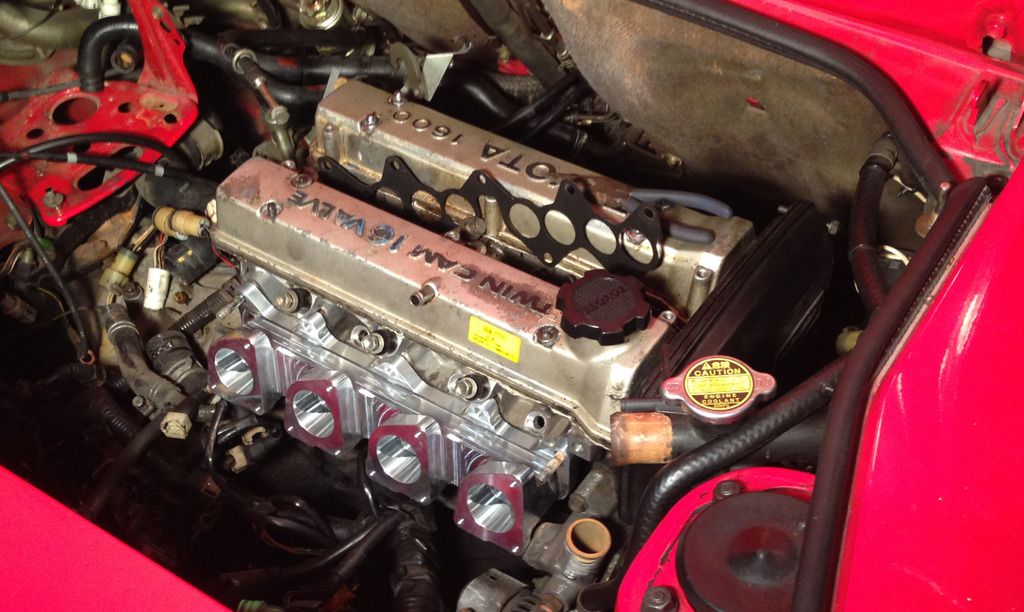
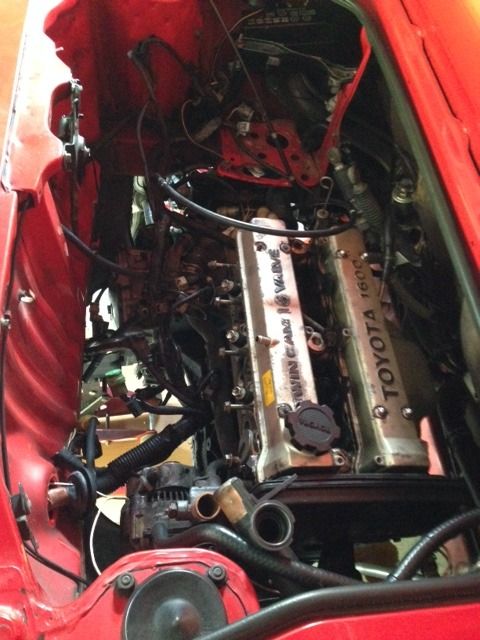
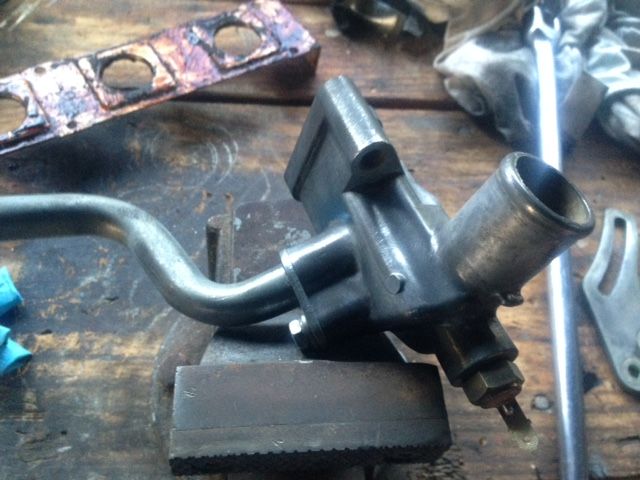
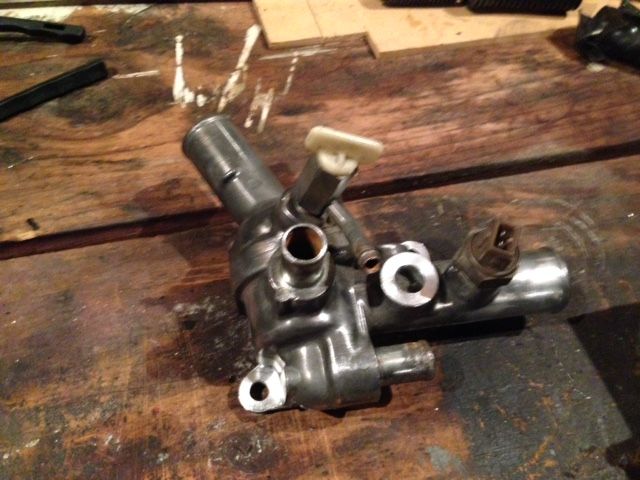
I have two more pics I took last night which I'll share, since everyone loves ITB's:
At the moment I'm trying to get all the various O-rings and gaskets for all the coolant fittings.
I have two more pics I took last night which I'll share, since everyone loves ITB's:
At the moment I'm trying to get all the various O-rings and gaskets for all the coolant fittings.
-
mknz
- Site Admin - MR2OCNZ
- Posts: 1182
- Joined: Thu Apr 03, 2014 1:17 am
- Stomping Ground: Auckland
- Prime Mover: More than one MR2
- First name: Michael
- Contact: